Project Introduction – Laptop Modding Adventure – Part 1/5
YouTube video transcription
[Original source] Partially based on the script of my YouTube videos: https://www.youtube.com/watch?v=Q50QU8a776E
[Updated] Contains updated data from 2022.
This guide is compatible with the the following laptops.
[Laptop] XMG Apex 15 Max (2022) with B550 chipset & XMG Apex 15 (2020) with B450 chipset
[Barebone] Clevo NH50VR / NH55VR / NH57VR / NH58VR (B550) & Clevo NH50AF1 / NH55AF1 / NH57AF1 / NH58AF1 (B450)
[Similar laptops] One K56-AR, Eluktronics Thicc-15, Eurocom Nightsky ARX15
[CPU] Zen3 & Zen2 Ryzen Desktop CPUs
[Note] This guide is applicable for Zen3 and Zen2 Ryzen CPUs in the B550 chipset based XMG APEX Max (E22) and B450 chipset based XMG APEX (E20) laptop.
The new RTX 30 series mobile GPUs are out and IF available you can expect good performance in games and production applications.
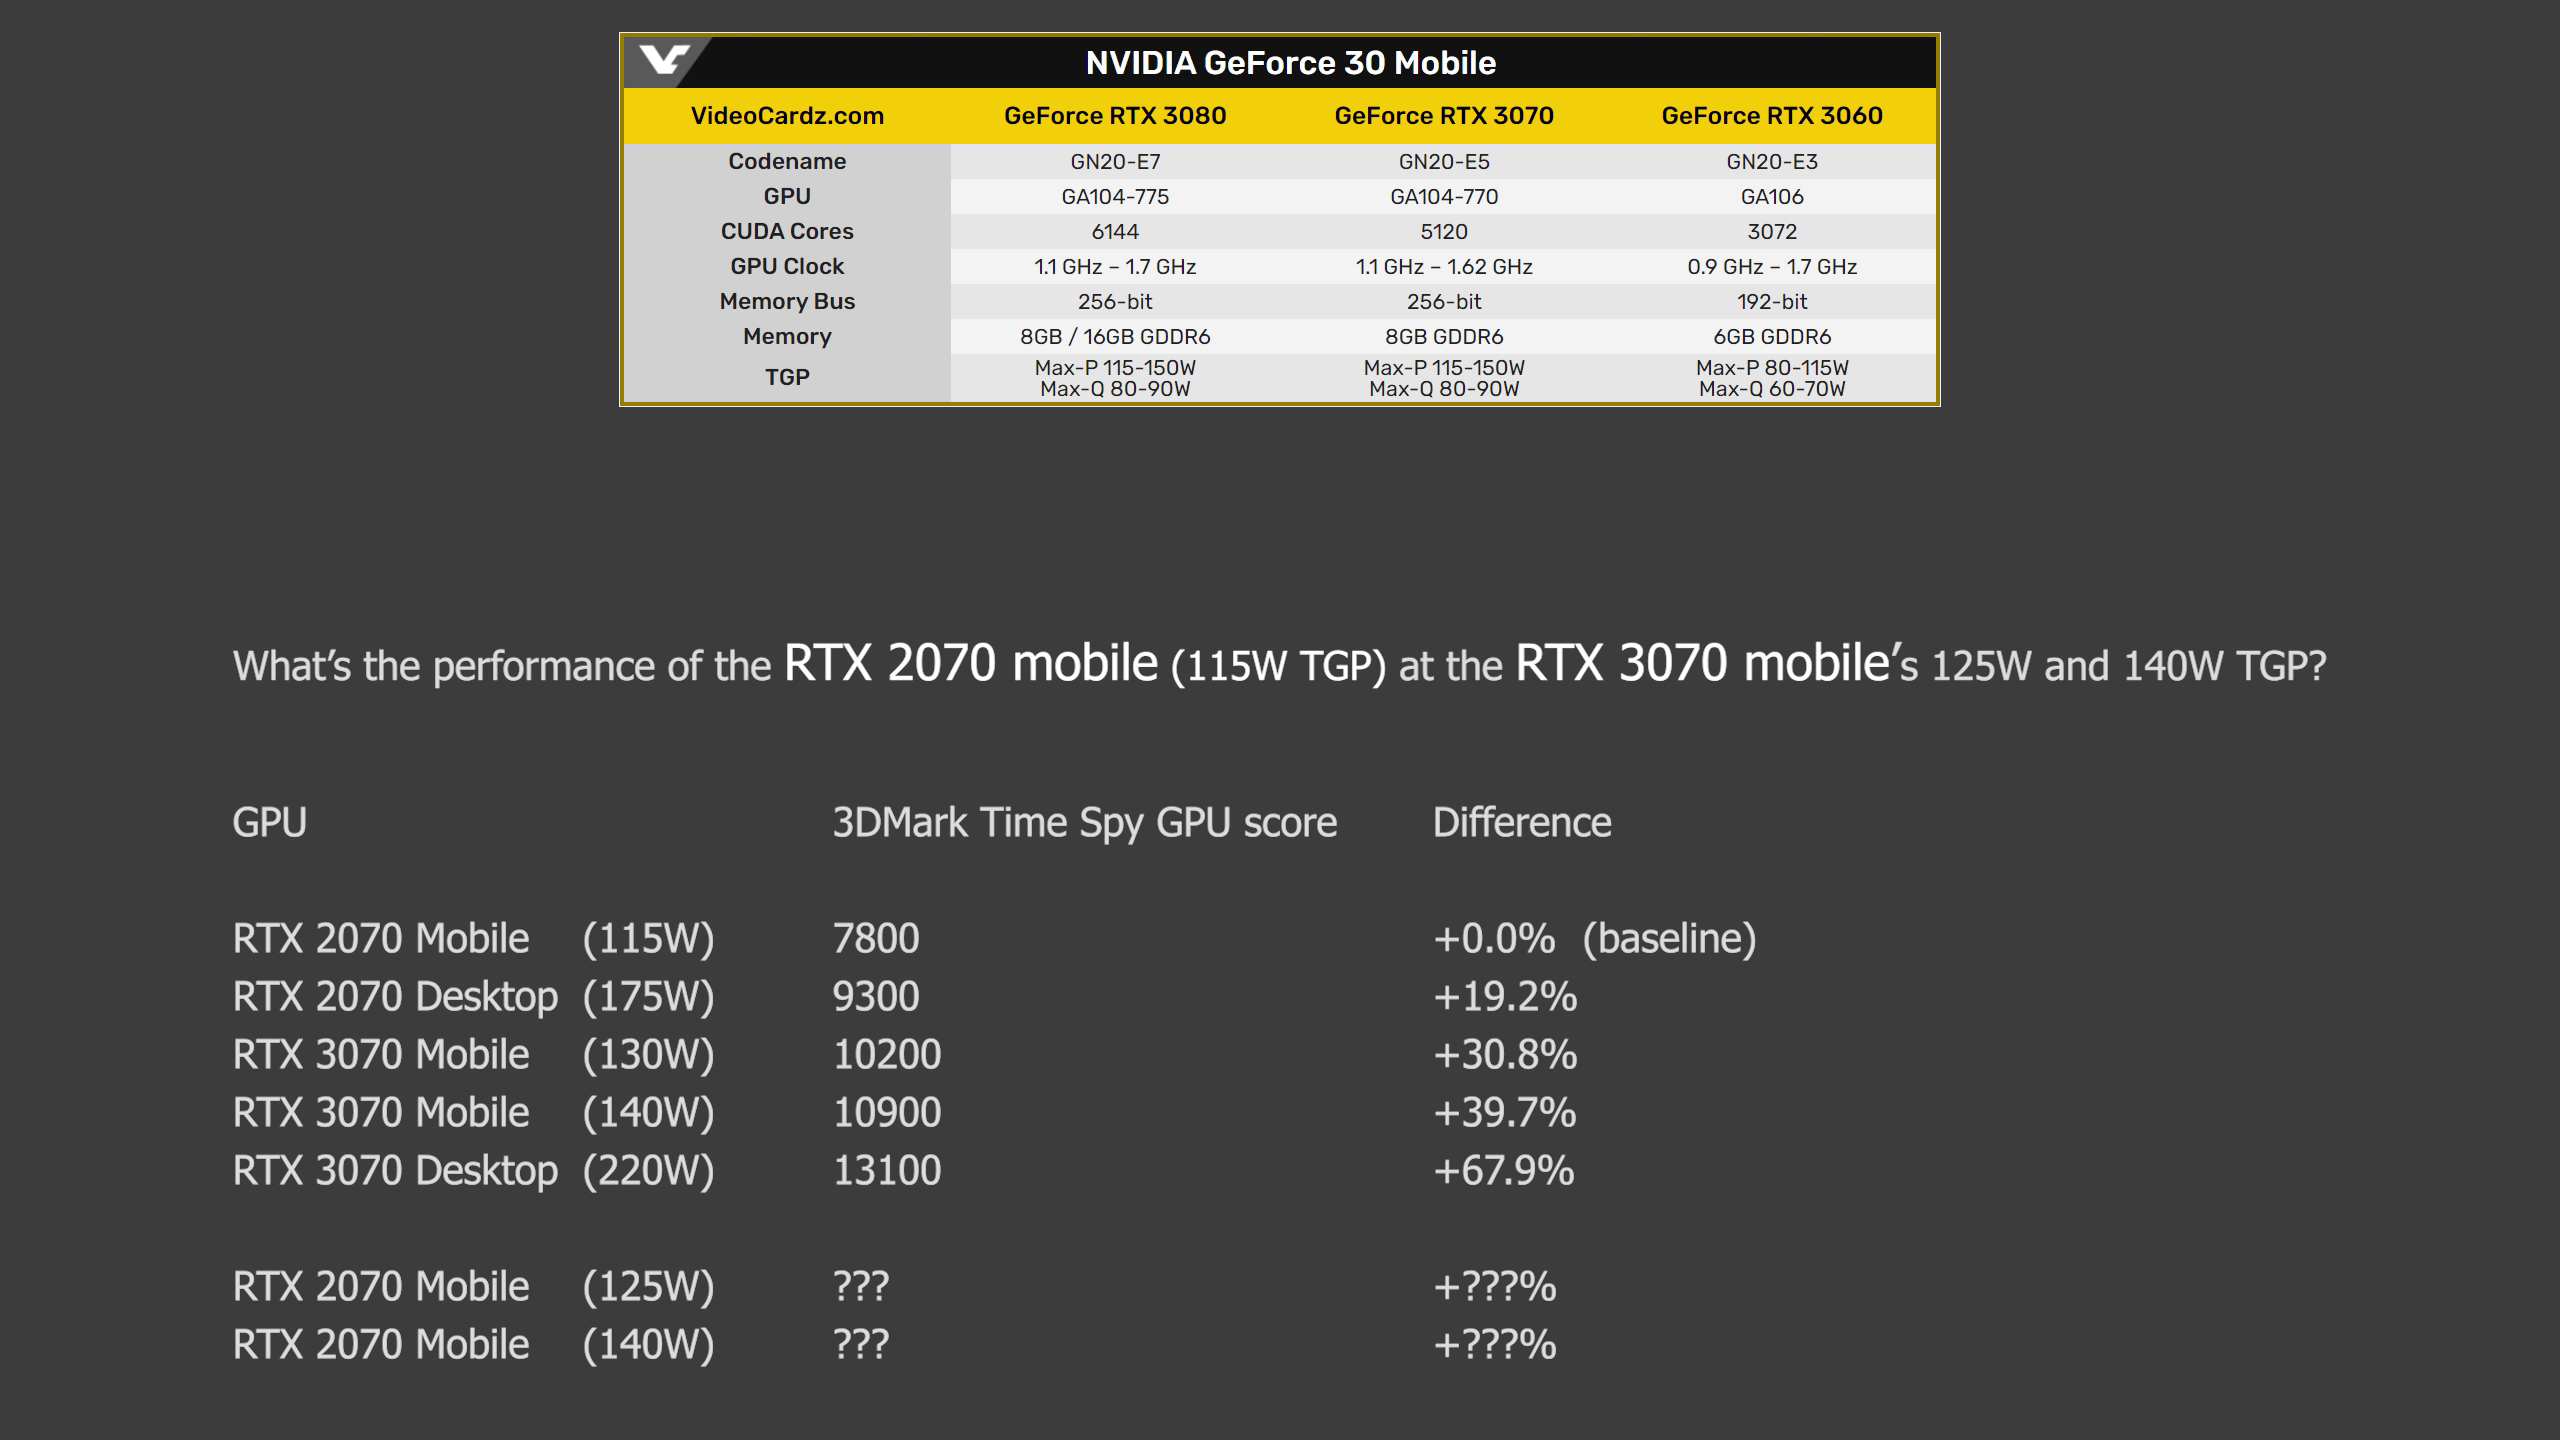
On average you can expect an up to 30% uplift in performance for the RTX 3070 mobile compared to the RTX 2070 mobile. I don’t know what you think, but for me 30% does not sound like a lot, especially when you take into the equation that the RTX 30 series introduced more power draw for their “Max-P” variants. It made me ask myself what performance the RTX 2070 Max-P with it’s 115W would really have compared to the RTX 3070 Max-P at 125W or 140W, WHEN we could allow the RTX 2070 to draw 125W and 140W respectively.
So what if we modify a RTX 2070 laptop to feature the same higher power draw as the mobile RTX 3070? How big the gap would really be between both GPUs? And what are the necessary steps to make in a laptop?

If you know me and my videos you already guessed that I will not simply do the mod and show the results. This is about investigations, too and the critical question: Can the laptop’s hardware support higher power draws and what effect it has on temperatures?
There are a lot more questions and surely a lot to discuss. So the roadmap for this video series will be the following.

1) proper temperature readings
Measuring the CPU and GPU die temperature is not enough. The higher power draw on the GPU side will lead to more load on the VRMs too. We need to discuss their default configuration and possible modifications to improve things.
Which lead to step 2.
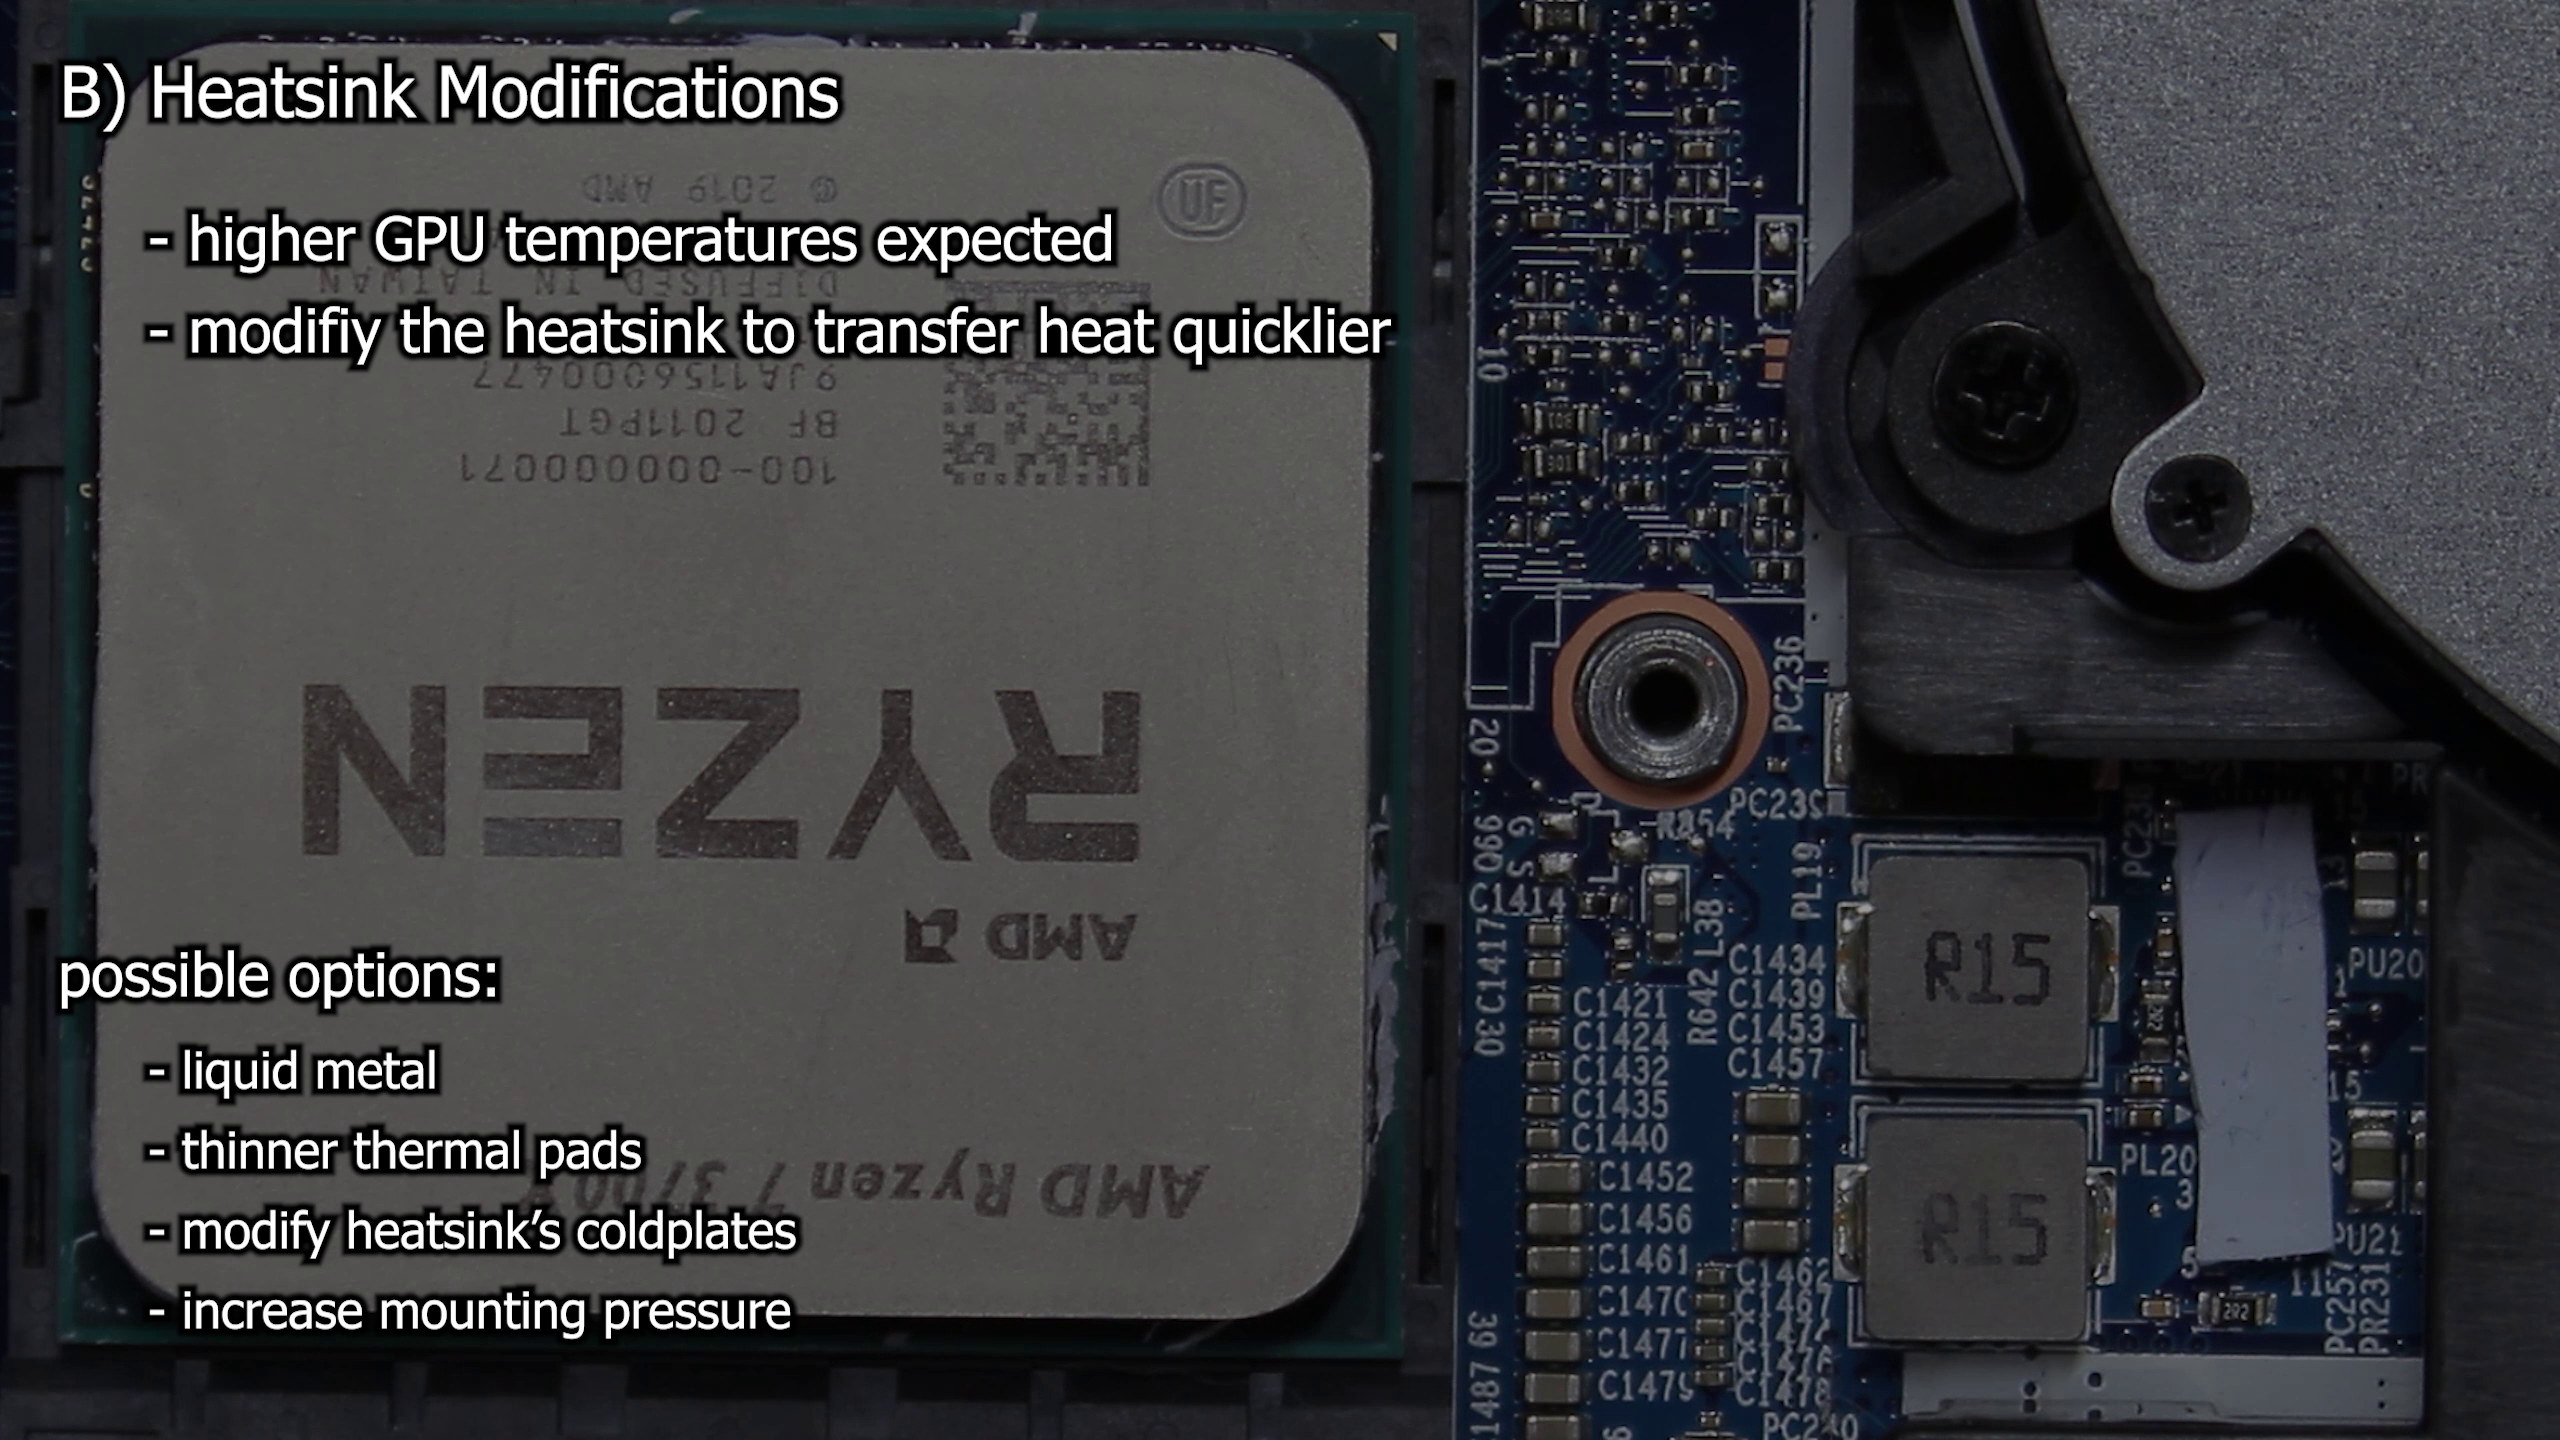
2) heatsink modifications
The higher power draw will lead to higher GPU temperatures. That’s very clear and not hard to foresee. So we need to prepare the heatsink to transfer heat quicklier away from the GPU die. Obvious modifications would be to use a better thermal interface material like liquid metal, reduce the thermal pad thickness and raise the mounting pressure. But when I want to use liquid metal I should think about nickel plating the heatsink to stop the liquid metal corroding the copper contact area.
And finally step 3.
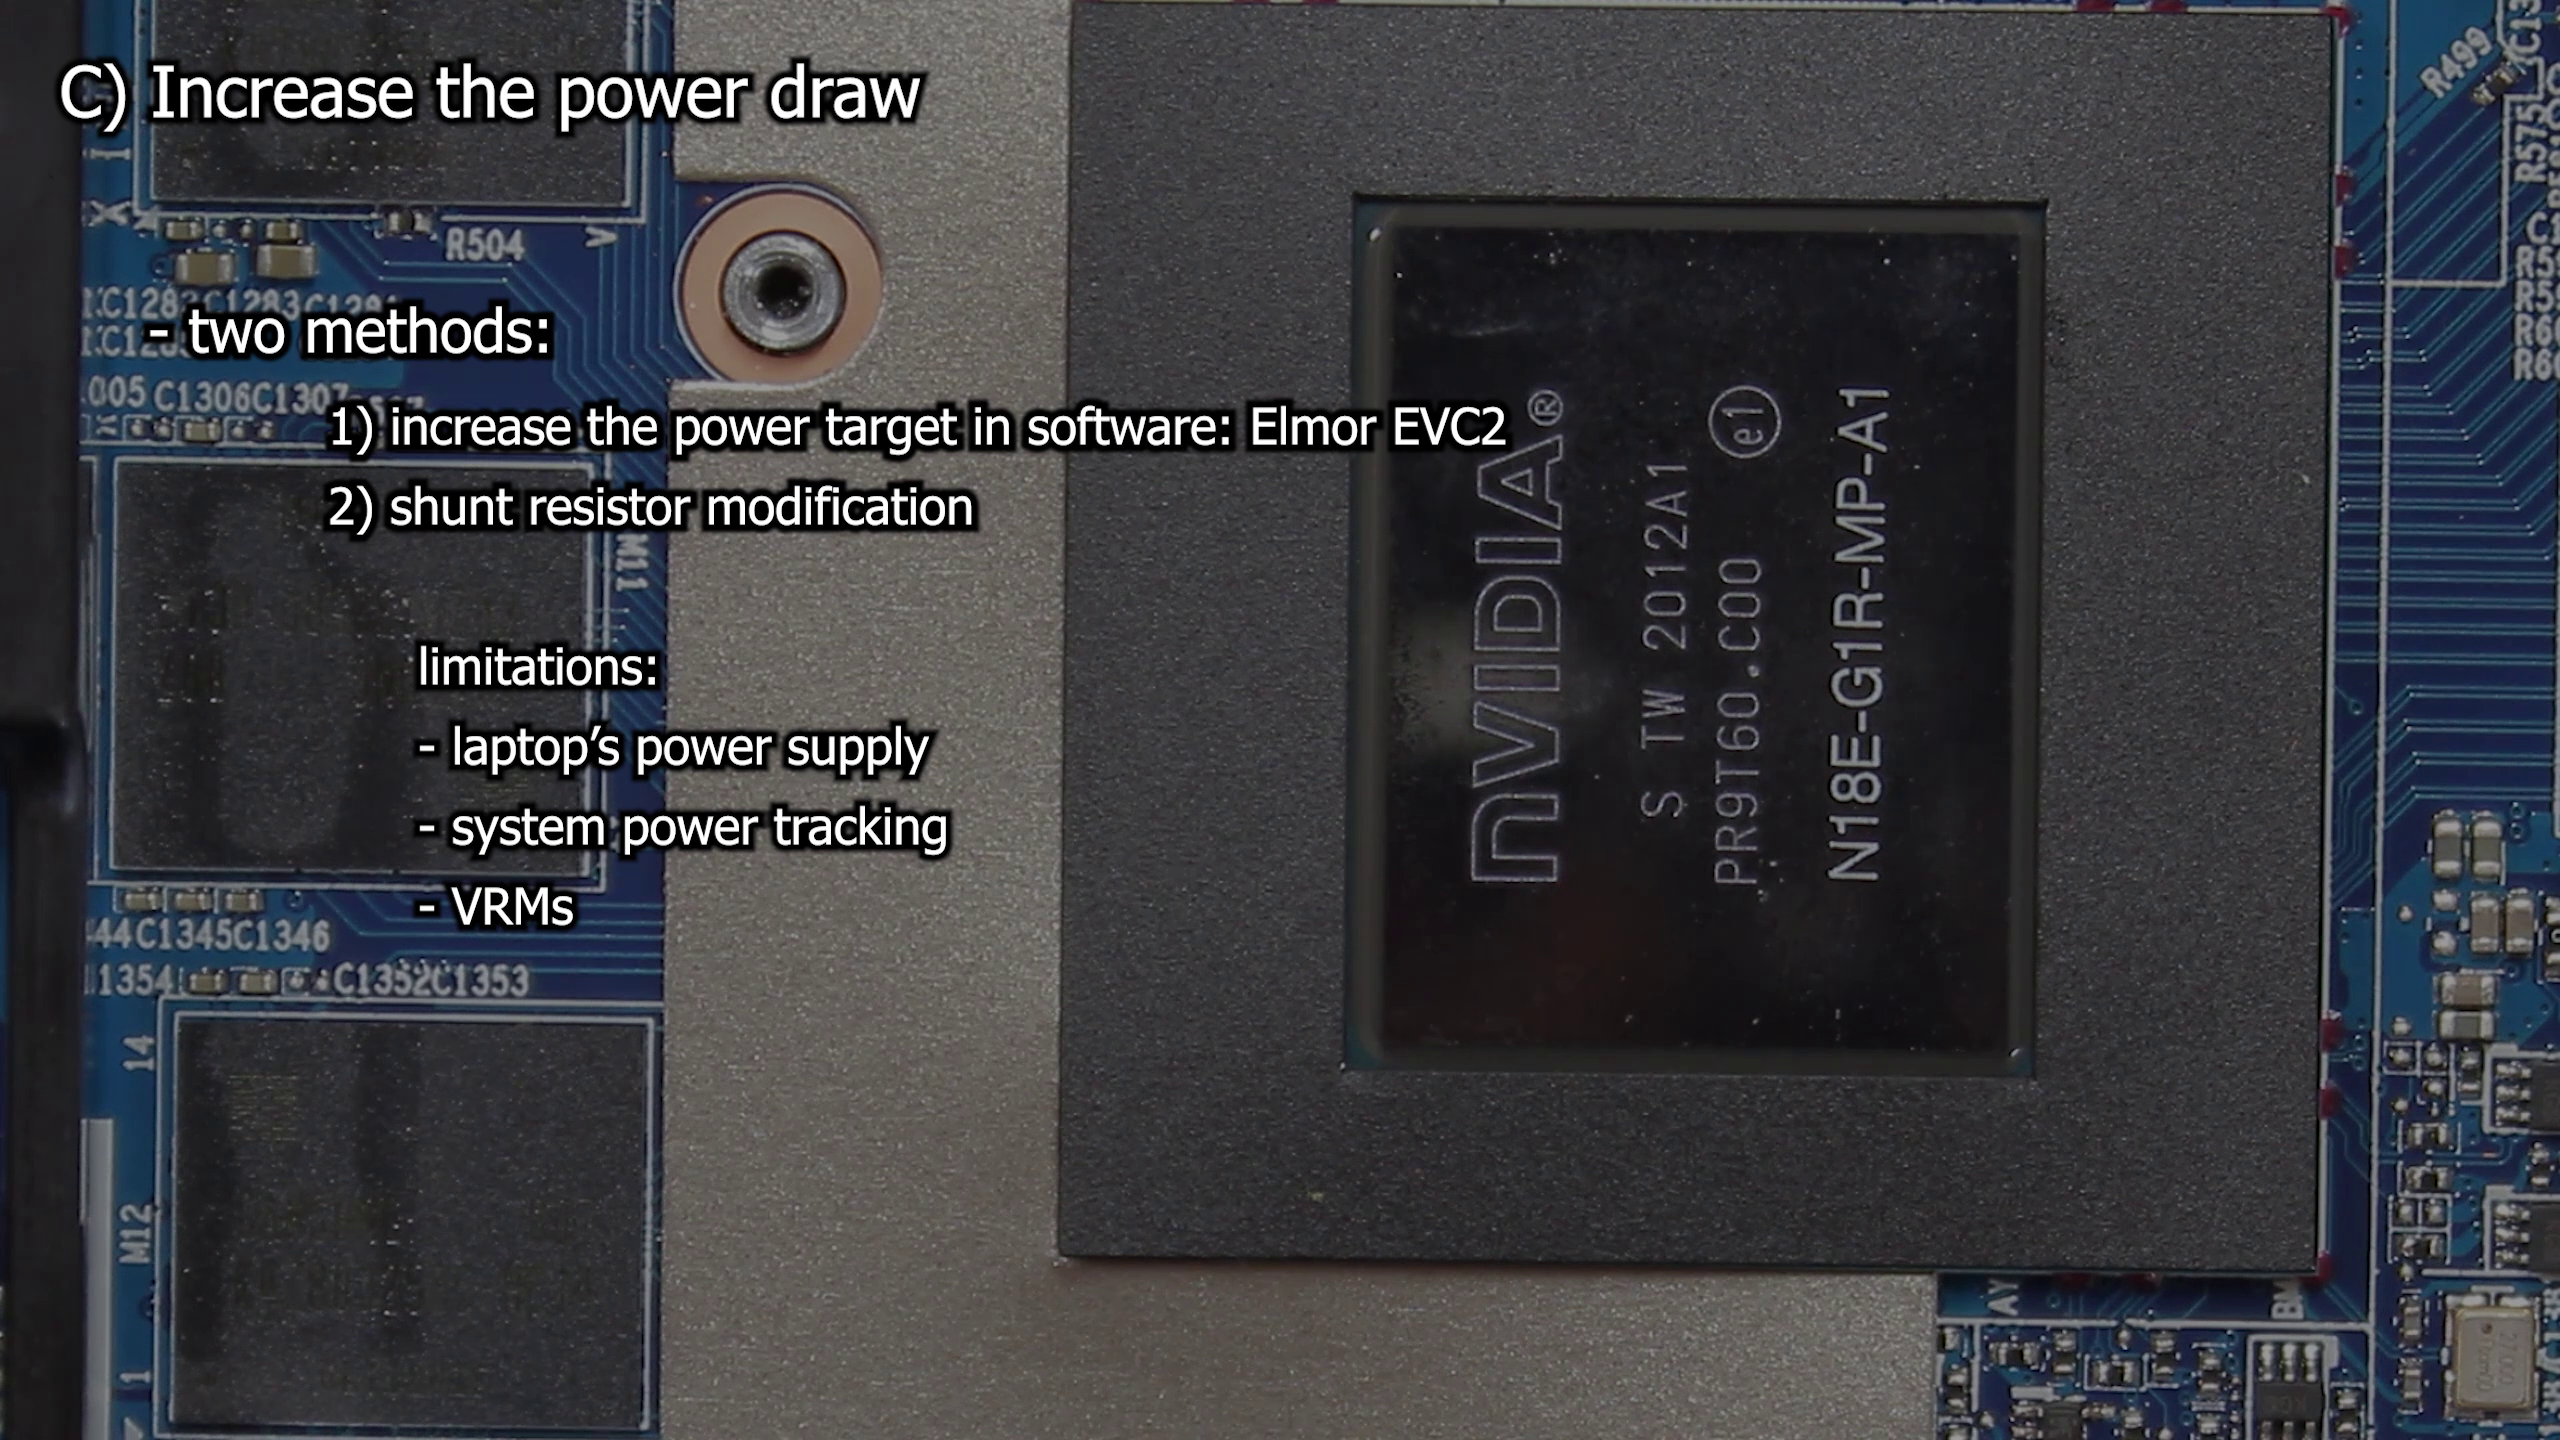
3) Increase the power draw of the RTX 2070: to 125W and 140W.
3 a) The final step can be solved in two ways. The first one would be a software sided power draw increase. Unfortunately the mobile RTX 20 series GPUs are locked in that regard, BUT there are also some tools which allow us to use a specialized software to make non-permanent changes to the power draw. Elmor Labs produce some little devices which allow overclockers to directly set settings on the voltage regulator modules, or better known as VRMs. Unfortunately it’s not really a software-only solution, because you usually need to solder some wires to the I²C Bus. But after doing so you can set the power target manually well beyond the enabled limits. Well, if the VRM controller is supported. But usually all VRMs typically used on NVidia’s cards are supported by Elmor Lab’s software. [Update: As said in part 2, it turned out this is not working with NVidia GPUs, but with AMD. So for me the only working way will be a shunt mod.]
3 b) And the final and permanent solution would be to shunt mod the laptop’s RTX in a compareable way to desktop GPUs. The task itself isn’t too hard, but we need to pay closer attention as for most desktop GPUs, because our power draw is still very limited because of the power supply and probably also because the laptop’s EC tracks the total system power draw and shut’s the system down if a certain limit is exceeded. I hope the 140W power limit will be low enough to not run into any problems. The 125W power limit will most likely perform just fine. If we ran into problems we could also mod the system power draw tracking shunt resistor of course. But if that’s the case we could also need a little bigger power supply.

Beginning with this video you will be part of the journey. You will get some insights about the whole modding and it’s effects on the laptop. No matter if I fail or succeed. … But if I succeed we can finally answer the question what RTX 2070 mobile would have been with the same power draw as the new RTX 3070 mobile. The goal can’t be to beat the RTX 3070 mobile of course, BUT to come close to RTX 2070 desktop’s performance.
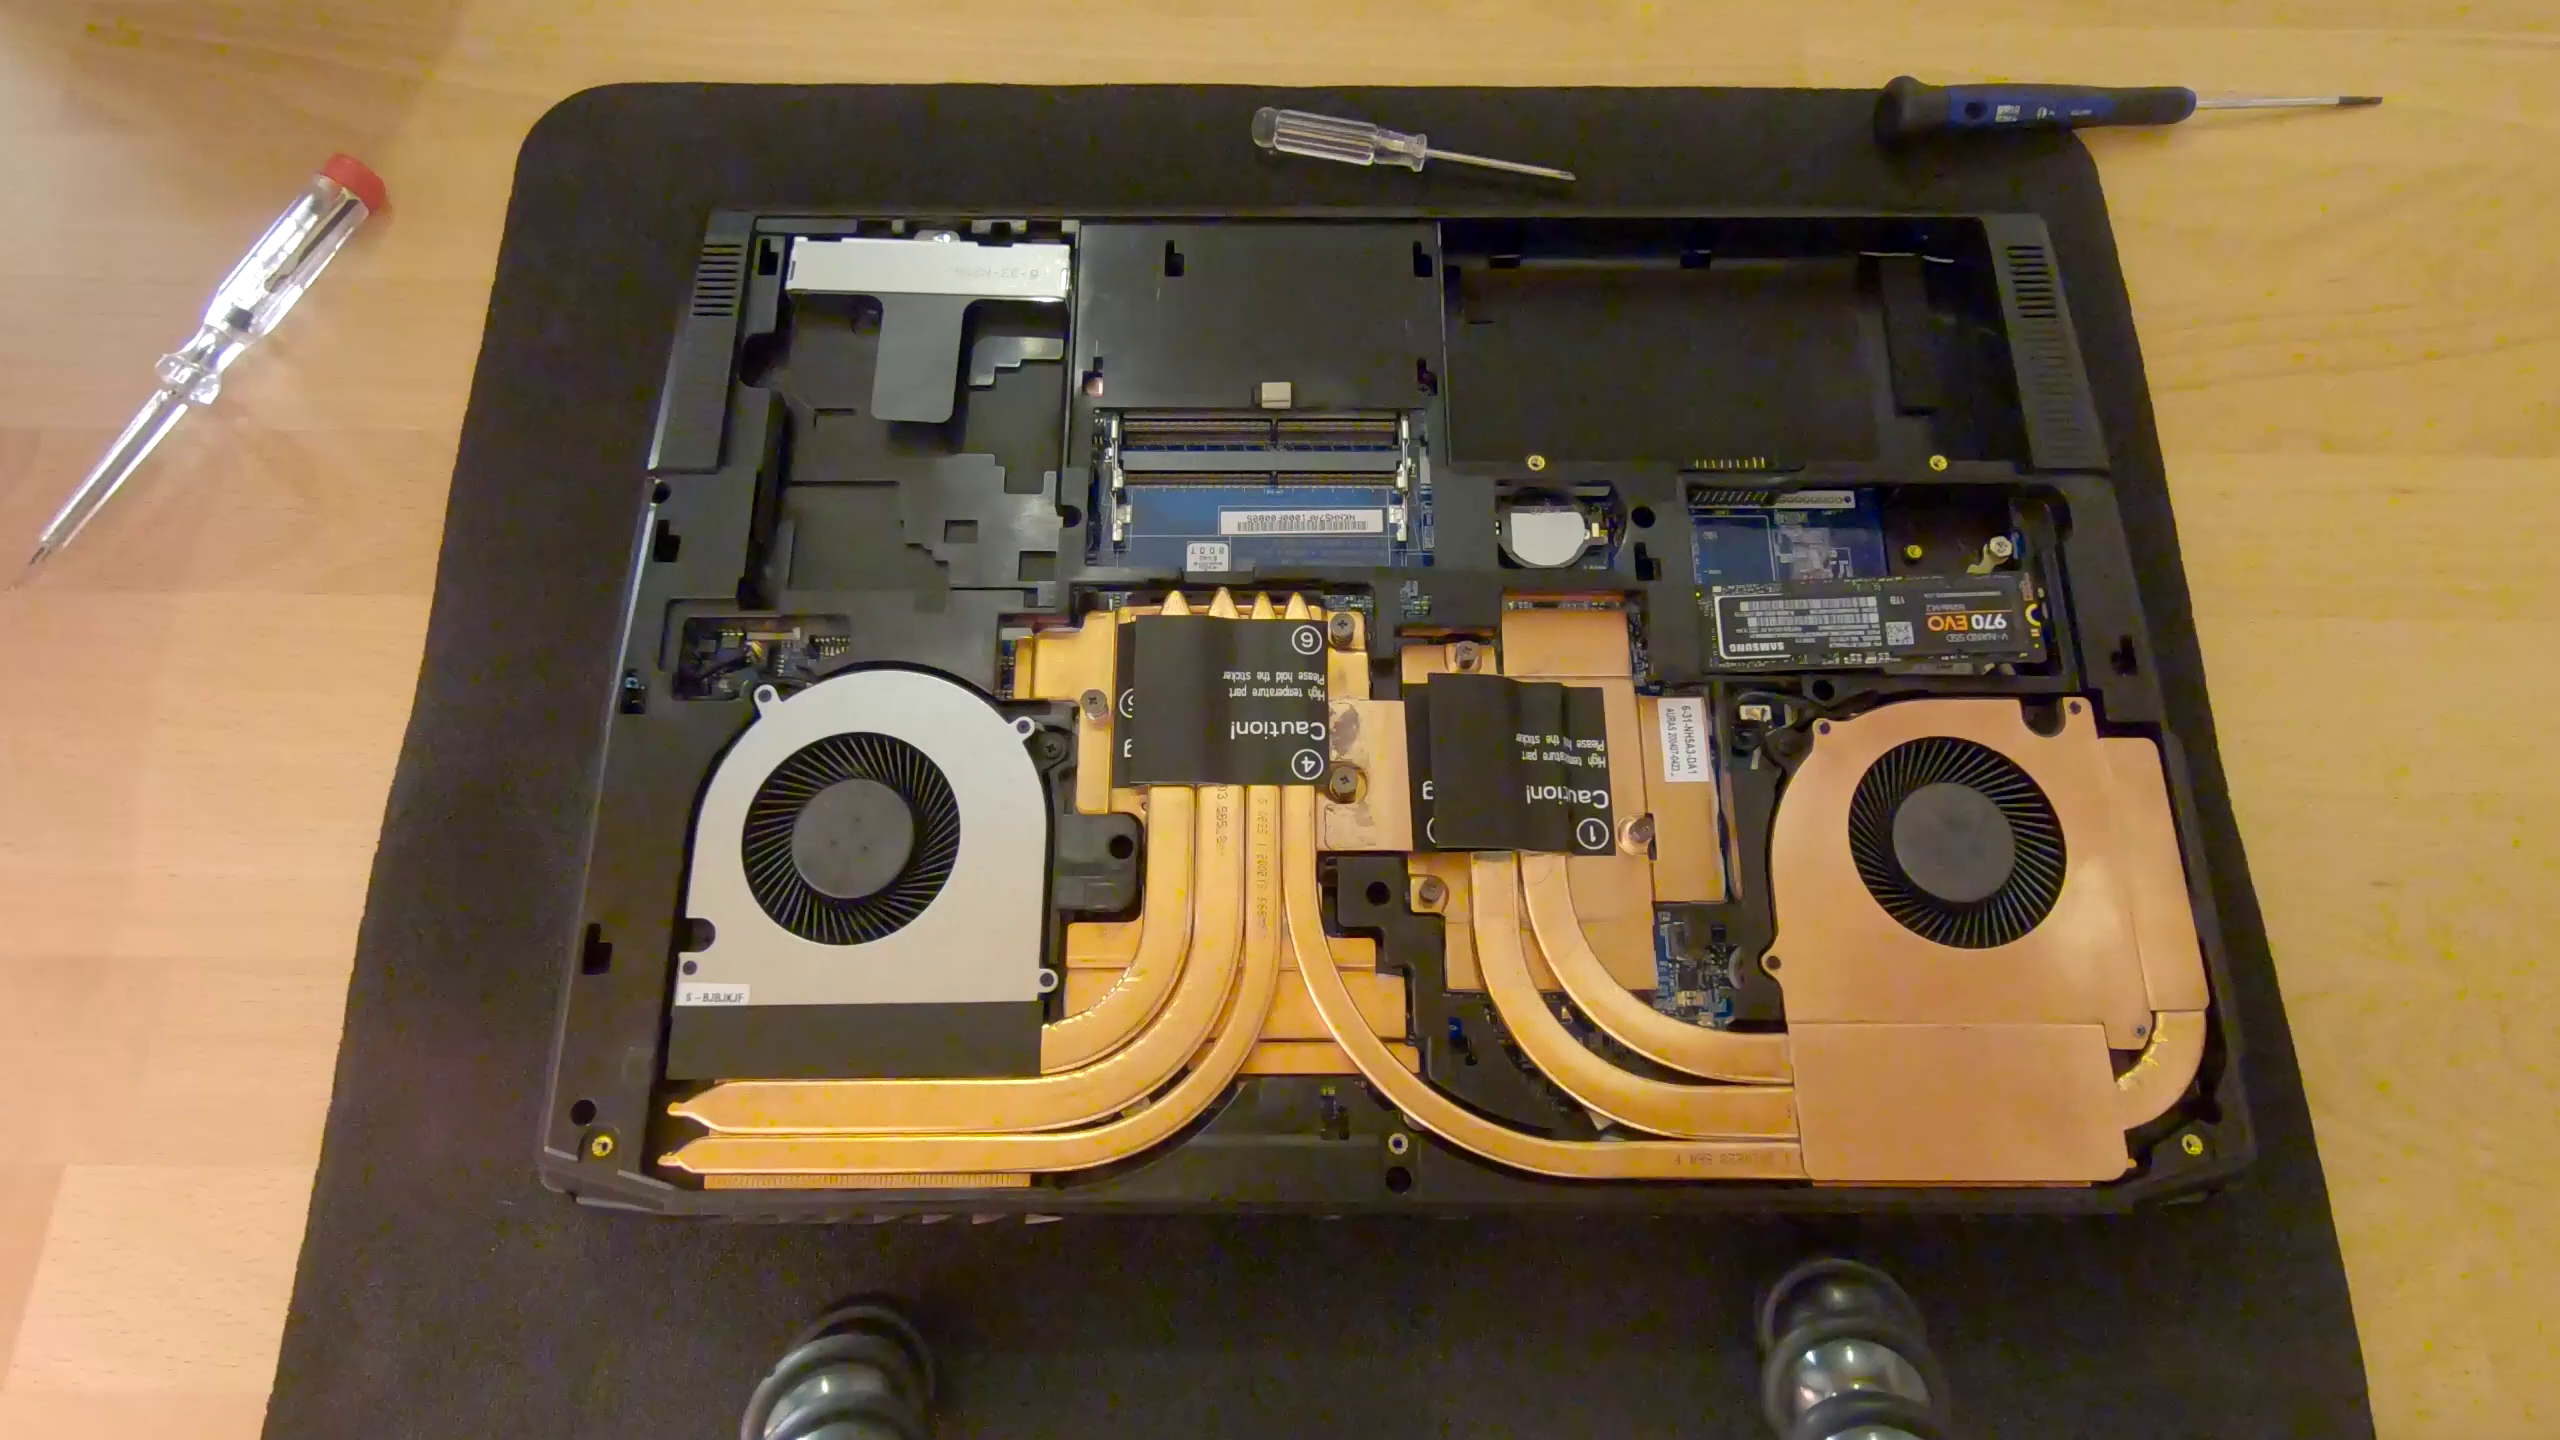

This video is all about the introduction of the journey. But before I can start we need a victim of course, and I surely don’t want to risk my daily used laptop. So I made some unreasonable purchases and I finally got the very same laptop again. It’s a 2020 XMG Apex 15, better known as Clevo NH57AF1 with an RTX 2070 in the 115W Max-P configuration. I saved some bucks by going with the barebone version without a CPU, memory and storage, because I got some hardware lying around. In it’s current state it’s equipped with my old Ryzen 3700X pushing 4.2GHz at 1.225V and 32GB single rank memory running at 3200 CL18.
As part of the introduction I want to make sure you understand what you will see in the upcoming videos. So I will talk a little about the general VRM configuration in laptops.
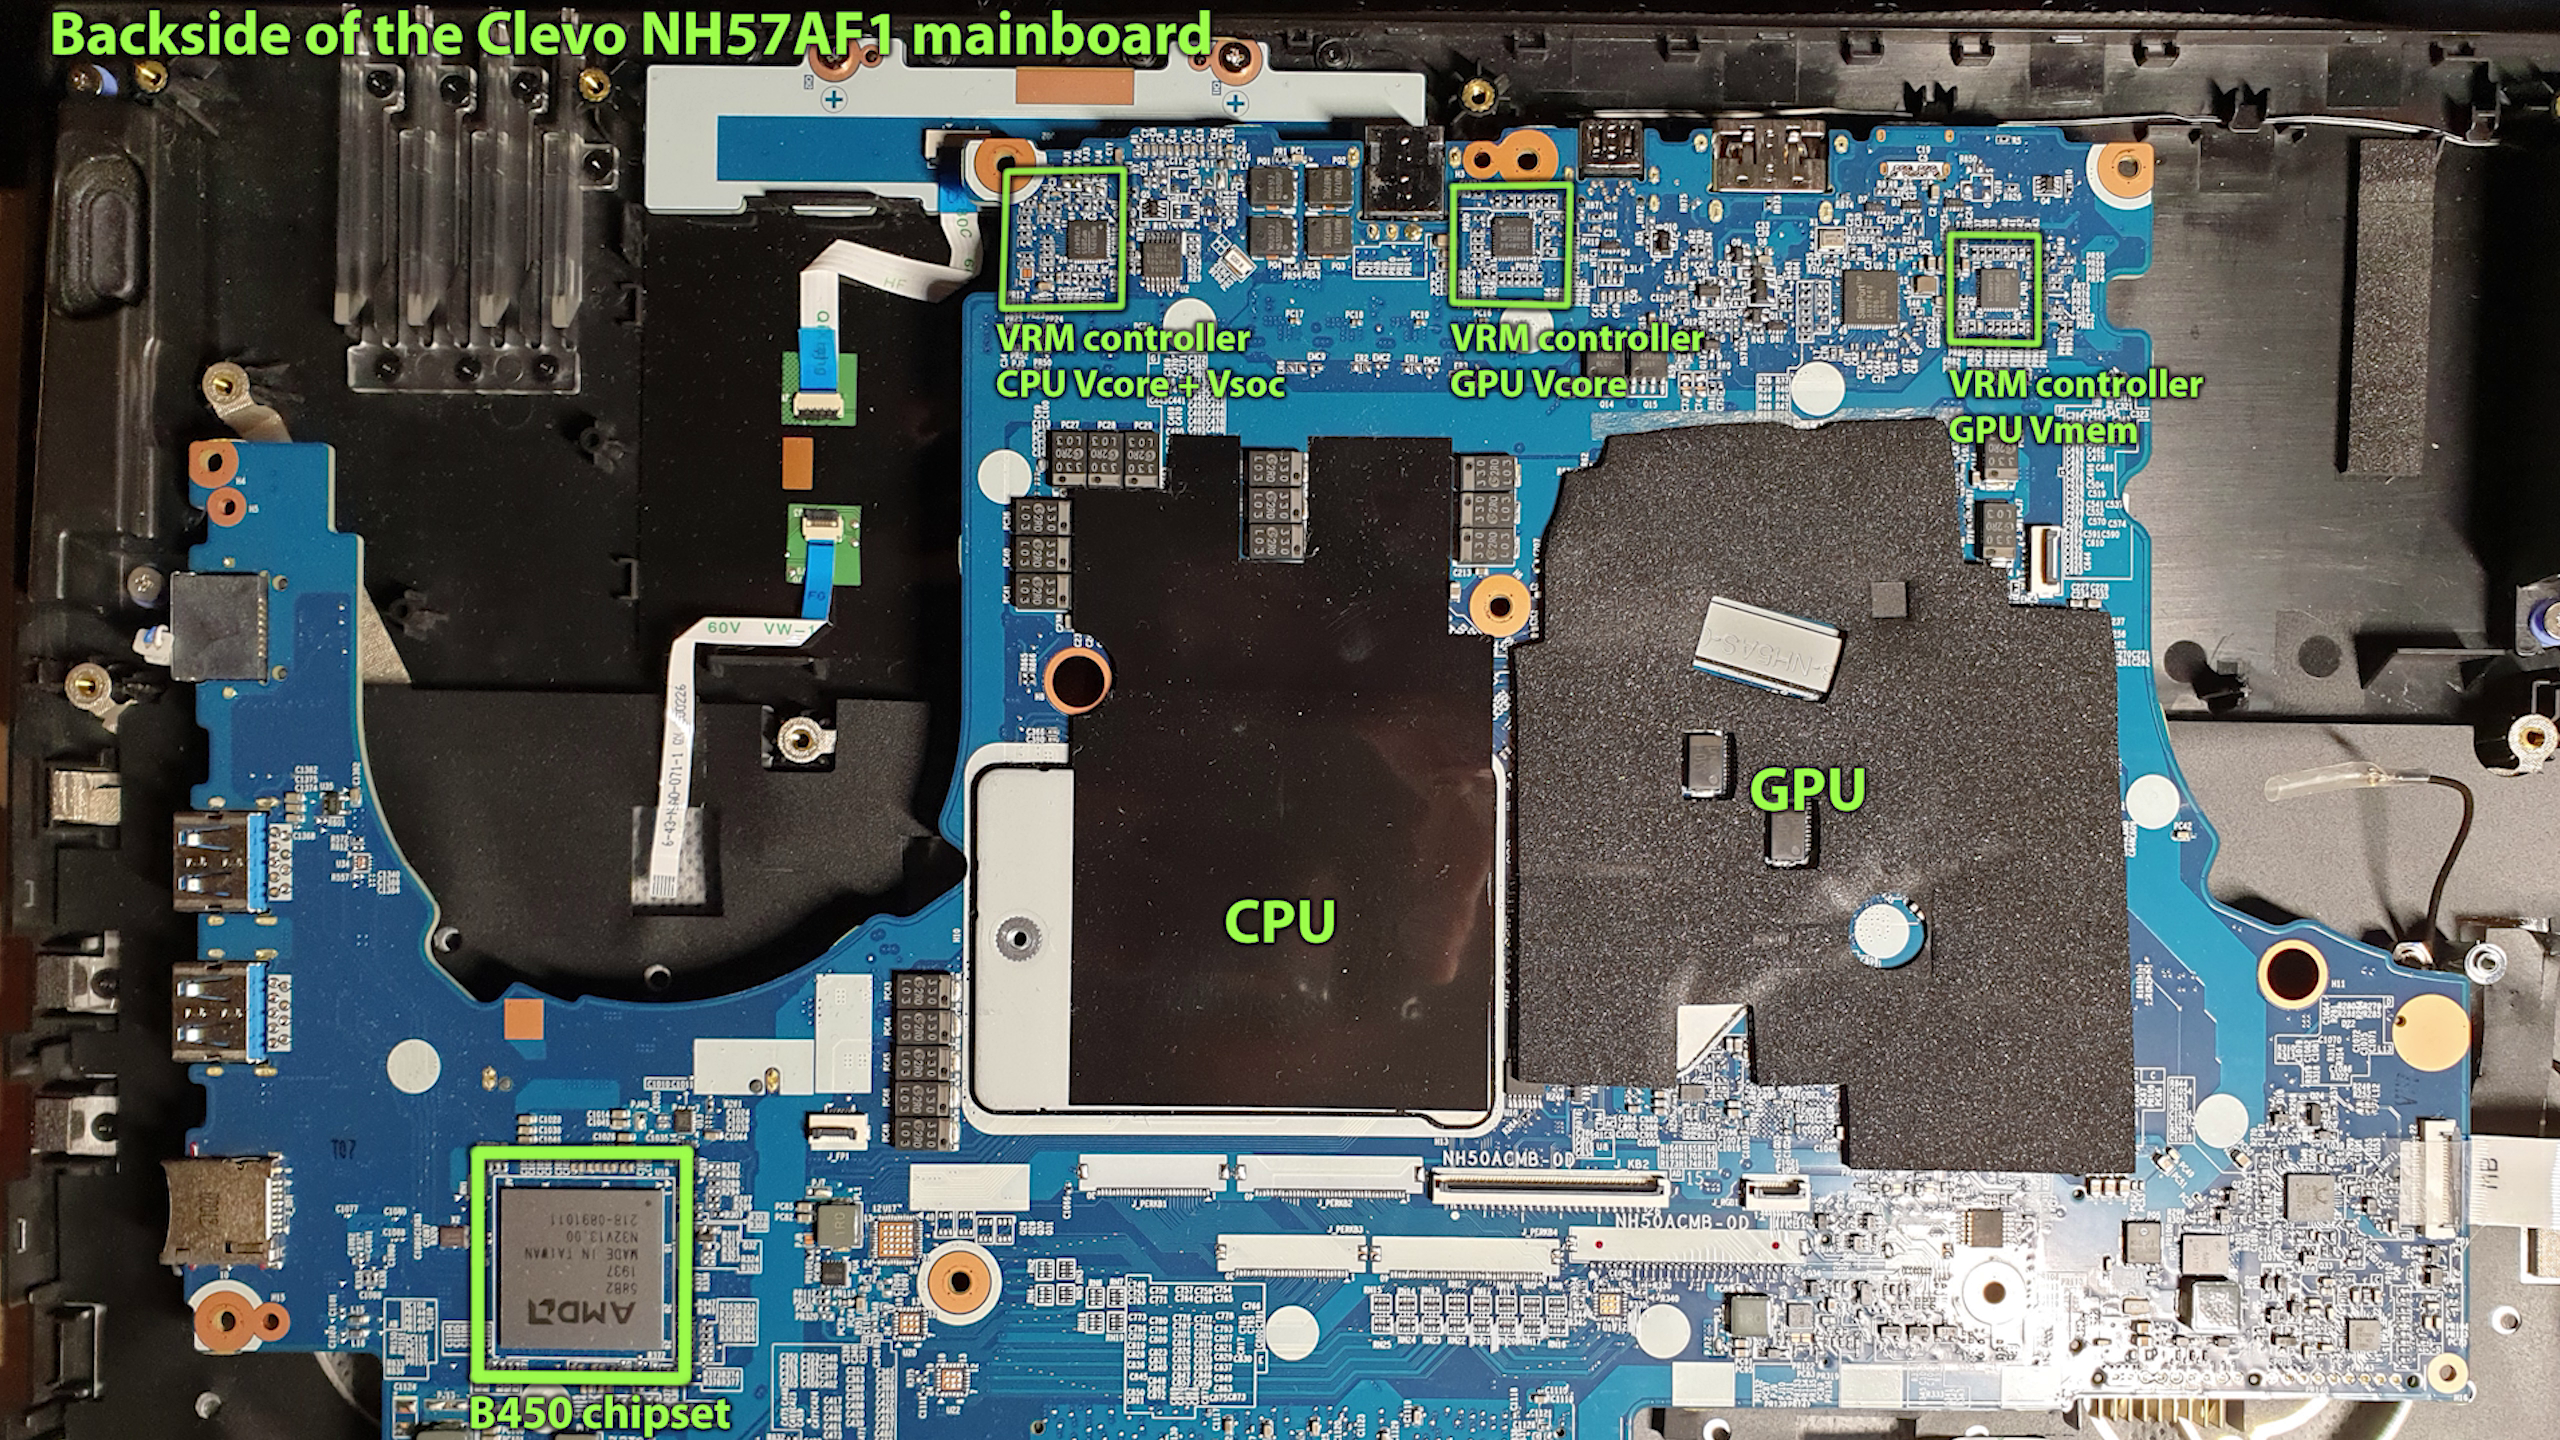
Let’s start with the voltage regulator modules, also often called “VRMs” which are basically there to convert the power supply’s higher voltage, which usually is 12V for desktops and 19V for laptops, to a smaller voltage which the chips are running with. They include a communication interface with which the GPU can tell the different VRMs what voltage it needs and the VRM finally sets the requested voltage. The voltages needed for modern chips are usually very low, mostly in the range between 0.6V and 1.2V. And if you keep in mind that we usually have between 65W and 300W power draw for CPUs and GPUs you can already guess that the required current at such low voltages will be quite huge. In fact we look at roughly 110A which the core of the RTX 2070 mobile requires in a full load scenario. But 110A can’t flow trough such a tiny chip without making it glow red hot. So VRMs use multiple external half-bridges including MOSFETs, often called “phases”, to split up the current between them.
In our case those are MP86941 smart half bridges. They can provide up to 30A continuous current. In our laptop’s default configuration they are loaded with up to 20A. So we got a headroom of roughly 50% more power, IF their temperature does not exceed the 150°C limit. And of course they have losses too. The more current flows trough them the higher the wasted power and the hotter they become. In the end we want to have as low as possible phase temperatures to not harm the health and lifetime of the laptop. That’s why I want to record all involved temperatures properly, which means I need to measure the actual reported VRM temperature and not just the surface temperature with a temperature probe.
Unfortunately the VRM’s phase temperature is not reported to the system. So I need to get the temperature of all important VRMs with a mod as you will see in the next video. The most important VRMs are those for the GPU Vcore, GPU Vmem, CPU Vcore and CPU Vsoc.
The GPU limits it’s power draw programmed into the vBIOS by requesting the power flowing trough the input side of the VRMs. Cooler VRMs got less power losses and the GPU can use the extra 1 or 2 watts, so that’s another reason to keep the VRM temperature as low as possible. The actual power draw is measured by the voltage drop caused by the current flowing trough the input sense resistor, better known as “shunt resistor”. So the most obvious choice is to trick the system and reduce the resistance of the shunt resistor. This leads to a lower power draw measurement and to a higher power draw in reality. But as I said earlier, we should not simply short the shunt resistor, because the reported power draw will be so low that the real power draw sky rockets over our power supply’s capabilities and probably also triggers a system fault state. My goal will be to raise the power draw in reasonable steps. As I said earlier the most interesting ones are 125W and 140W since they are the new “Max-P” limit for the RTX 3070.


That’s it for the introduction. I want to say thank you to José at this point.
He helped me gather all the necessary informations and shared some very helpful photos of the laptop’s naked mainboard to plan the upcoming actions.
Next up will be about the temperature readings, which requires some soldering on the laptop’s mainboard. There is enough potential to fail at this point very early on. So in the worst case that will already be the end of the journey. Let’s hope for the best.


