DIY Laptop Water Cooling – Part 2/?
YouTube video transcription
[Original source] Partially based on the script of my YouTube videos:
[Updated] Contains updated data from 2022.
This guide is compatible with the the following laptops.
[Laptop] XMG Apex 15 Max (2022) with B550 chipset & XMG Apex 15 (2020) with B450 chipset
[Barebone] Clevo NH50VR / NH55VR / NH57VR / NH58VR (B550) & Clevo NH50AF1 / NH55AF1 / NH57AF1 / NH58AF1 (B450)
[Similar laptops] One K56-AR, Eluktronics Thicc-15, Eurocom Nightsky ARX15
[CPU] Zen3 & Zen2 Ryzen Desktop CPUs
[Note] This guide is applicable for almost all laptops. Of course it will require you to change some critical aspects, especially about re-using the existing waterpipe and positioning it on your individual heatsink. Building your own waterpipe solution is highly recommended.
I know how hard that sounds, this is a do-it-yourself project and requires some skills and includes risks, if you want to replicate it.
Intro
In the previous video I have introduced the project goals and desoldered the waterpipe from our donor heatsink.
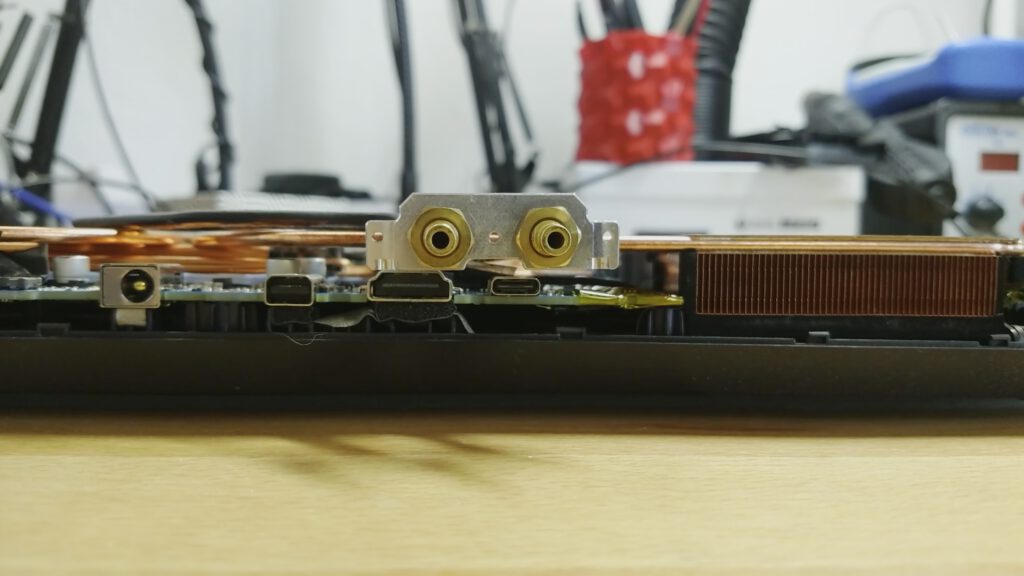
A quick test fit showed that there are two usable spots for the water pipe to be soldered onto the other laptop’s heatsink. Unfortunately both of them were not optimal.
One had really good contact to the heatsink, but the connectors ended up in a very unfortunate position, blocking the HDMI and USB-C port.
And the other had a lot worse contact to the heatsink reducing it’s cooling capabilities, but the connectors were in a way better position.


One way or the other the final solution wouldn’t look as clean as I like and come with major trade-offs. That’s why I decided to use the desoldered waterpipe for a first, quick proof-of-concept, to get some baseline data.
And in the next video I want to create my own cutom waterpipe. With more contact area, better connector positioning and the very same quick-release connectors as used with the existing waterpipe.
So for this first baseline test I chose the waterpipe’s mounting position with the most contact area of course, ignoring the problems with the connectors on the outside.
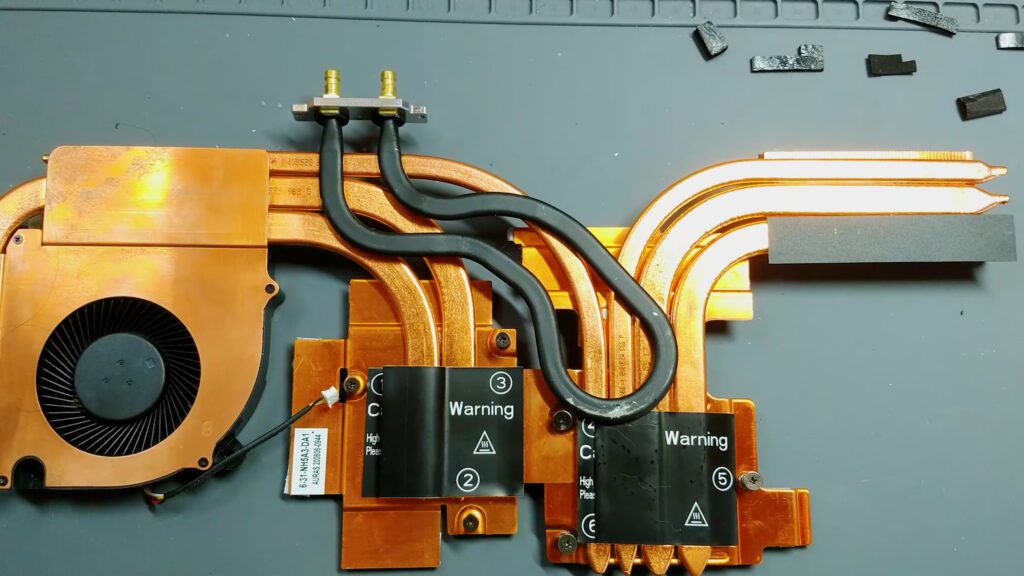
Clean-Up
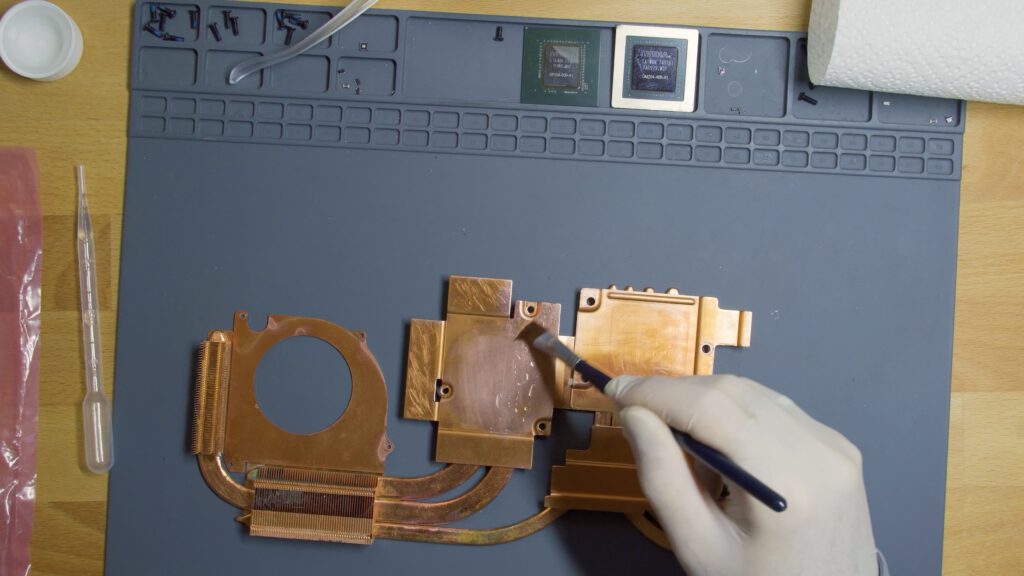
Before I could start to solder in the waterpipe I had to remove the stickers and glue. Otherwise they would melt, smell and leave ugly residues.
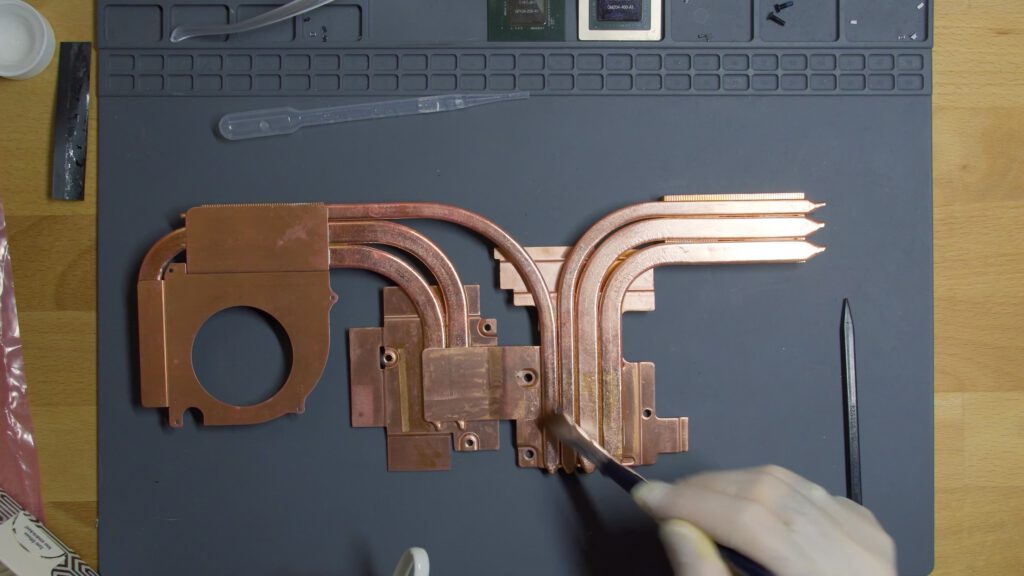
To remove the glue residues I’ve used isopropyl alcohol and some cotton sticks.
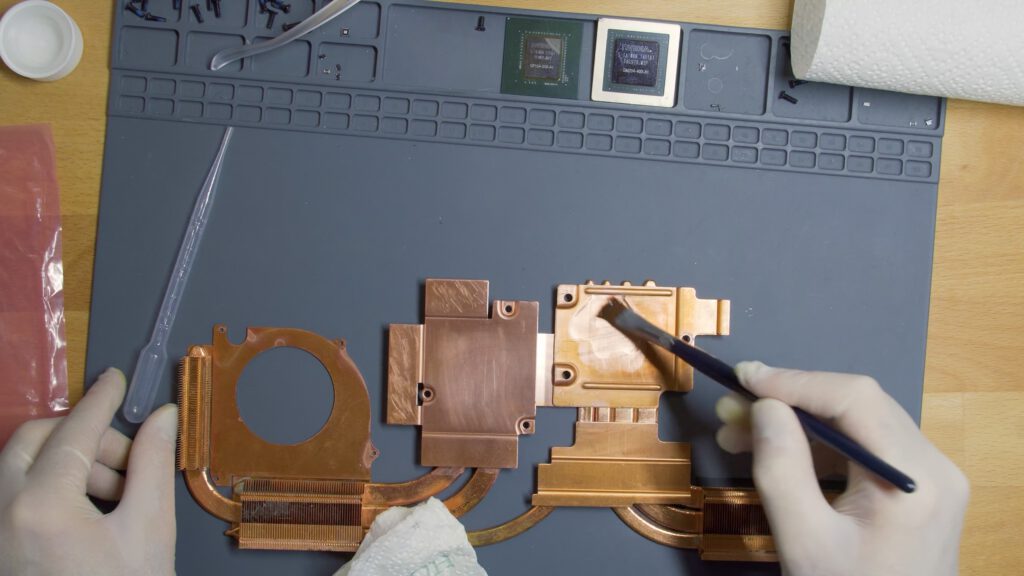
And in the end I had to clean off some of the corrosion to make sure the solder sticks properly on the surface.
I have read that acid is able to clean up copper corrosion easily. And yes it does. In fact also very very fast.
Of course it makes no sense to clean THE WHOLE heatsink before the actual soldering. The heatsink will get dirty and corroded all over again anyway.
But to be honest: it was really satisfying to see it fade to pure copper again.
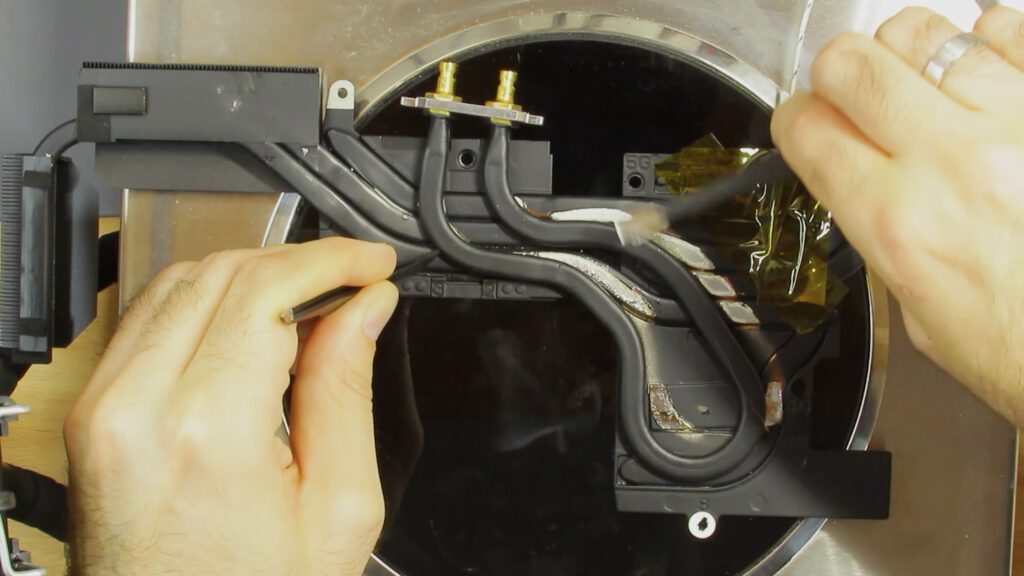
Soldering the waterpipe
Okay so let’s start with the most critical part. The Soldering.
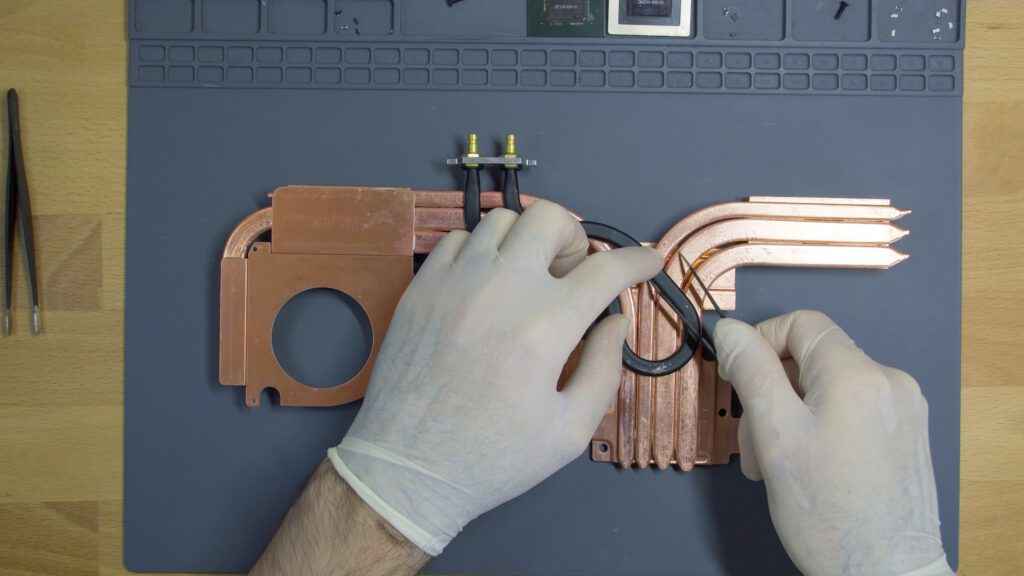
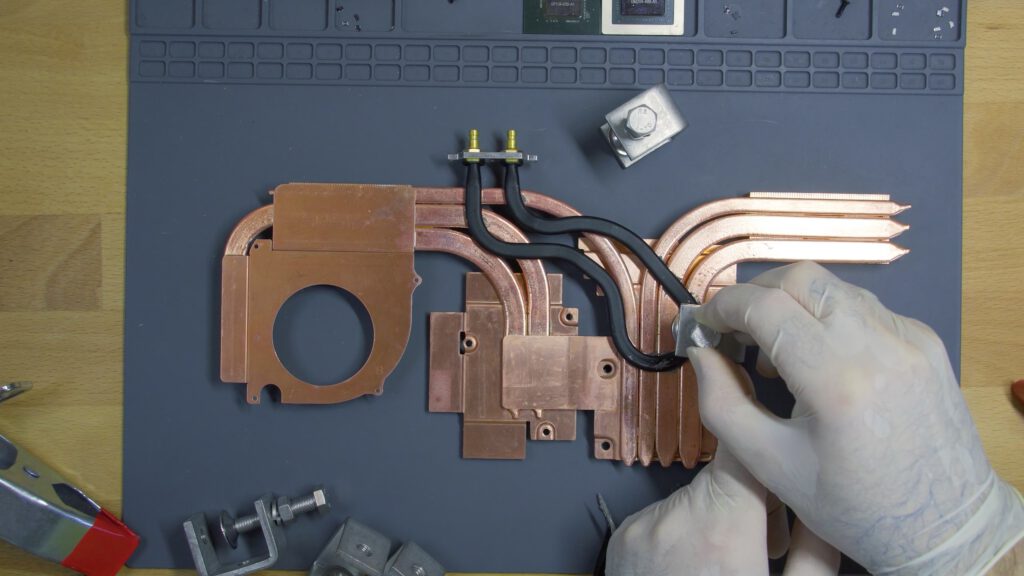
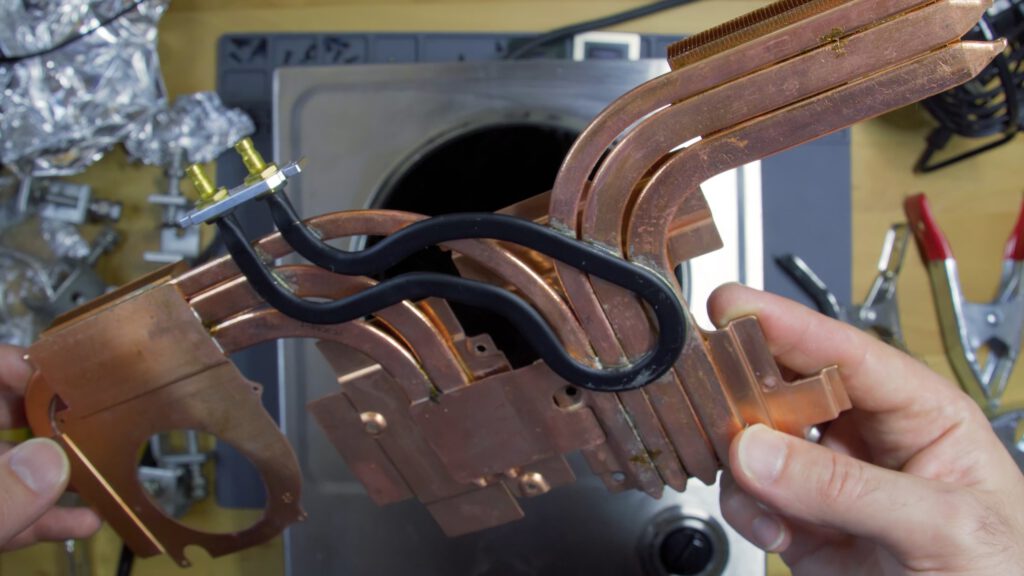
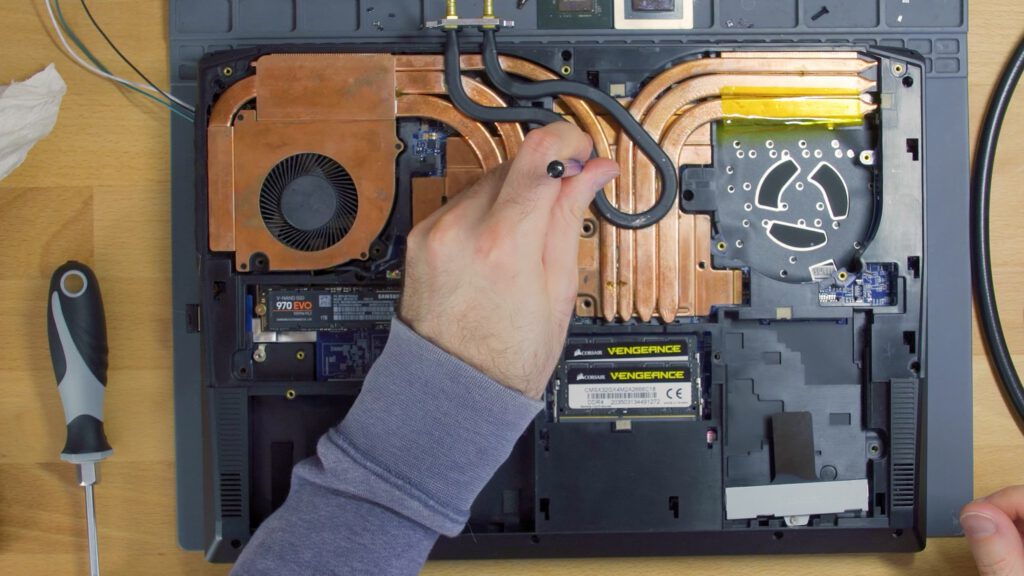
At first I layed down the waterpipe on the heatsink and adjusted it’s position until the contact area and the connectors position was good.
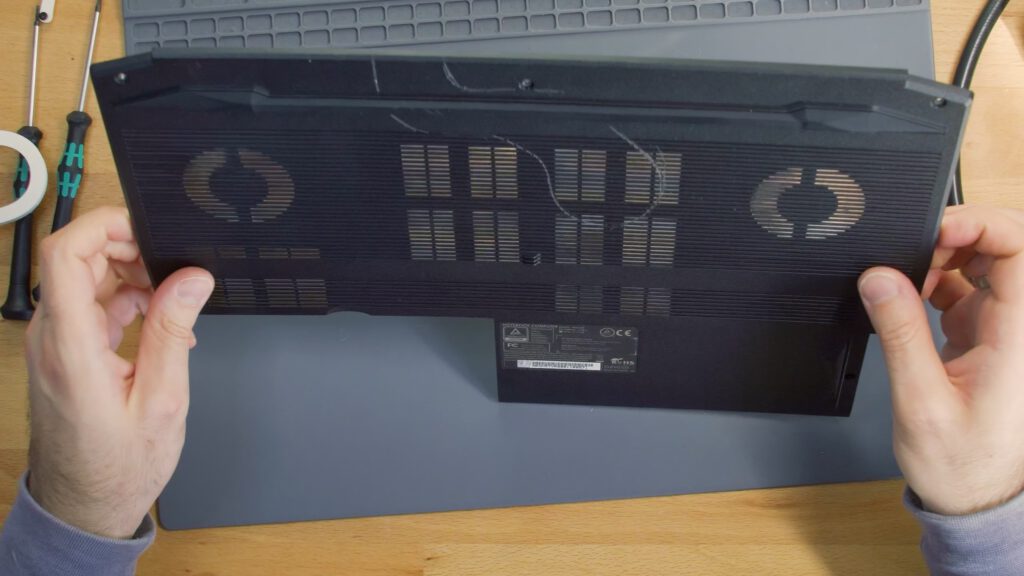
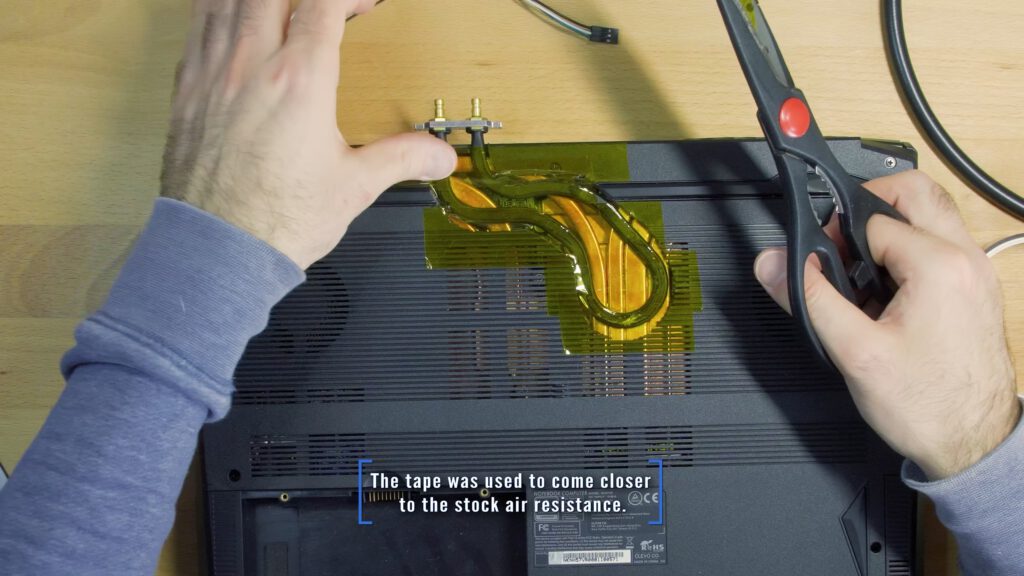
As you can see I have removed the bottom case, because it’s framing would prevent to lay down the waterpipe flat on the heatsink. So I have to make some cutouts afterwards unfortunately.
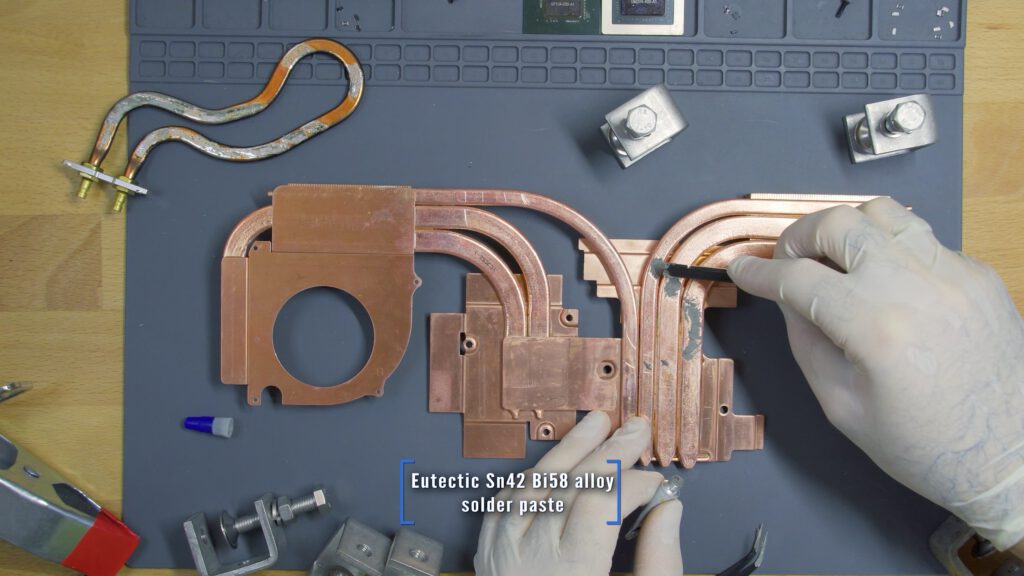
Now after positioning the waterpipe i scratched some markings into the heatsink. And applied the low temperature solder paste, which is made out of tin and bismuth as mentioned in the previous video.
After that I fixed the waterpipe into place with some heat-resistant clamps. And because the whole heatsink is soldered with low temperature solder I had fix down every other element, which should not fall off or change positions. So basically everything. I had barely enough clamps to properly secure the elements, so I used some aluminum foil, pushed it into the gaps to reduce the risk of moving heatpipes.

The actual soldering was mainly done using my hotplate. Again I have installed a thermocouple to check if I am close to the melting temperature.
To make sure the solder melted properly even at the edges of the hotplate I assisted the melting process using my hot air station.
After everything looked properly melted I cut the power and cooled down the heatsink quickly using a table fan. This way you can reduce the risk of damaging the heatpipes.
(Note: heatpipes can swell and break at above 150°C, because the gas pressure inside them rises with the temperature.)
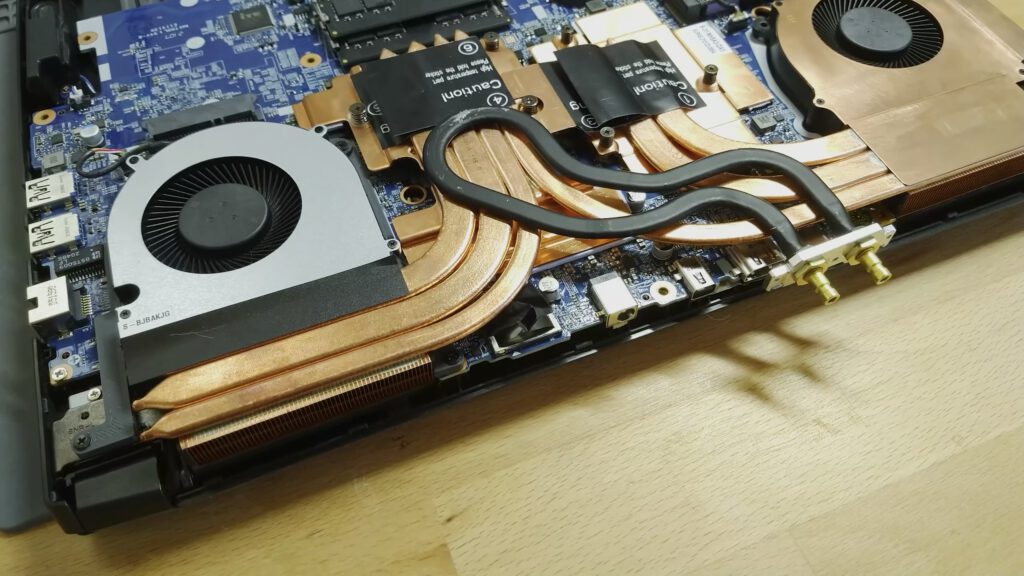
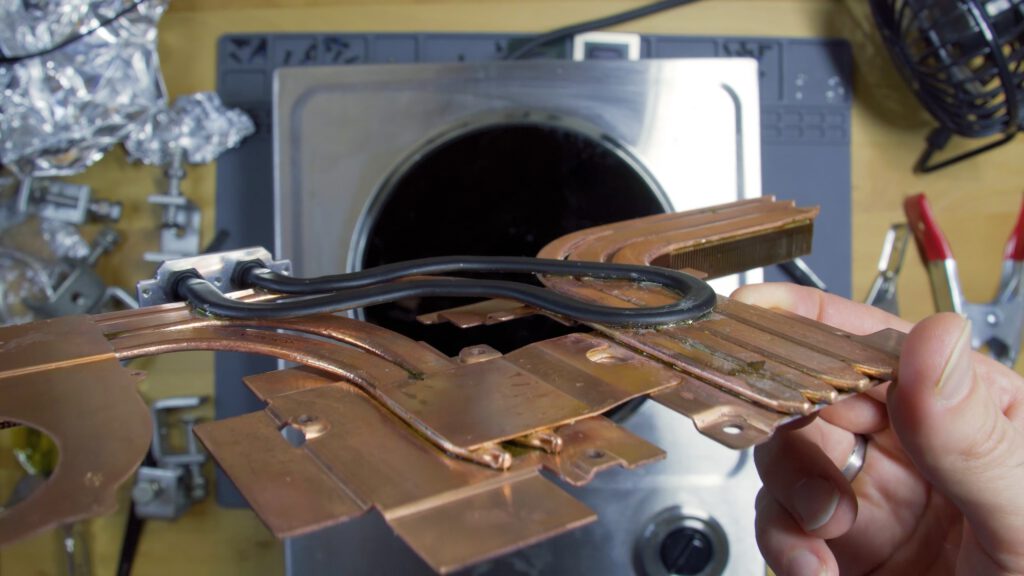
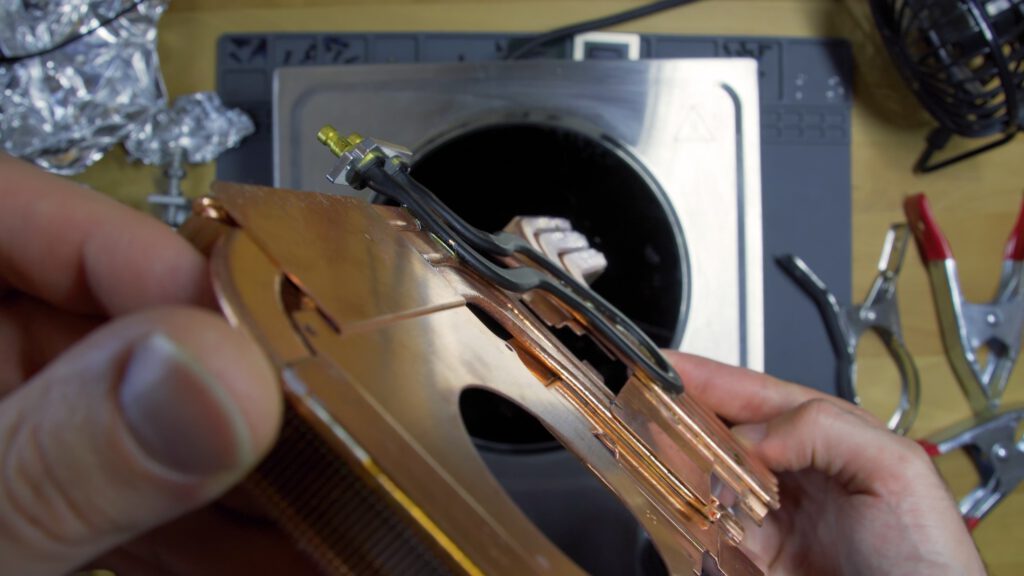
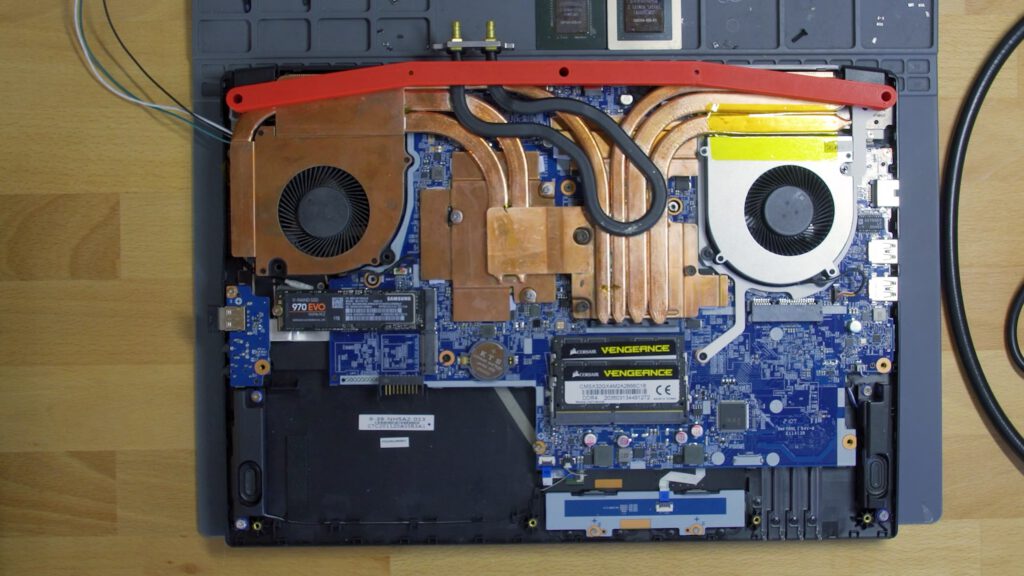
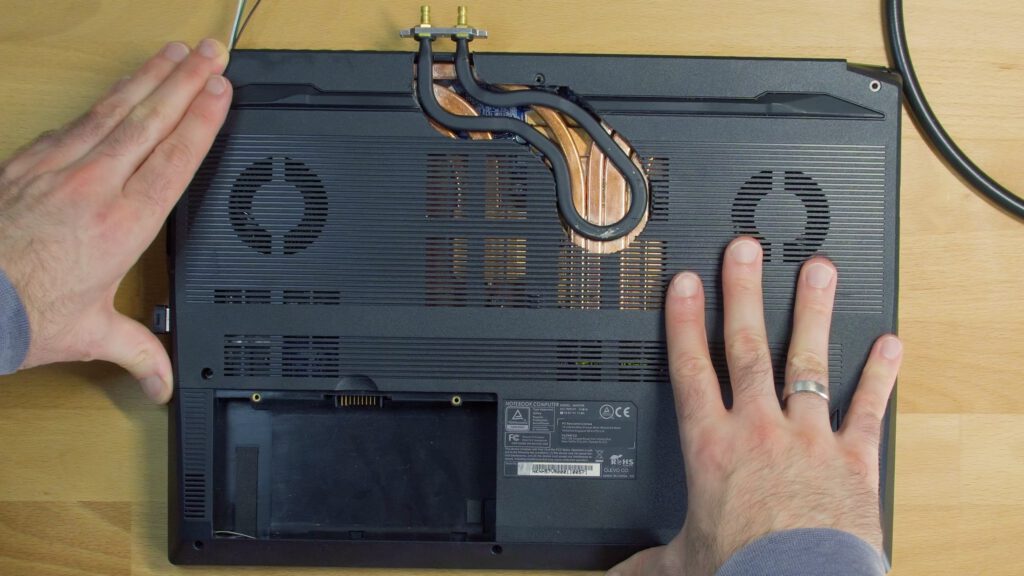
The result is exactly what I have hoped for. The solder joints look clean and make a wide contact to transfer a lot of heat into the waterpipe.

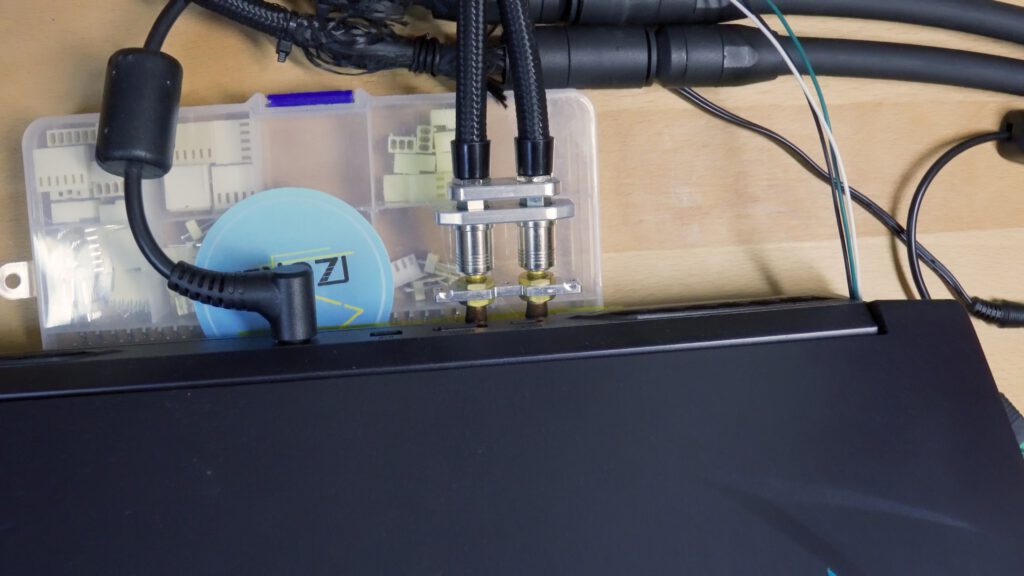
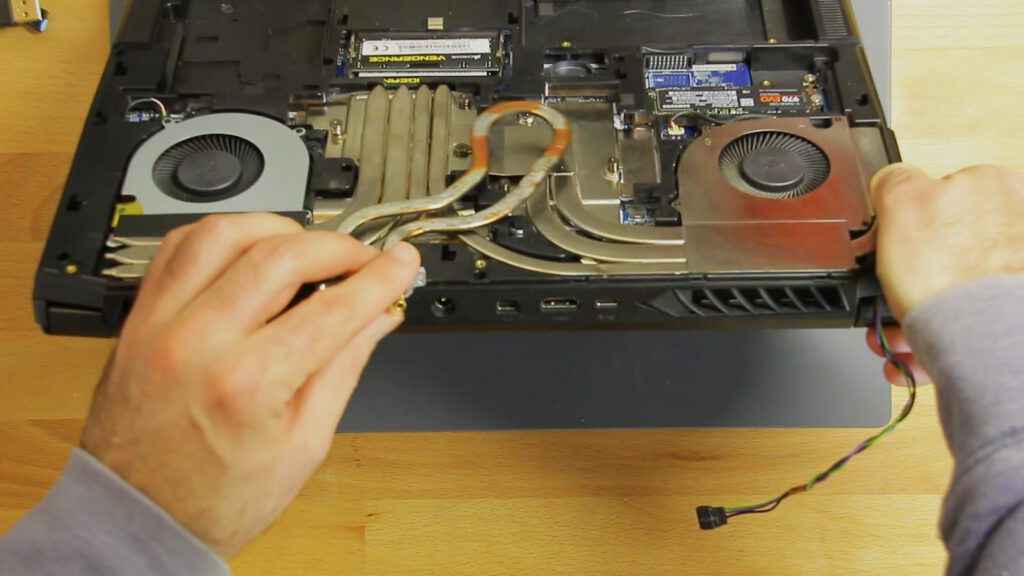
Installation & Equipment
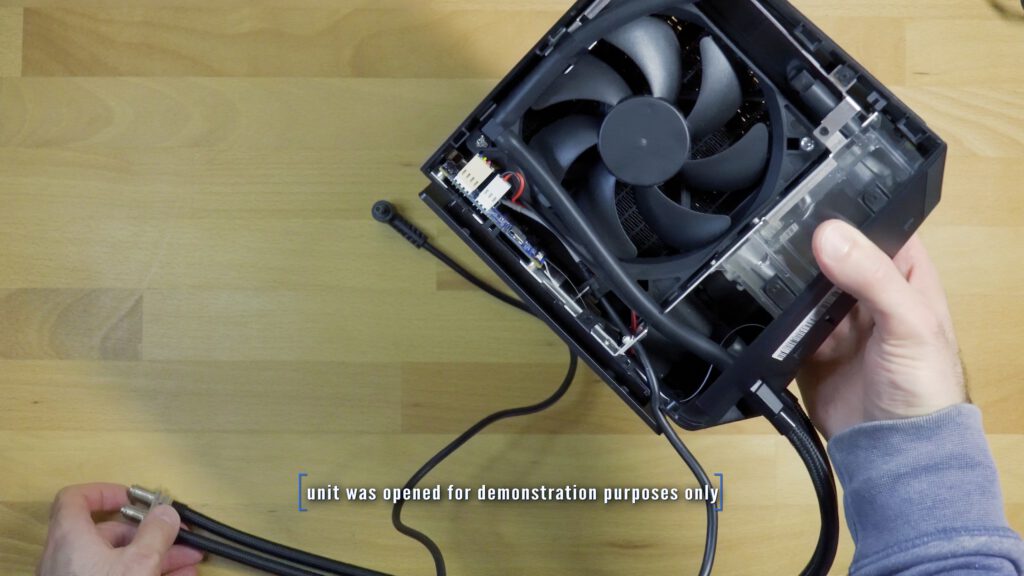
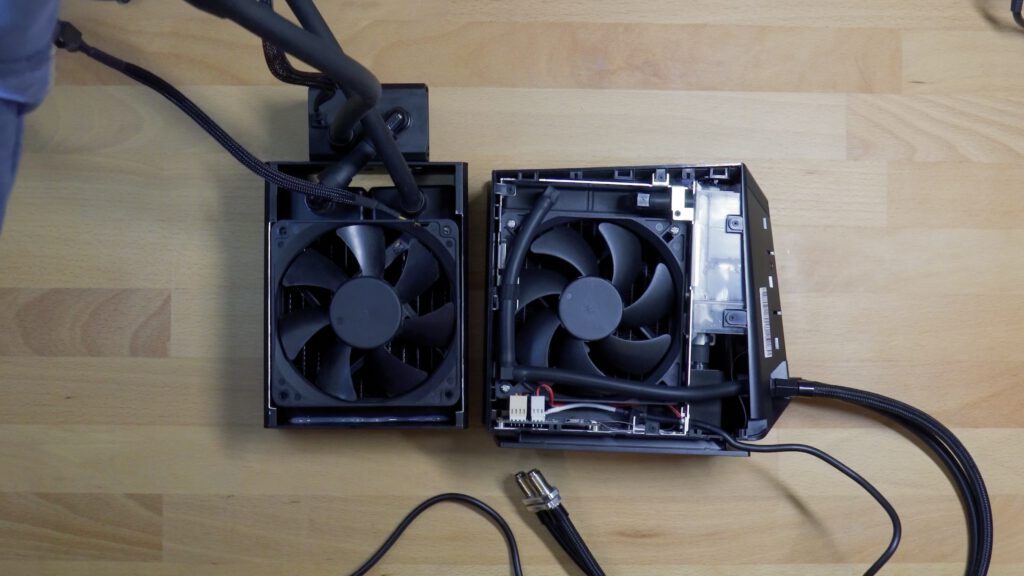
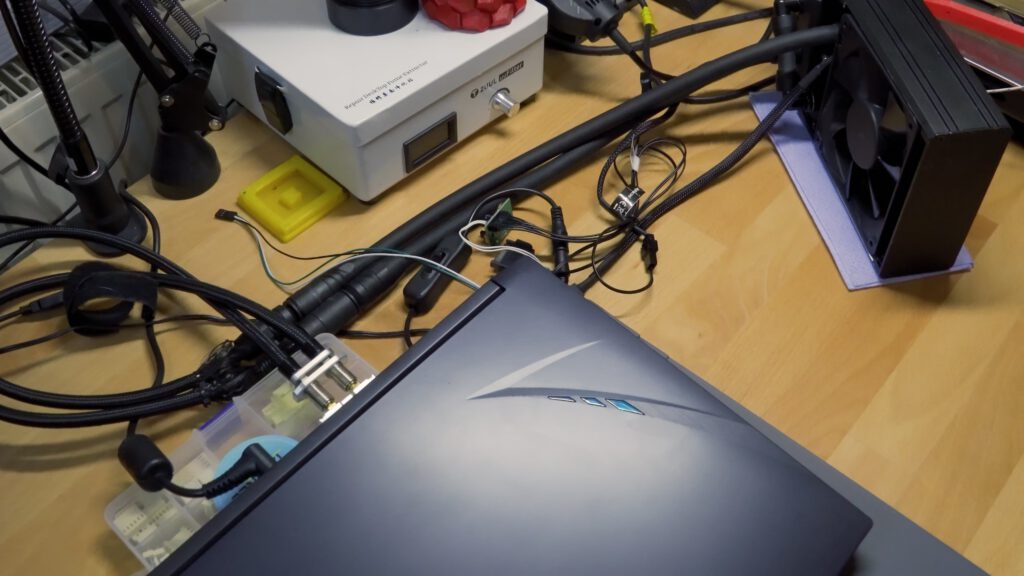
It was time to install the modded watercooled heatsink into the laptop. To prevent cutting parts off the original bottom case I thought that an open frame assembly might be a good idea.
So I designed a 3d printed part to hold the CPU fan without the case. And also a little reinforcement bar and stand to make sure I can put the half-way opened laptop on the table anyway.
The water cooling unit I wanted to use is the XMG Oasis. Unfortunately though, I have not taken the software into the equation. The unit can only be controlled via bluetooth using the Control Center App for specific laptops. But of course my laptop is not supported. So, I have to work on a proper solution and show it in another video.
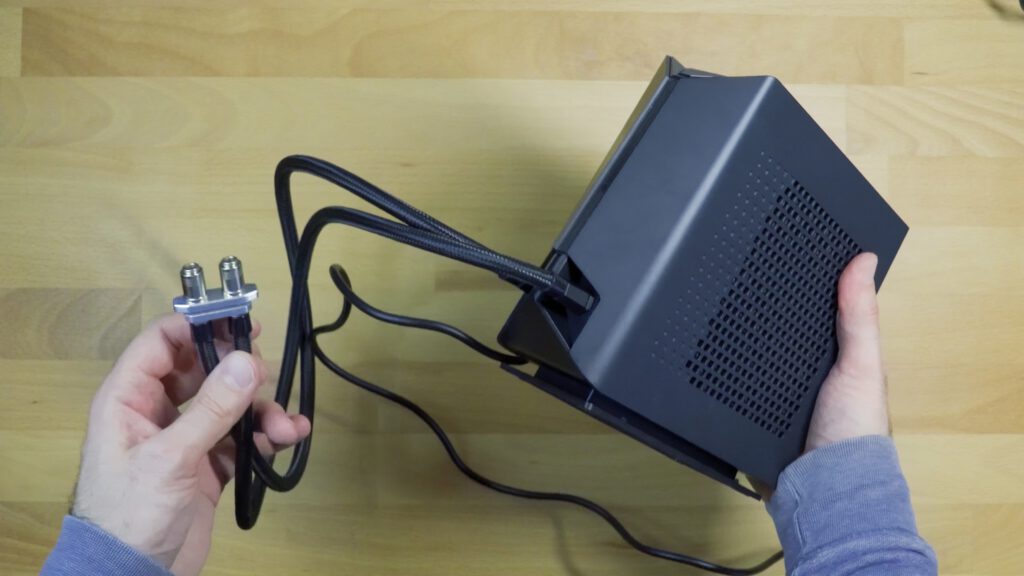
But we need a working solution right now. Luckily XMG had a little present for me. They gave me this.
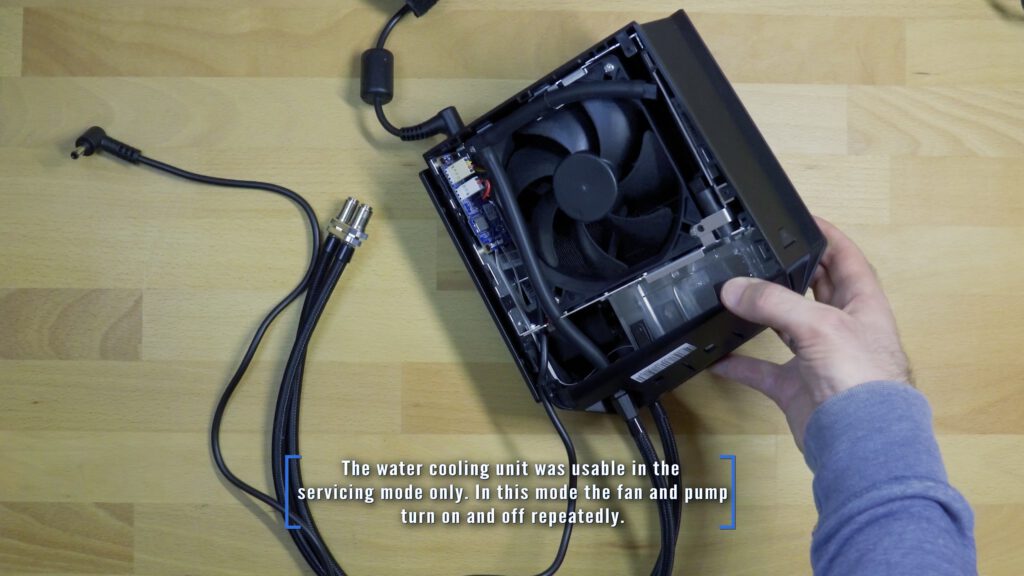
It is a prototype for the external water cooling unit, which is built with desktop-grade parts by XMG together with Igor from IgorsLab. They gave it the lovely name “Frankenstein”. Even if it does look a little fishy it works quite well. You simply plug in a 12V power source and can decide between three different speeds for the fan and pump. I have added the barrel plug socket and switch to eliminate the required external ATX power supply.
Using Frankenstein we will not see comparable results to the XMG Oasis water cooling unit of course, but it is a good way to get some baseline results in this video.
More Modding Required (Invalid Results)
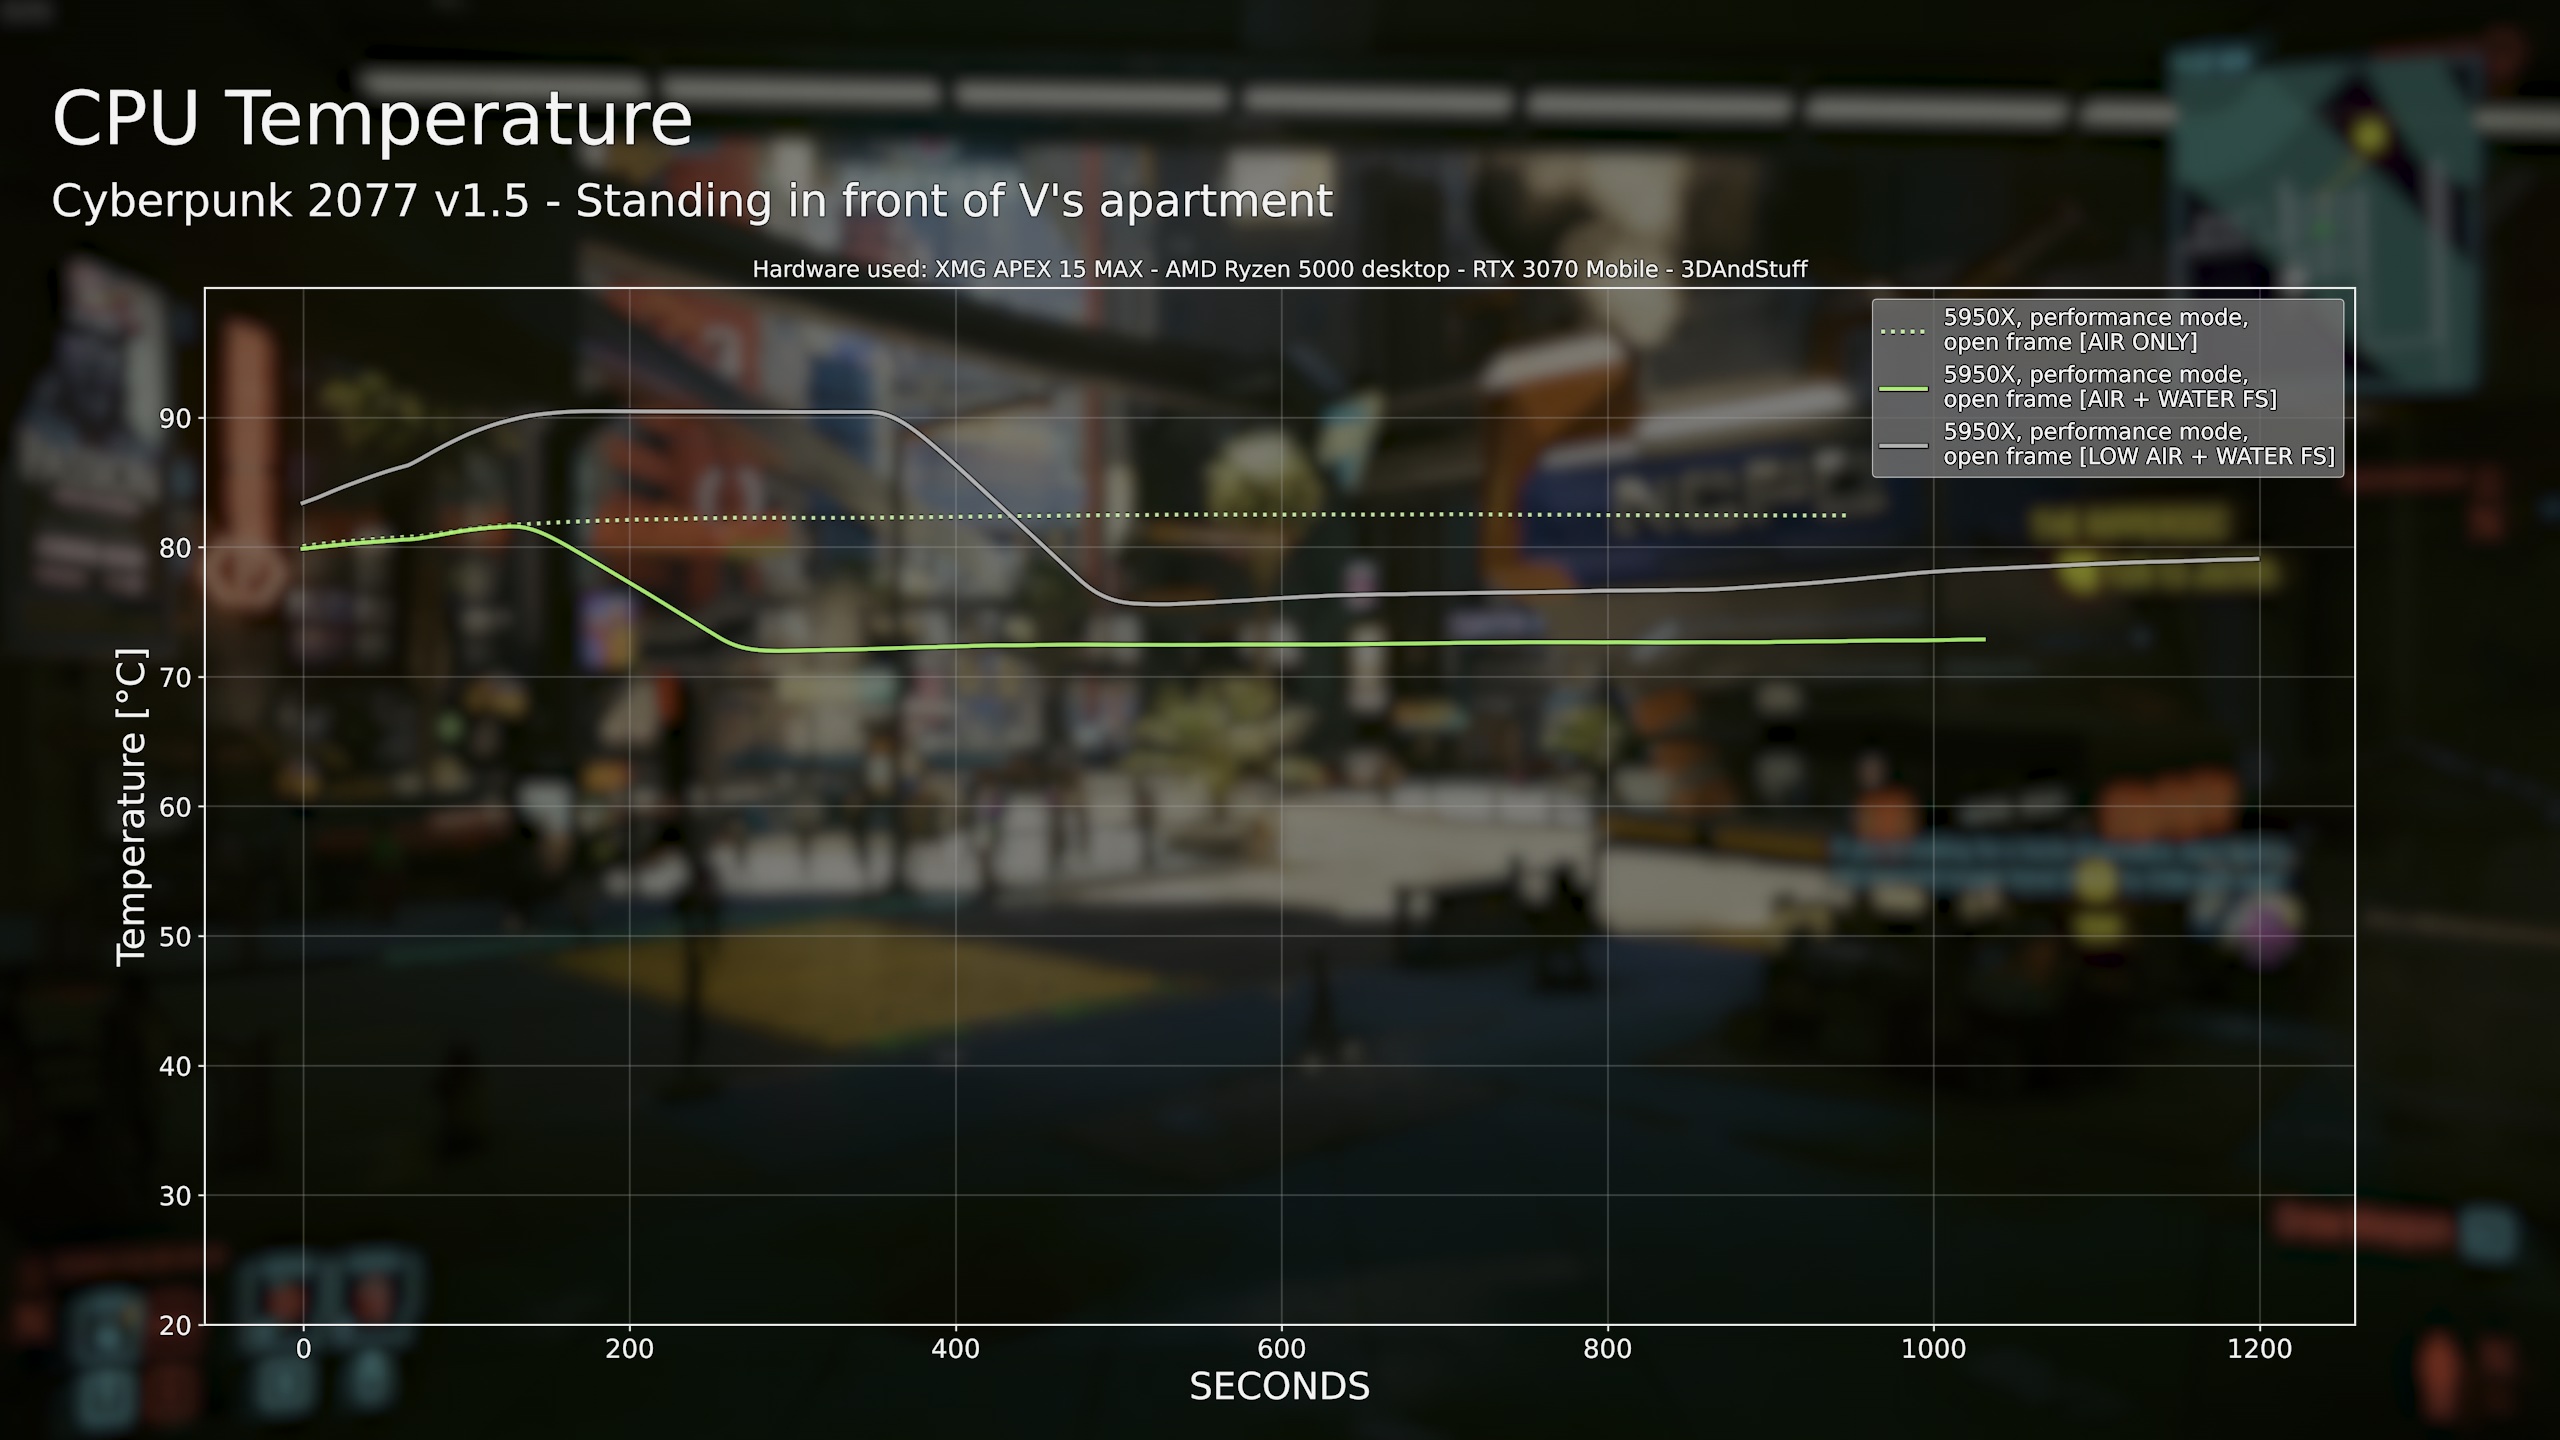
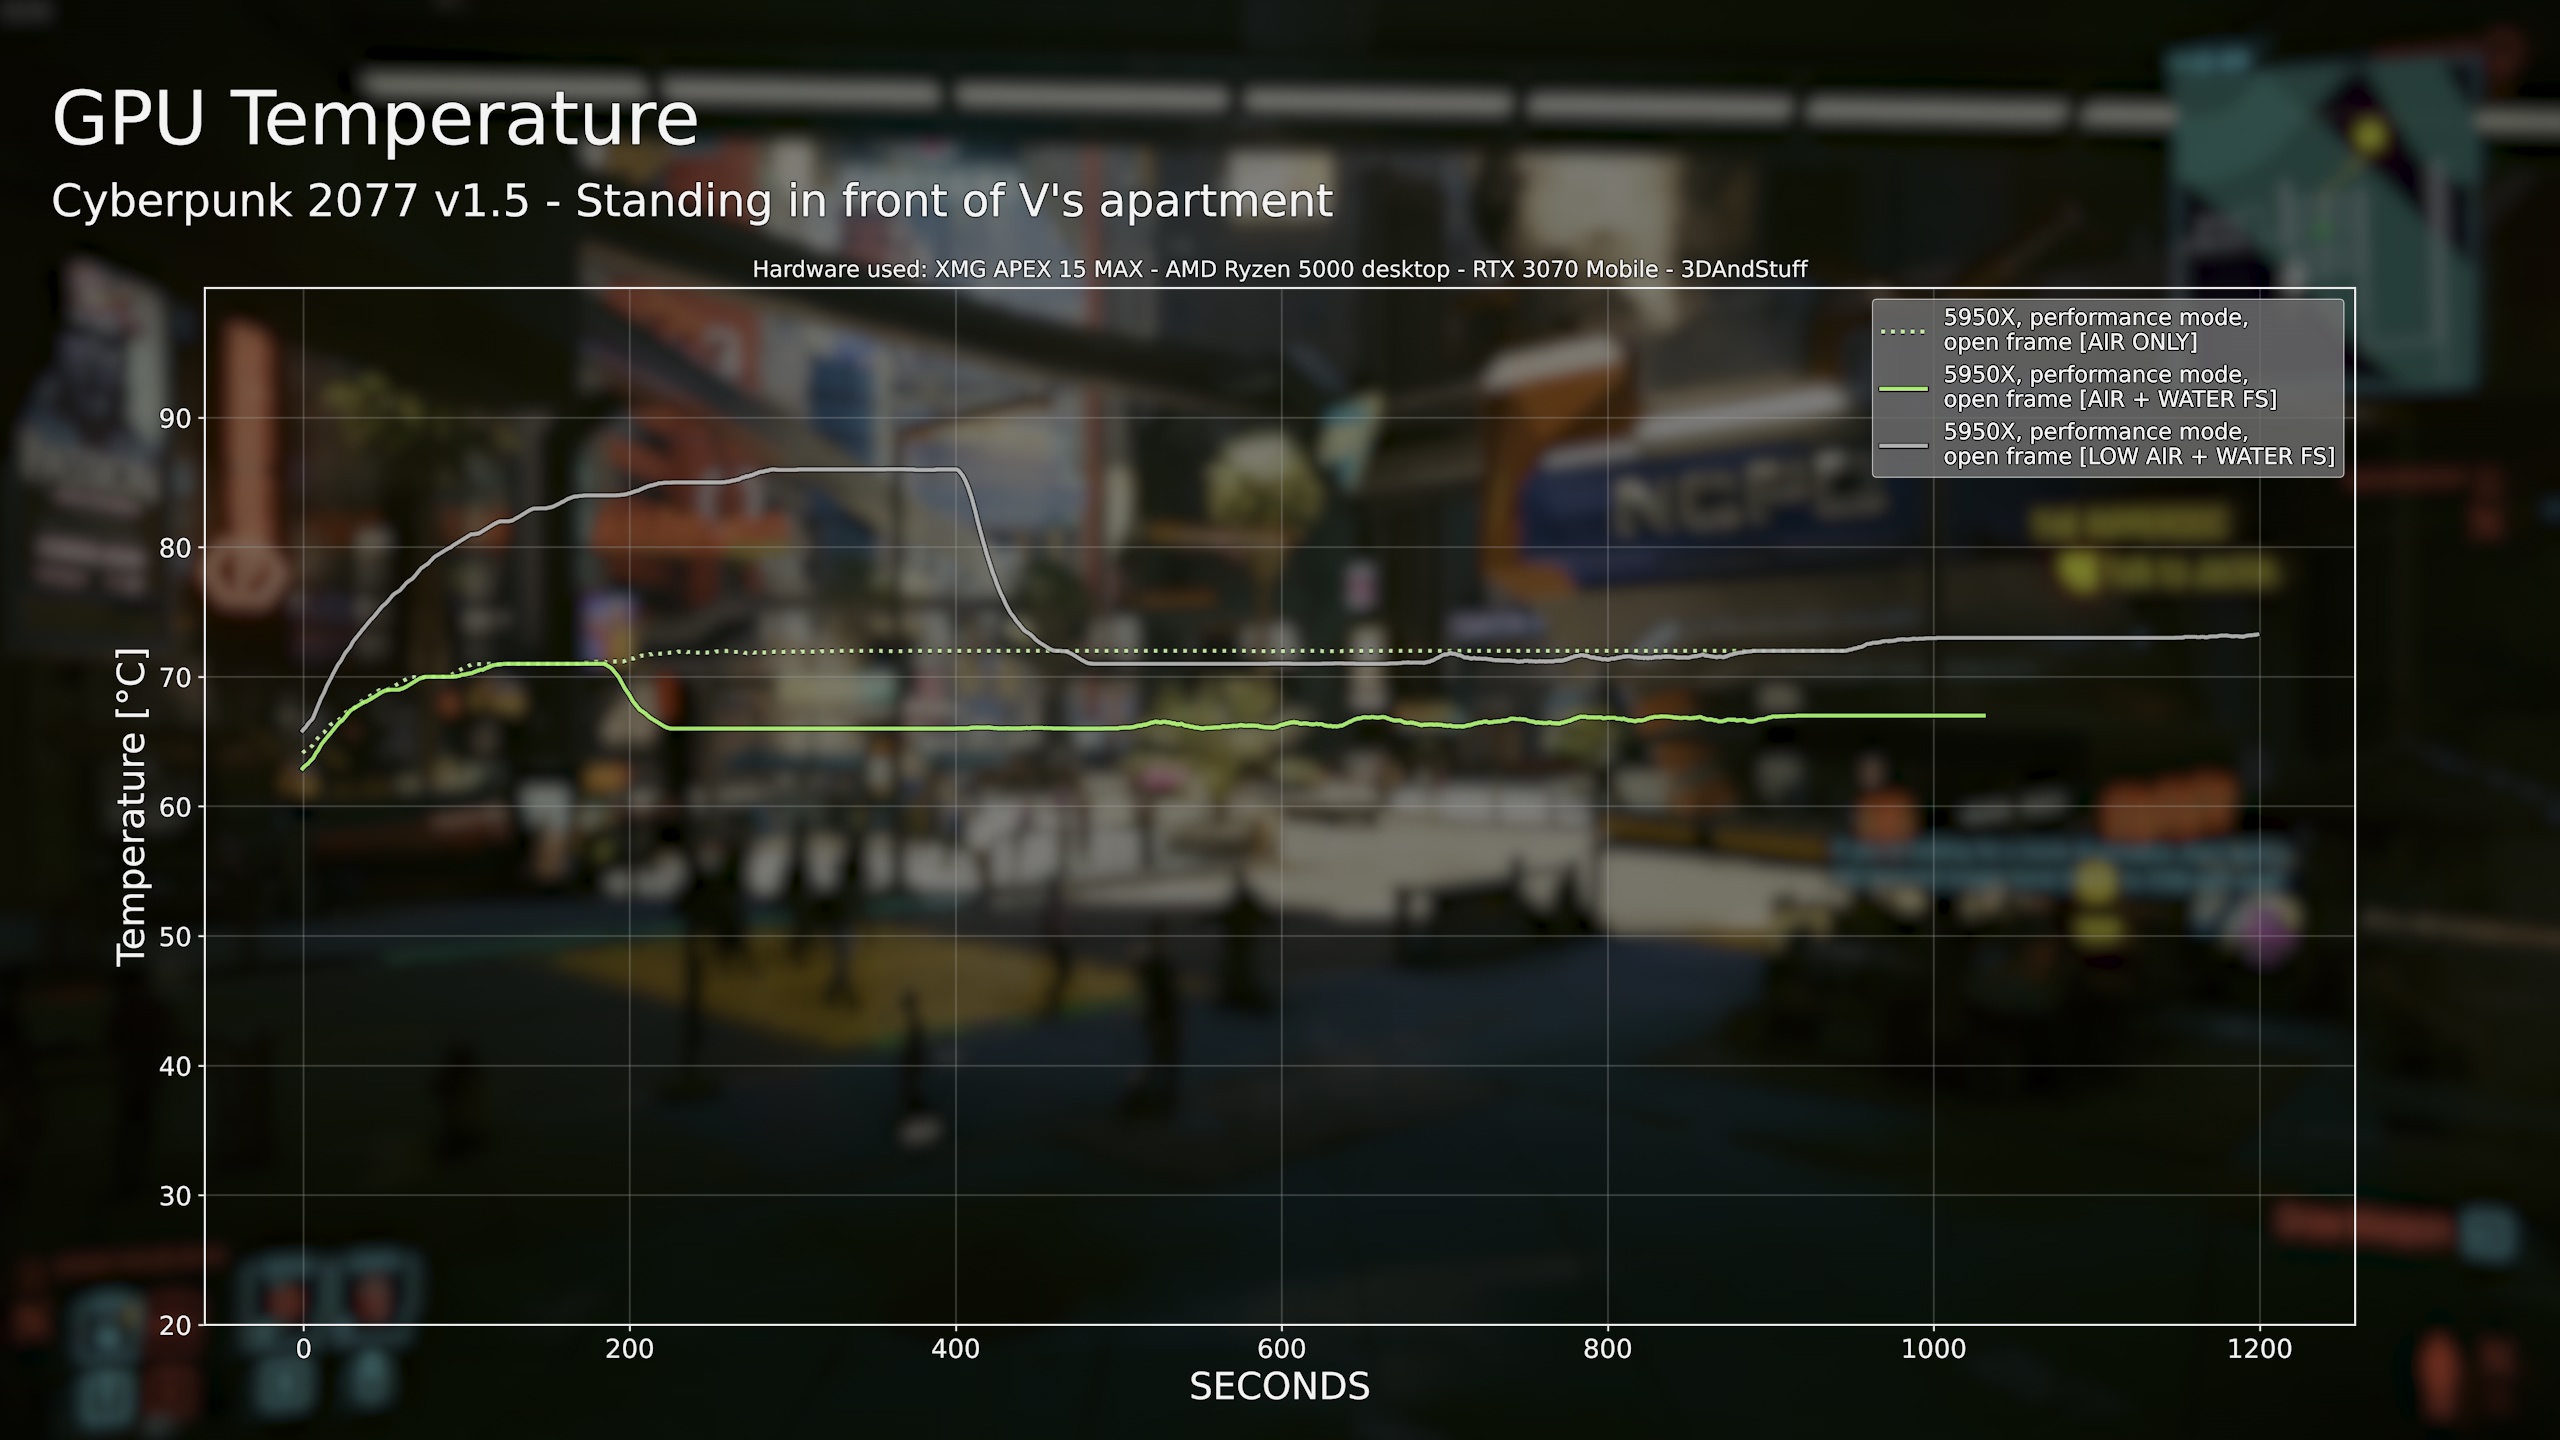
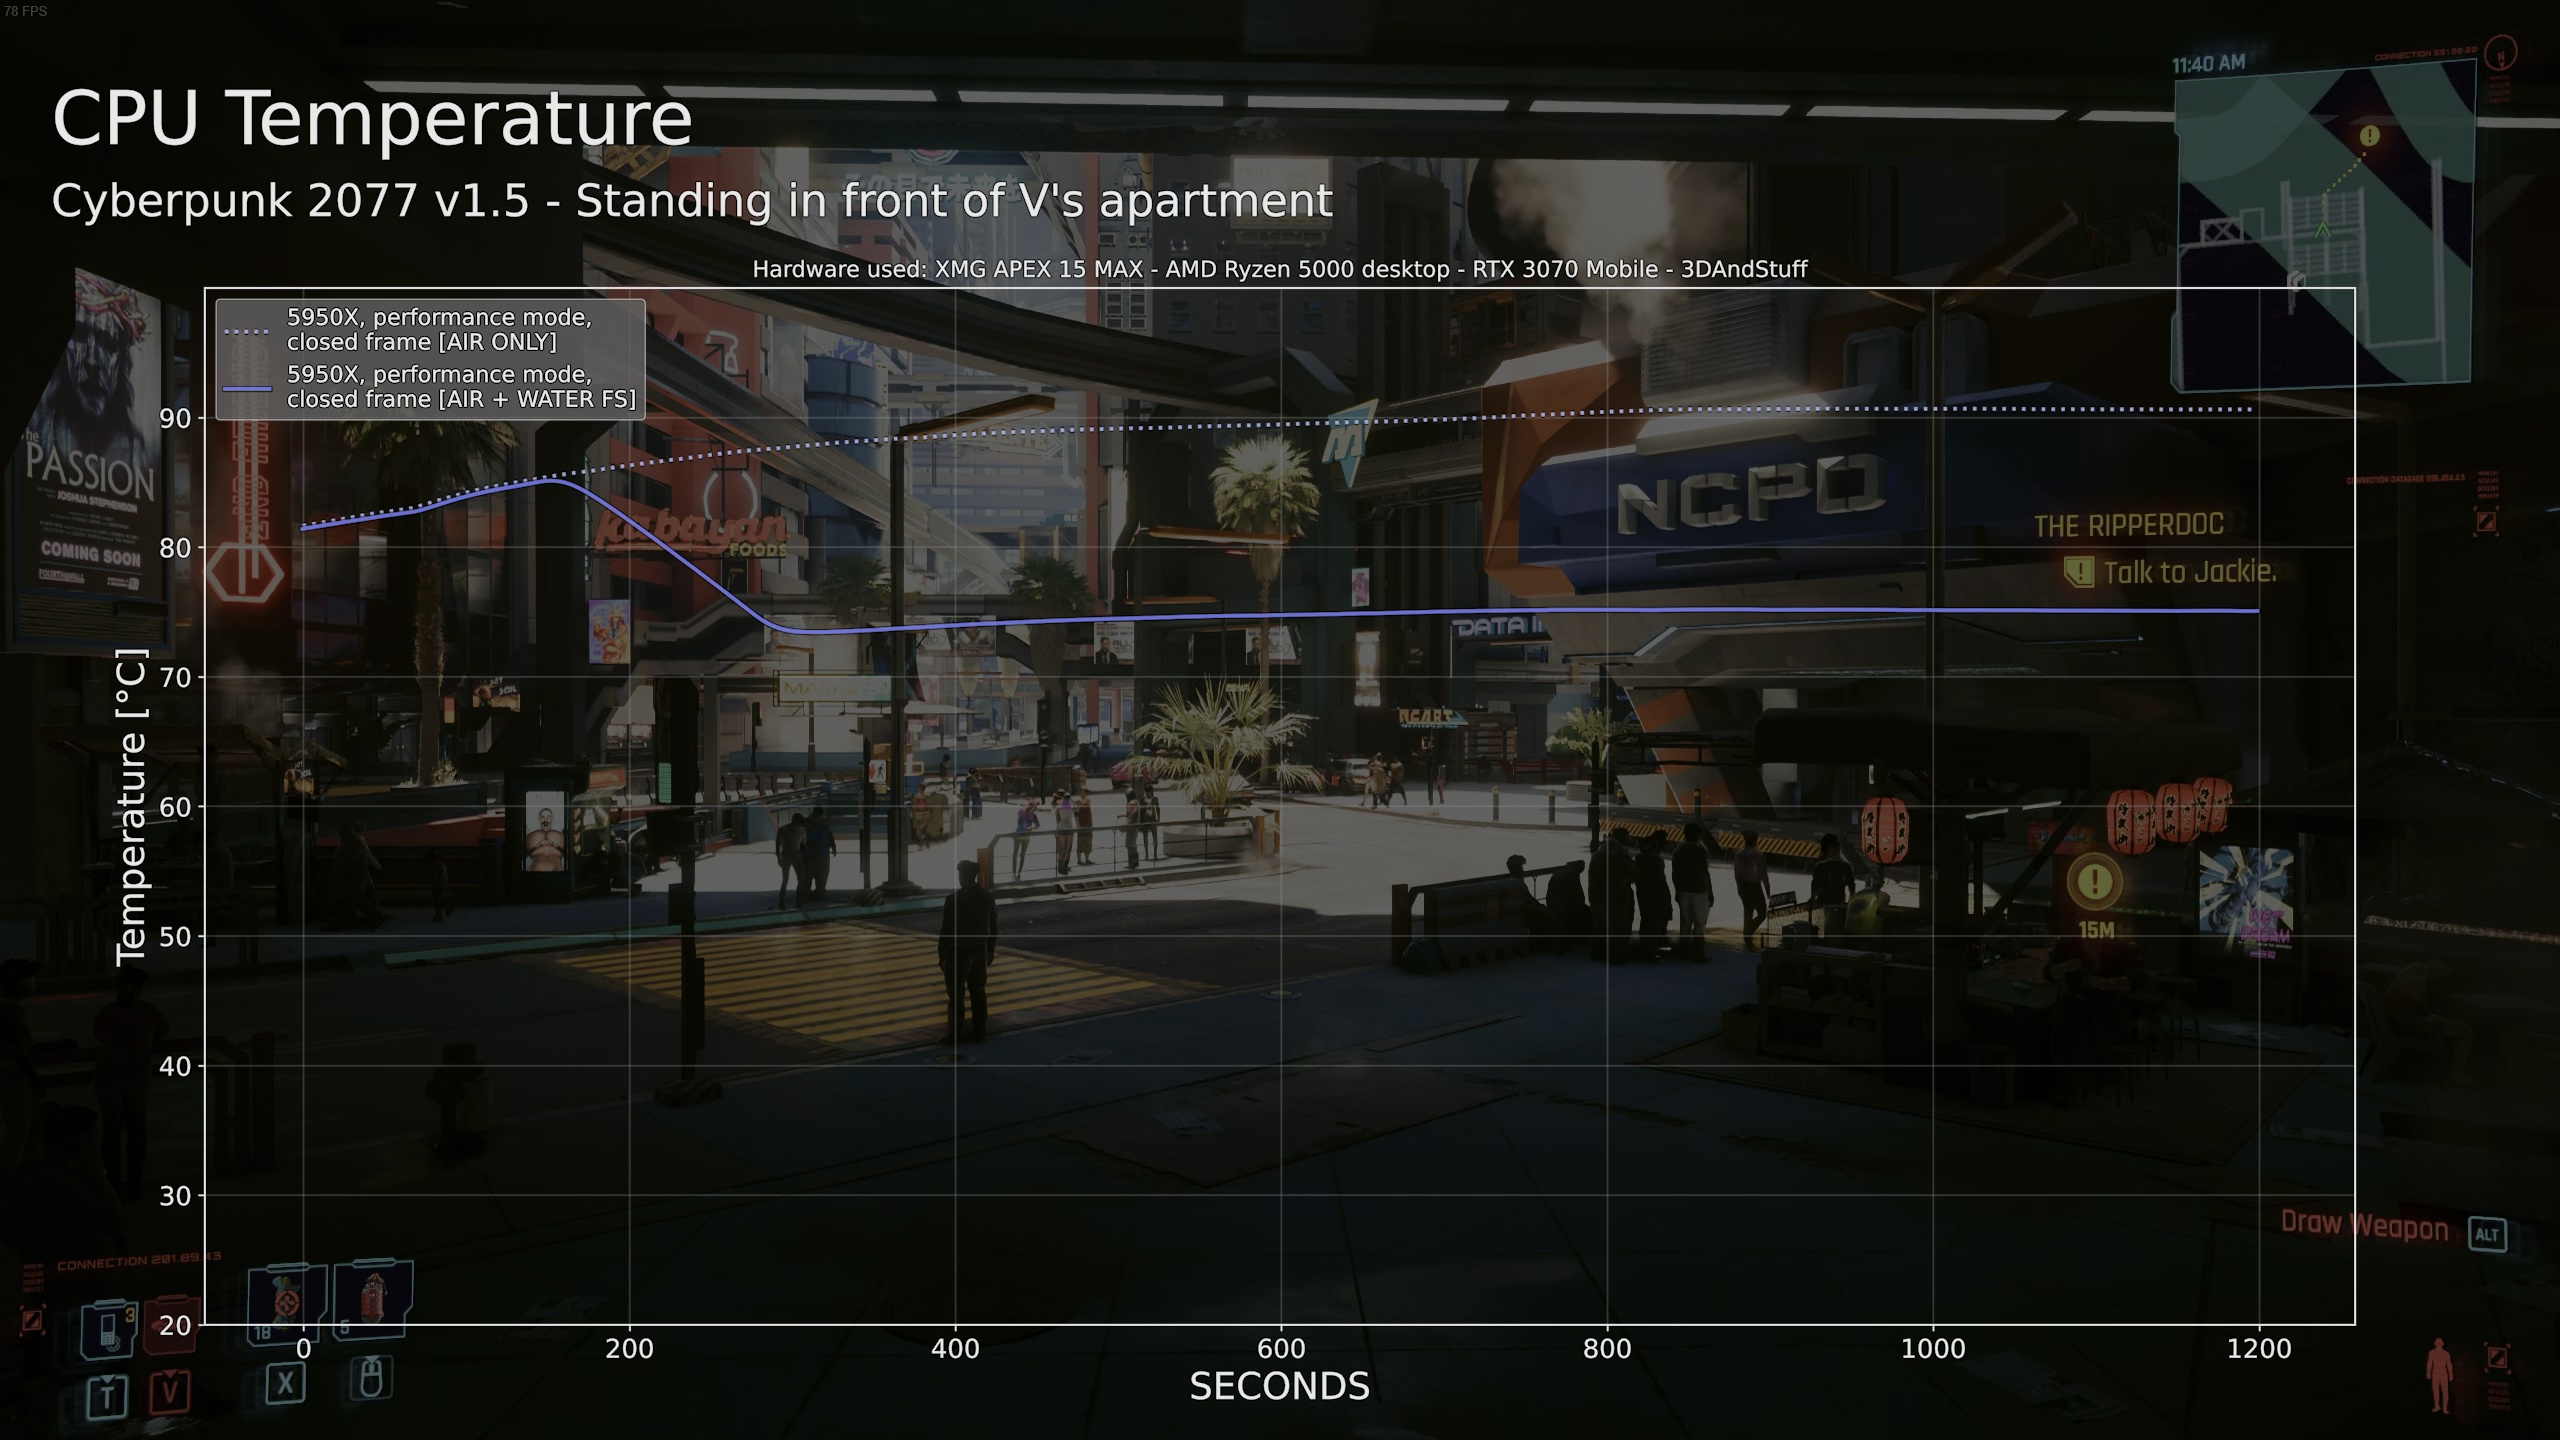
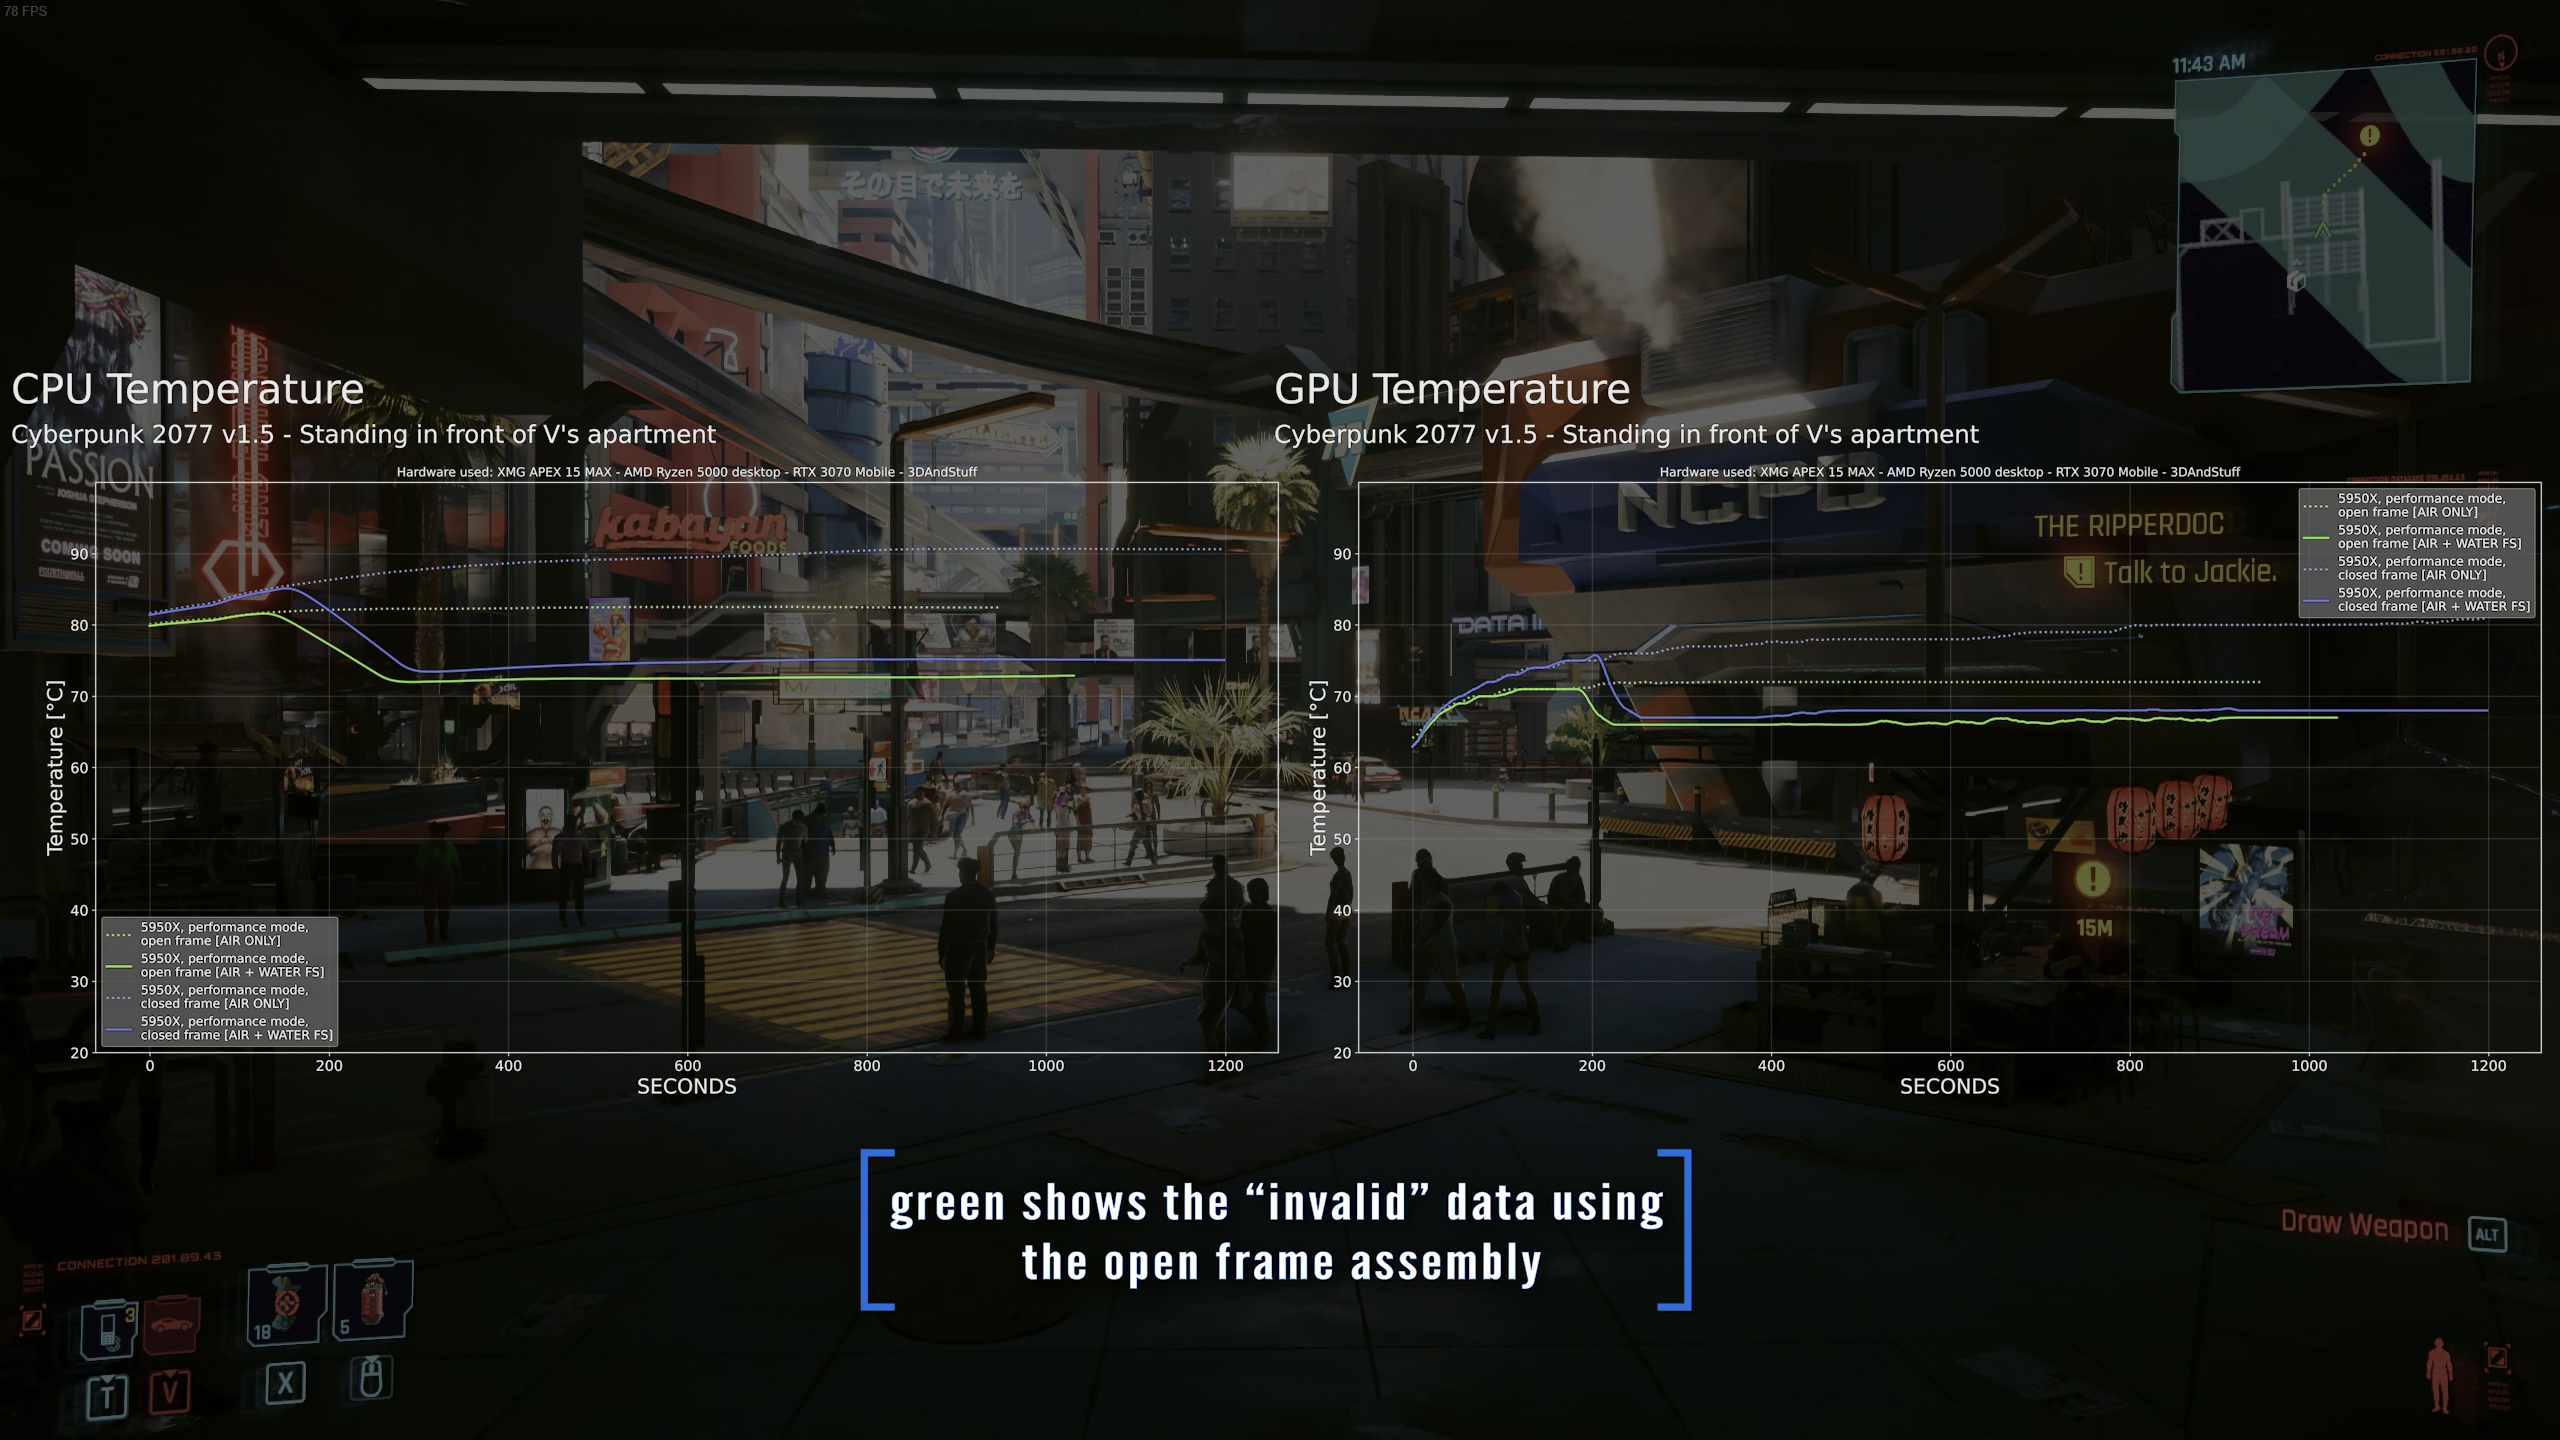
Finally let’s come to the plots. I have always done the first run without watercooling, using the air cooling in the laptop’s performance mode only. And the second run was with watercooling switched on after roughly 3 minutes.
As you can see the CPU and GPU temperature drops quickly until it reaches another plateau area. You can say that the water cooling is basically adding some more cooling performance on top of the air cooling.
Over all the difference seen here is 10°C for the CPU and only 6°C for the GPU.
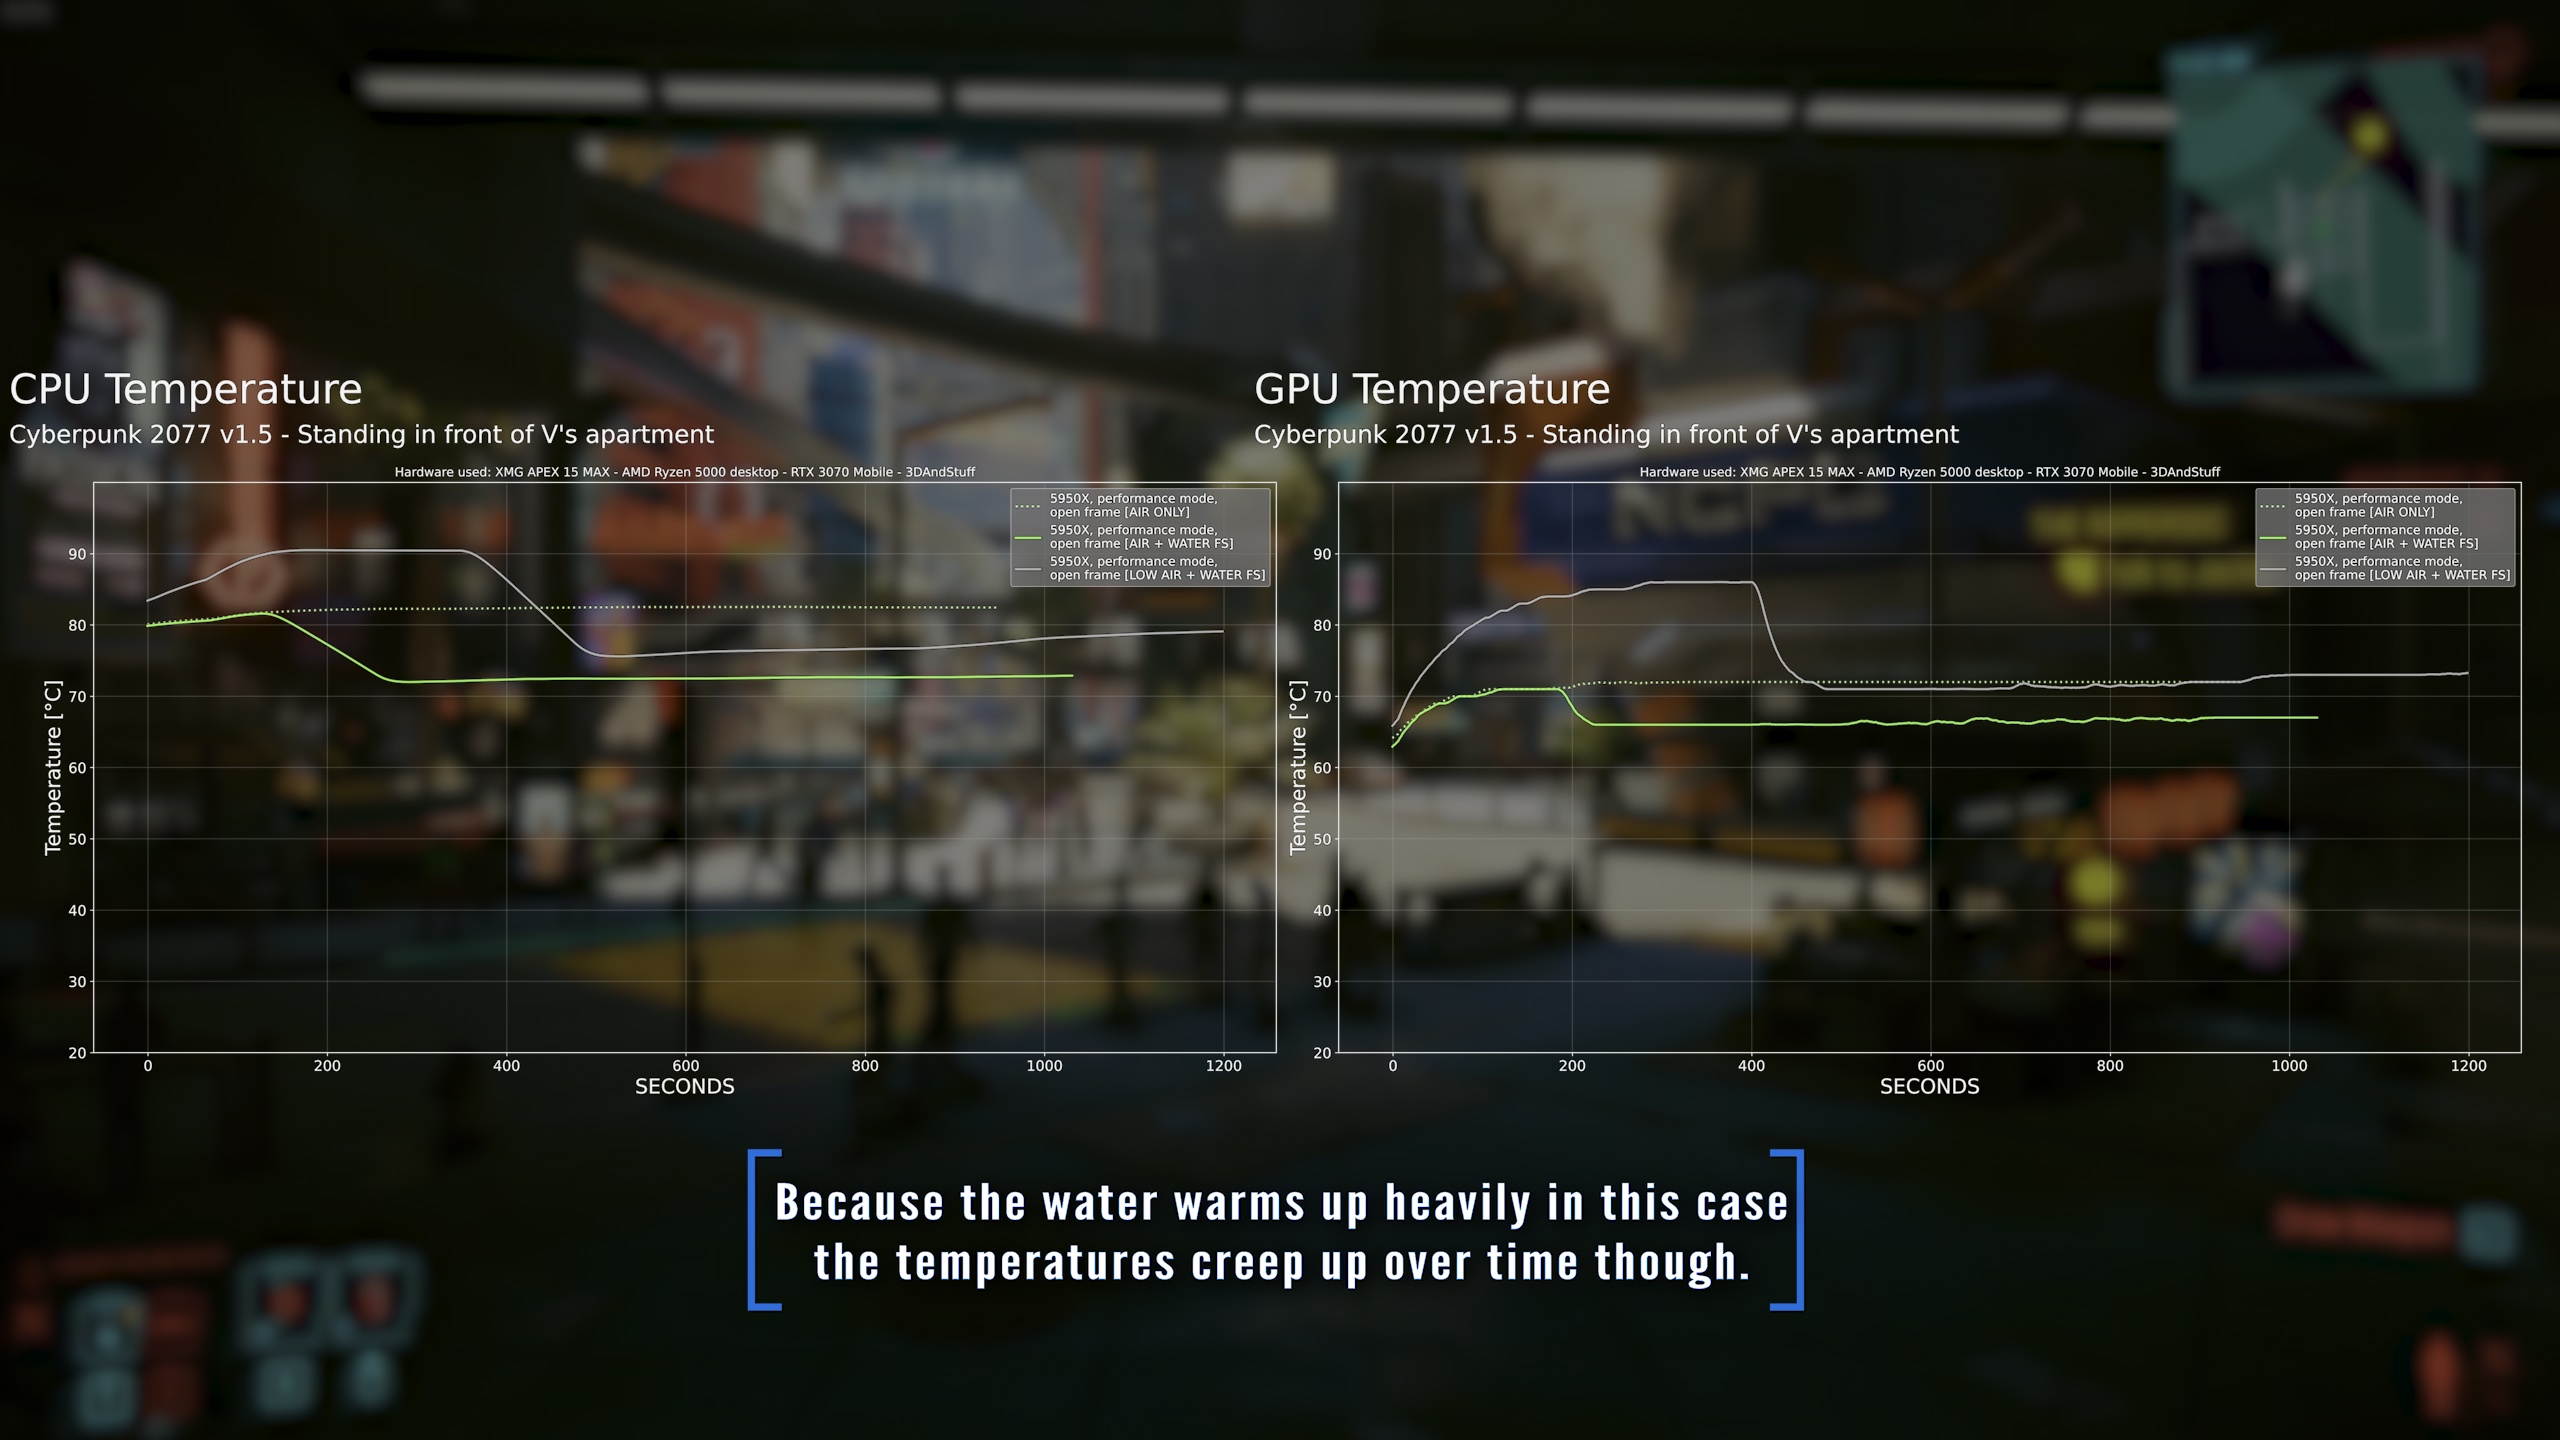
Additionally I have done a third run, which is shown in grey, with watercooling and the fans being locked at their idle speeds. This time the temperature difference was a lot bigger, because the higher the temperatures the easier it is to cut off some degrees. There was a 15°C difference for the CPU and GPU. So in the more extreme scenarios there is a much bigger benefit.
HOWEVER, it was this moment I realized that the temperatures using air only did look suspiciously low for this laptop. The reason must be the open frame assembly, which does allow the air to travel into the fans more freely without the drag introduced by the laptop’s case and back lid.
This is often true in many laptop case designs, but I can’t recommend to add cut outs to the lid, anyway. The air path is usually designed in a way the air needs to pass some passively cooled components on the mainboard, which could overheat otherwise. So you might gain some degrees for your GPU and CPU, but your laptop might die anyway, because some other component overheats all the time. And there are a lot of potential heat sources on the PCB.
So it might be bad case design, or intentional. But whatever it is, when I want to show you real comparable results, I have to modify the case and close it up again.
Case Mod
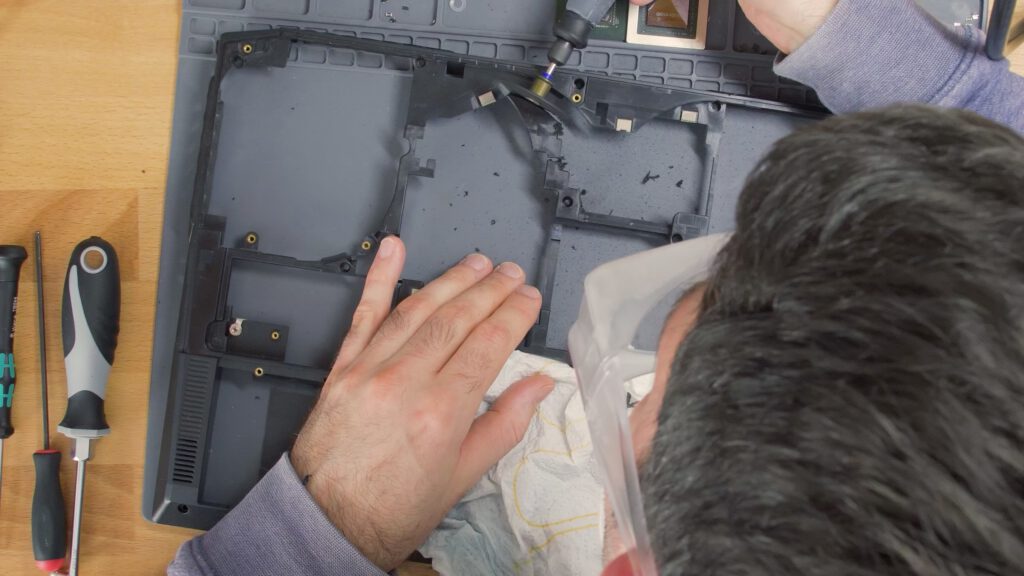
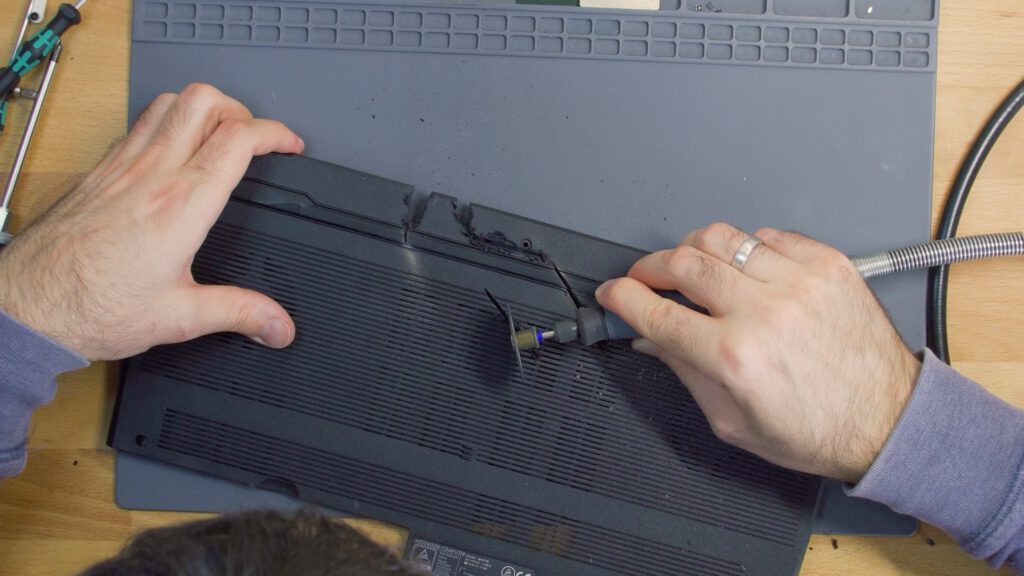
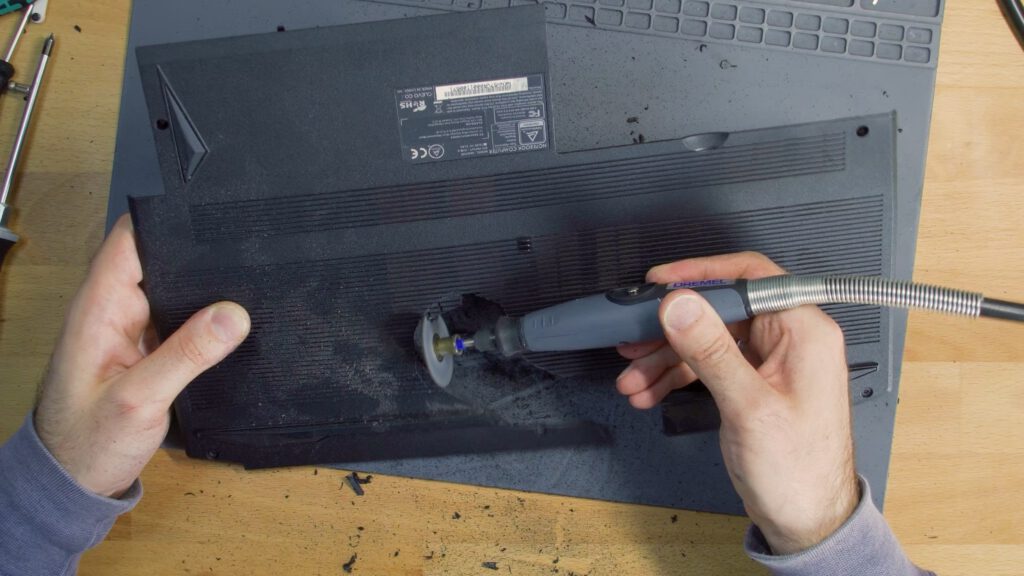
Adding the cutouts is pretty straight forward again. First I marked the spots that need to be removed.
Then I used my dremel to get rid of the “excessive” material.
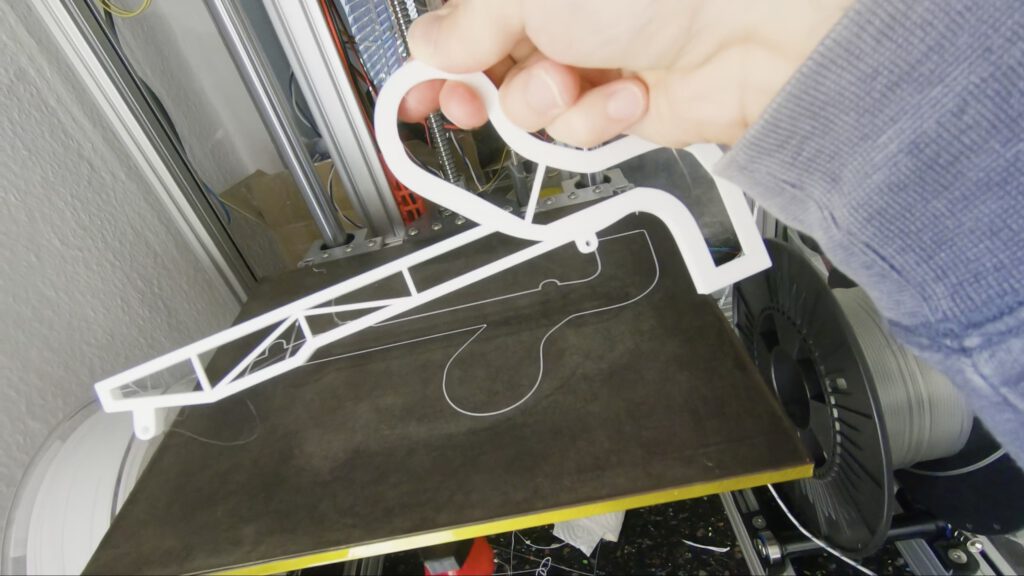
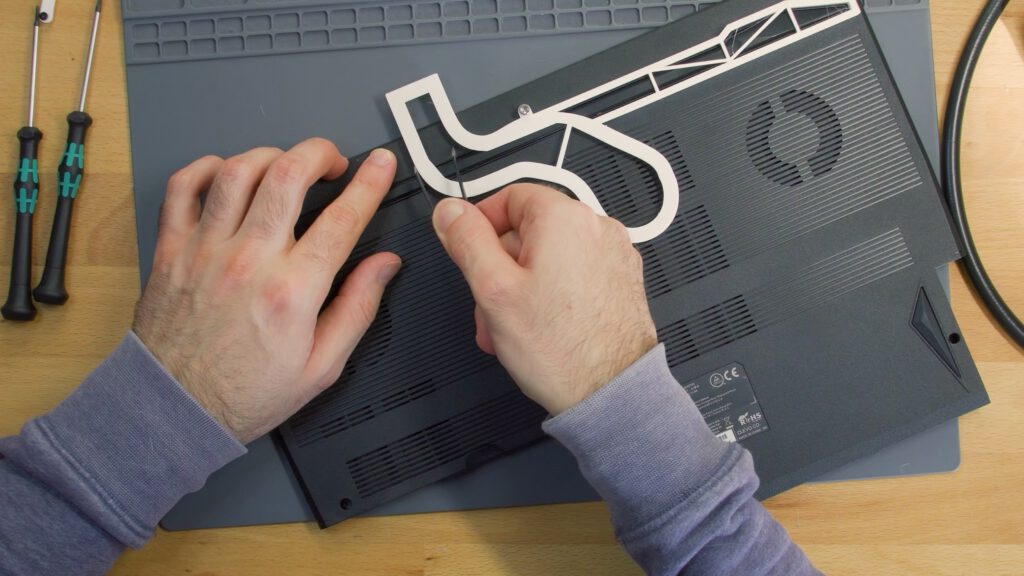
The back lid on the other hand is a bit more difficult. To prevent cutting it blindly I took a photo from the assembly from the top, imported it into my CAD software and made a dummy 3d printed part, which includes the outlines and encourages the slide-to-open design of the back lid.
Results using “Frankenstein”
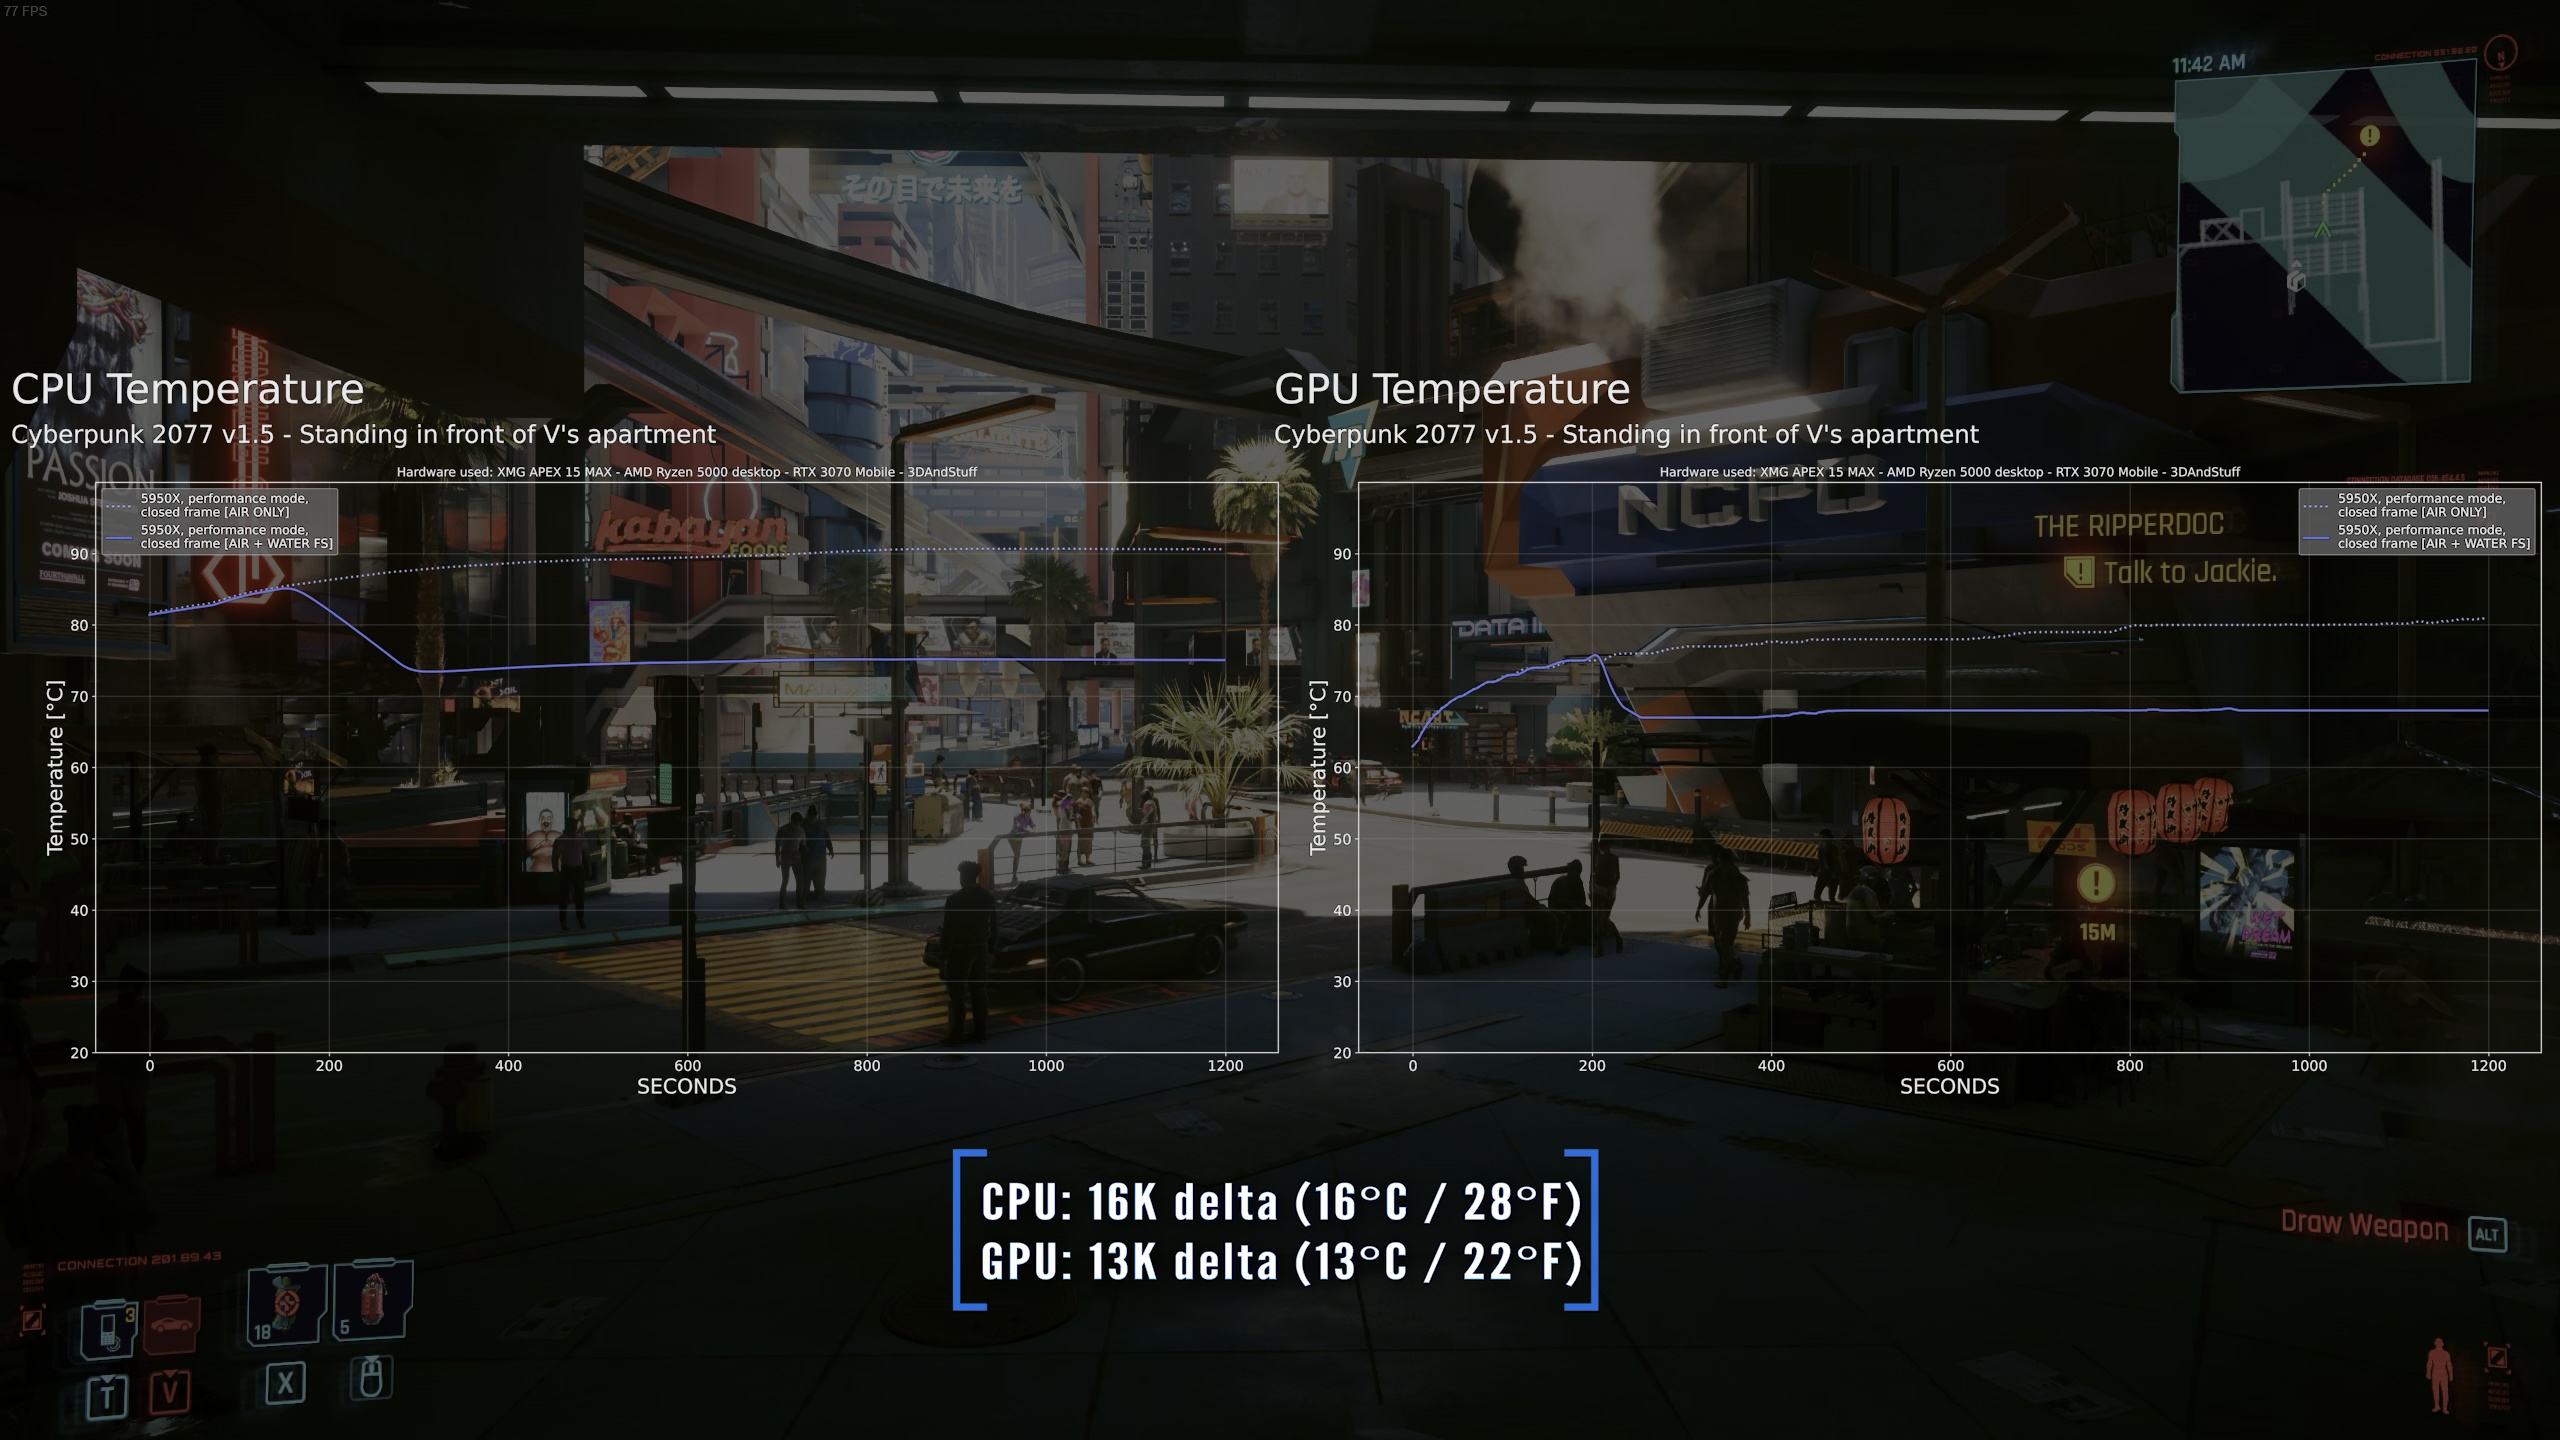
Finally properly closed, I rerun the benchmarks and got some new results using Frankenstein. This time I will show you three different Benchmarks, namely Cyberpunk 2077, CineBench R23 and the TimeSpy Loop Test.
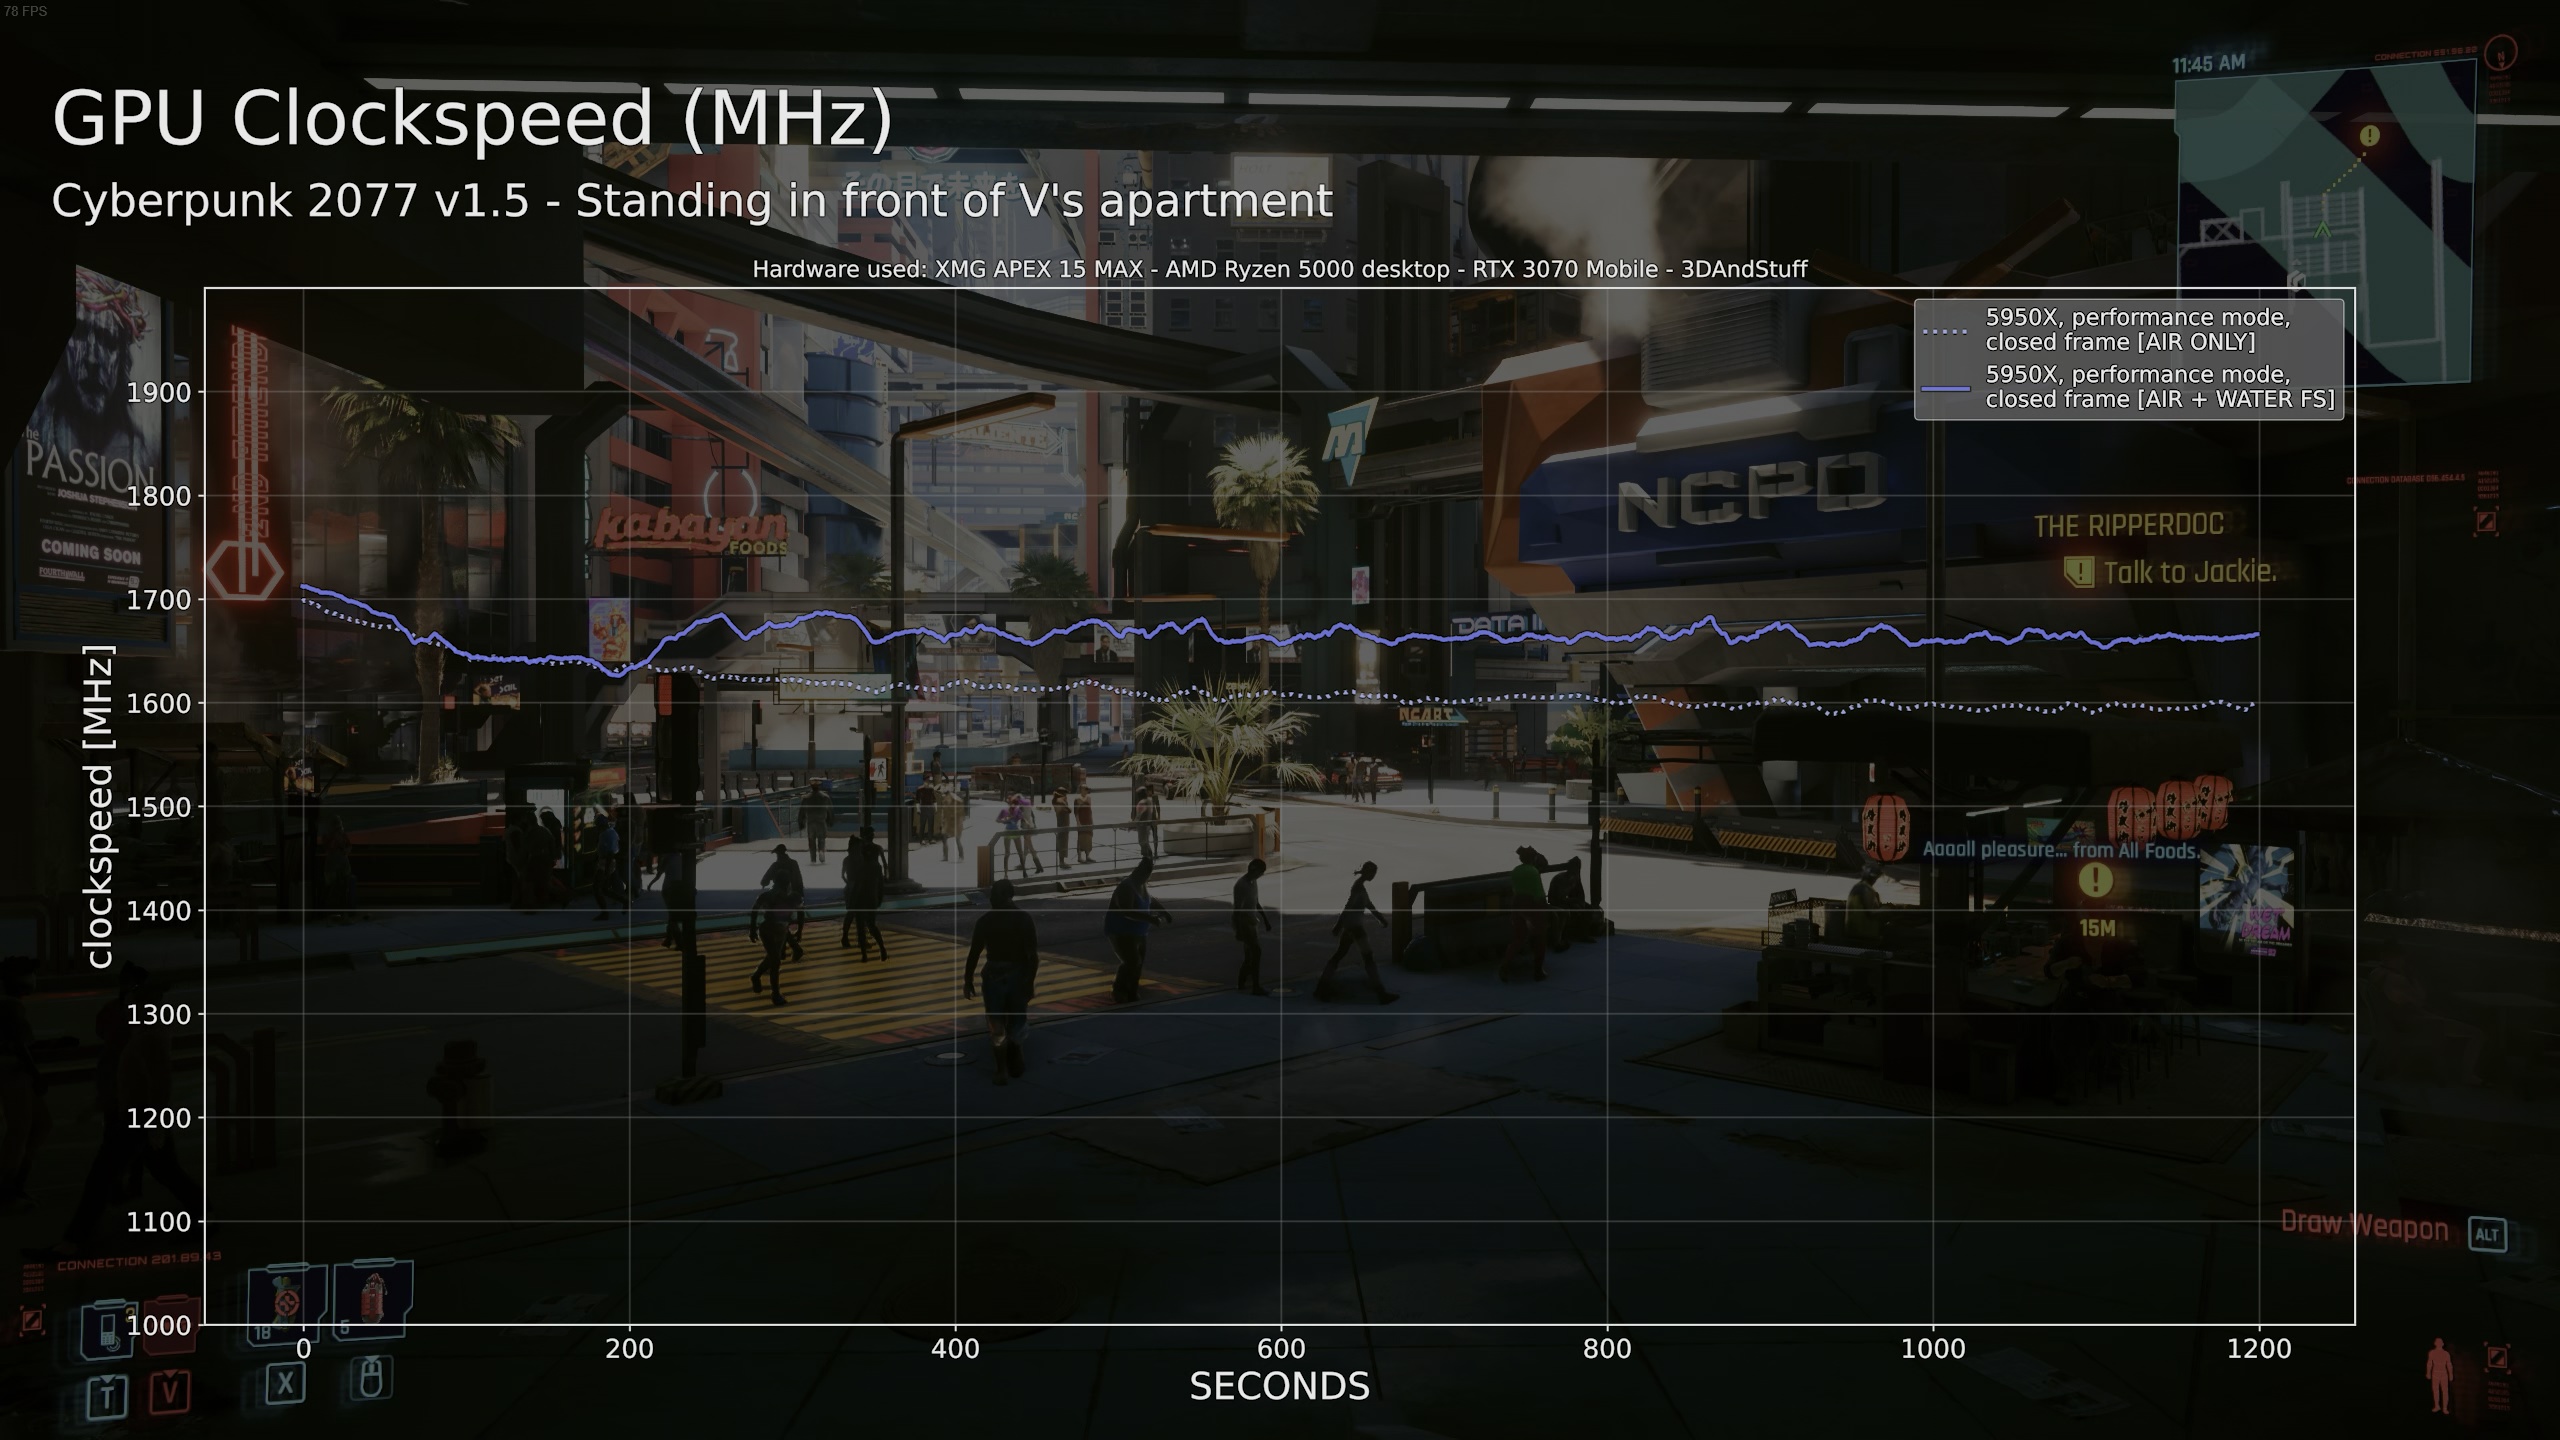
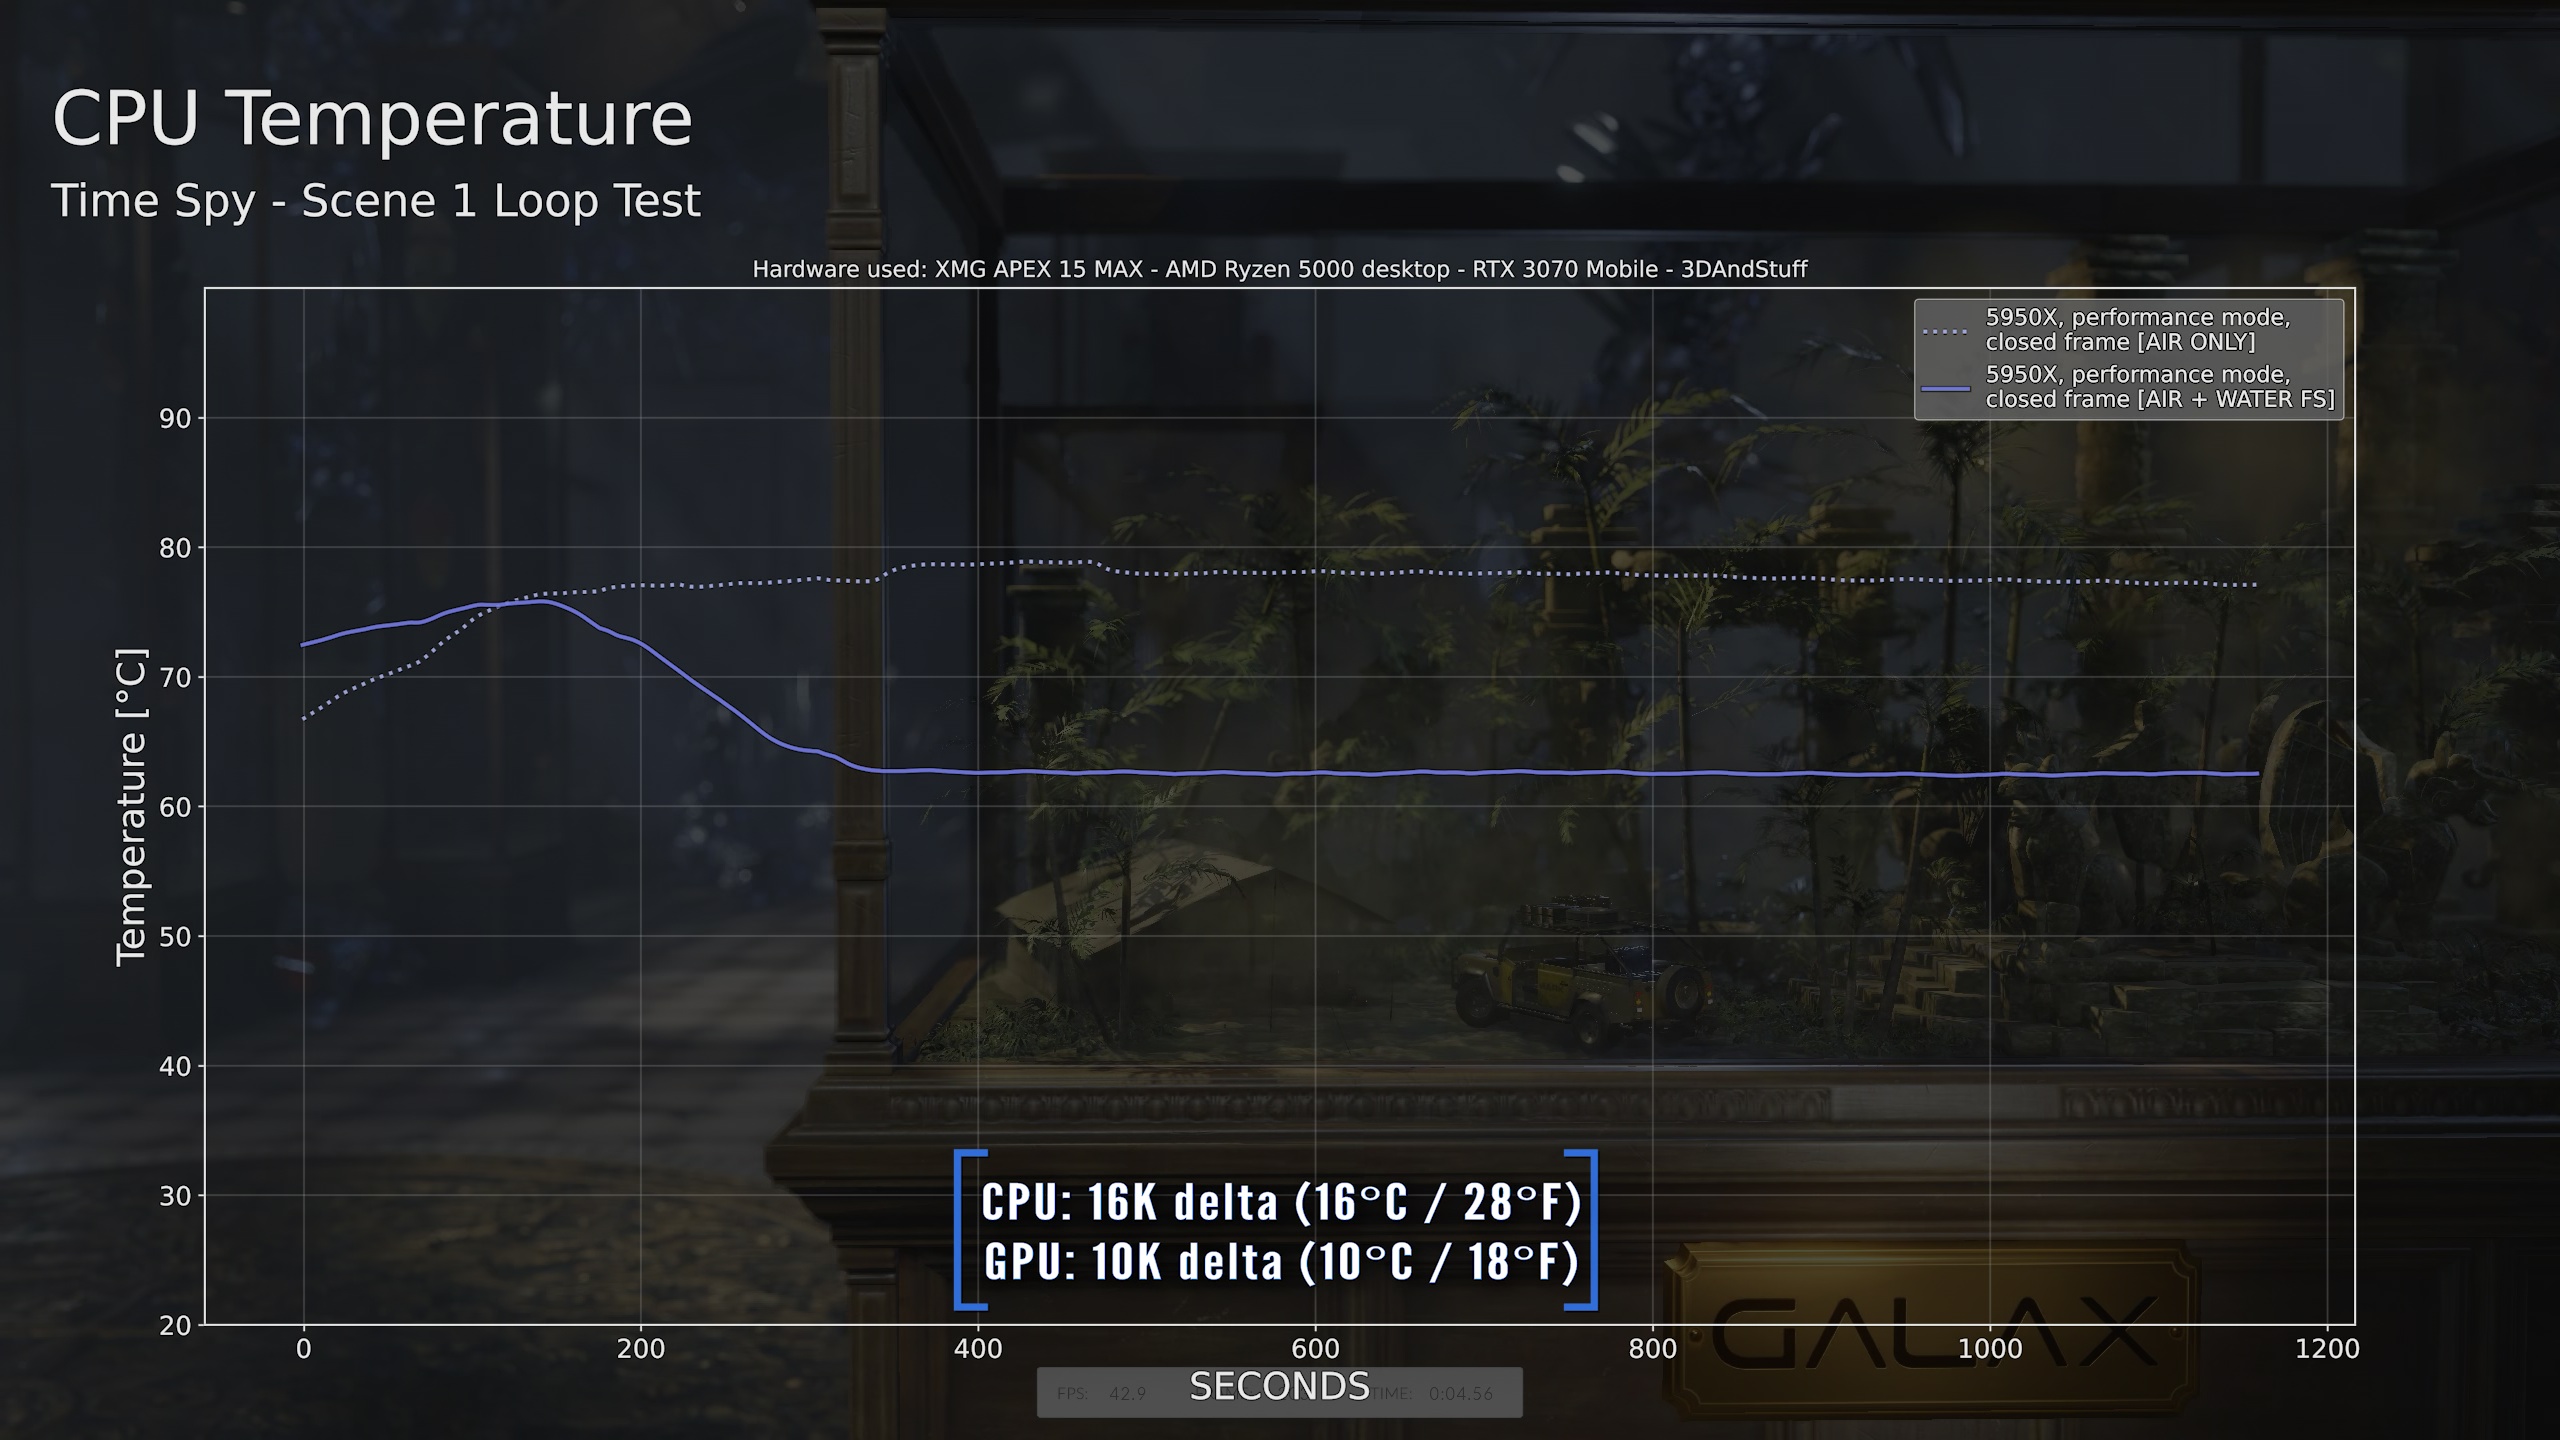
Cyberpunk does show the worst case nicely, because both the CPU and GPU got a very high load and put the most amount of heat into the heatsink at the same time. The overall difference was 16°C for the CPU and 13°C for the GPU. You can clearly see how much the laptop struggles to get rid off the heat when the whole case is installed.
Lower temperatures do also lead to less thermal throttling. This way we can see higher clockspeeds and performance.

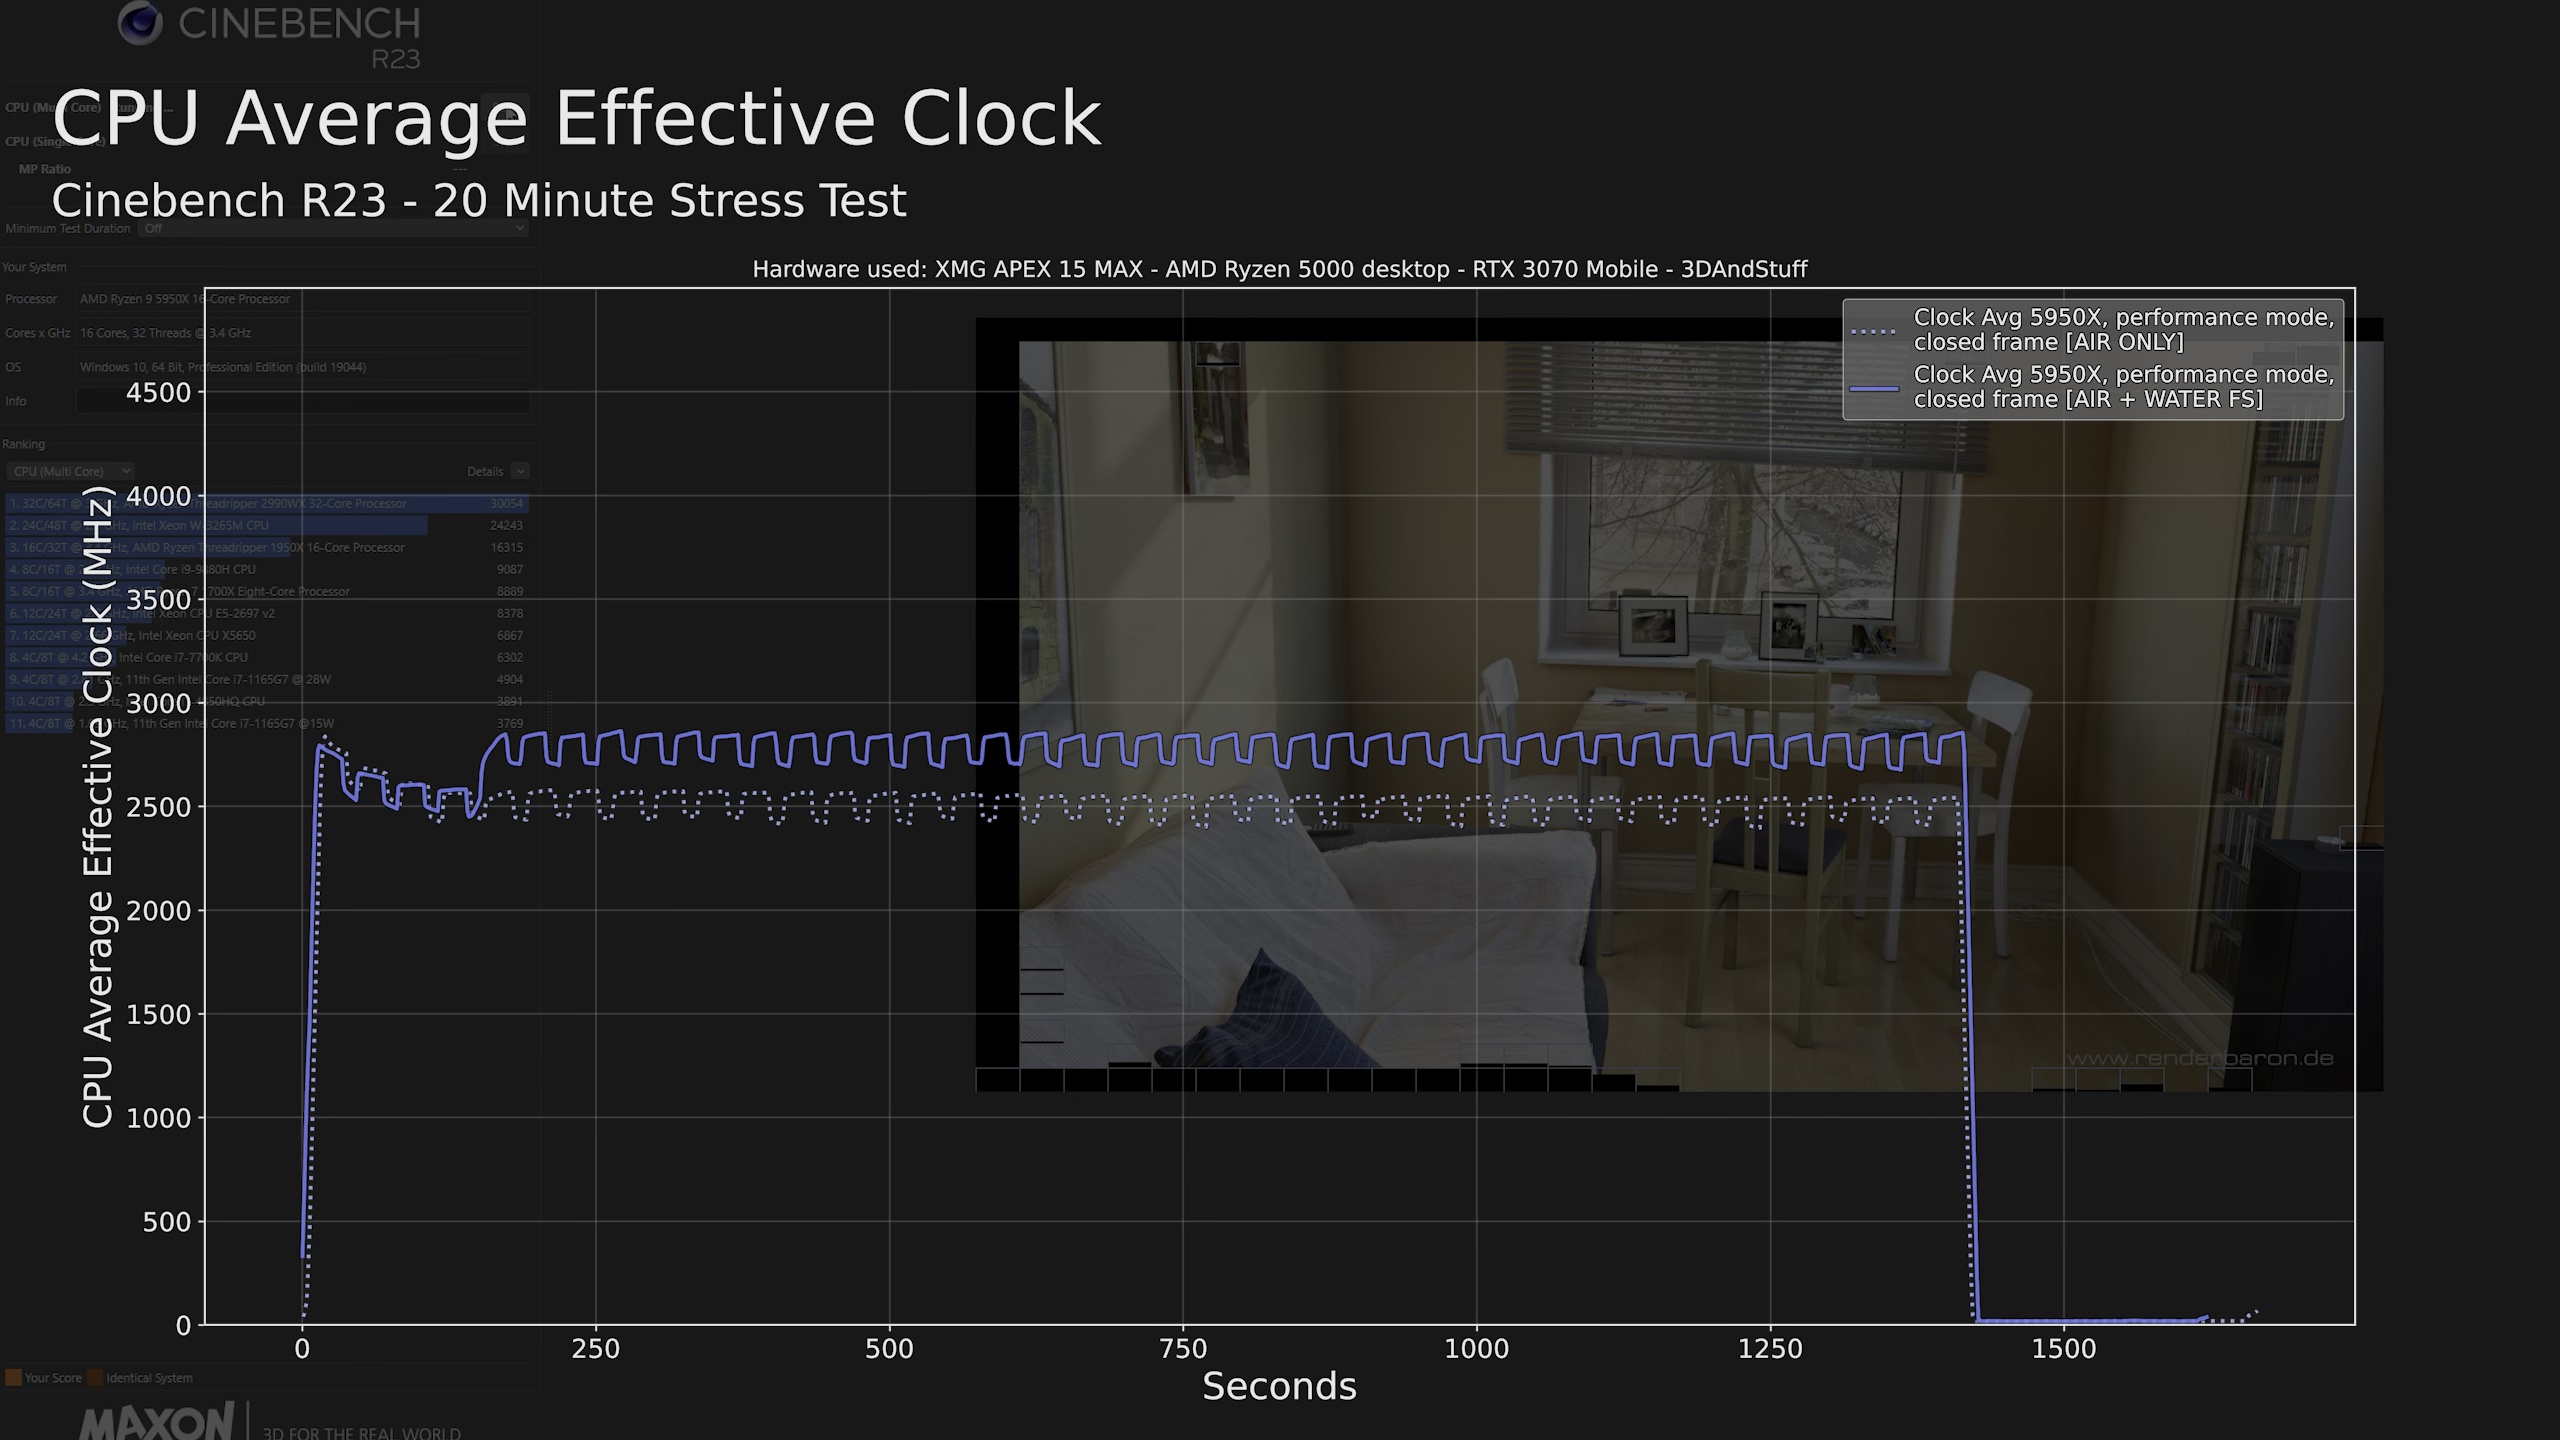
Cinebench R23 does represent CPU-heavy loads nicely. As you can see the temperature and performance benefits from the watercooling heavily.


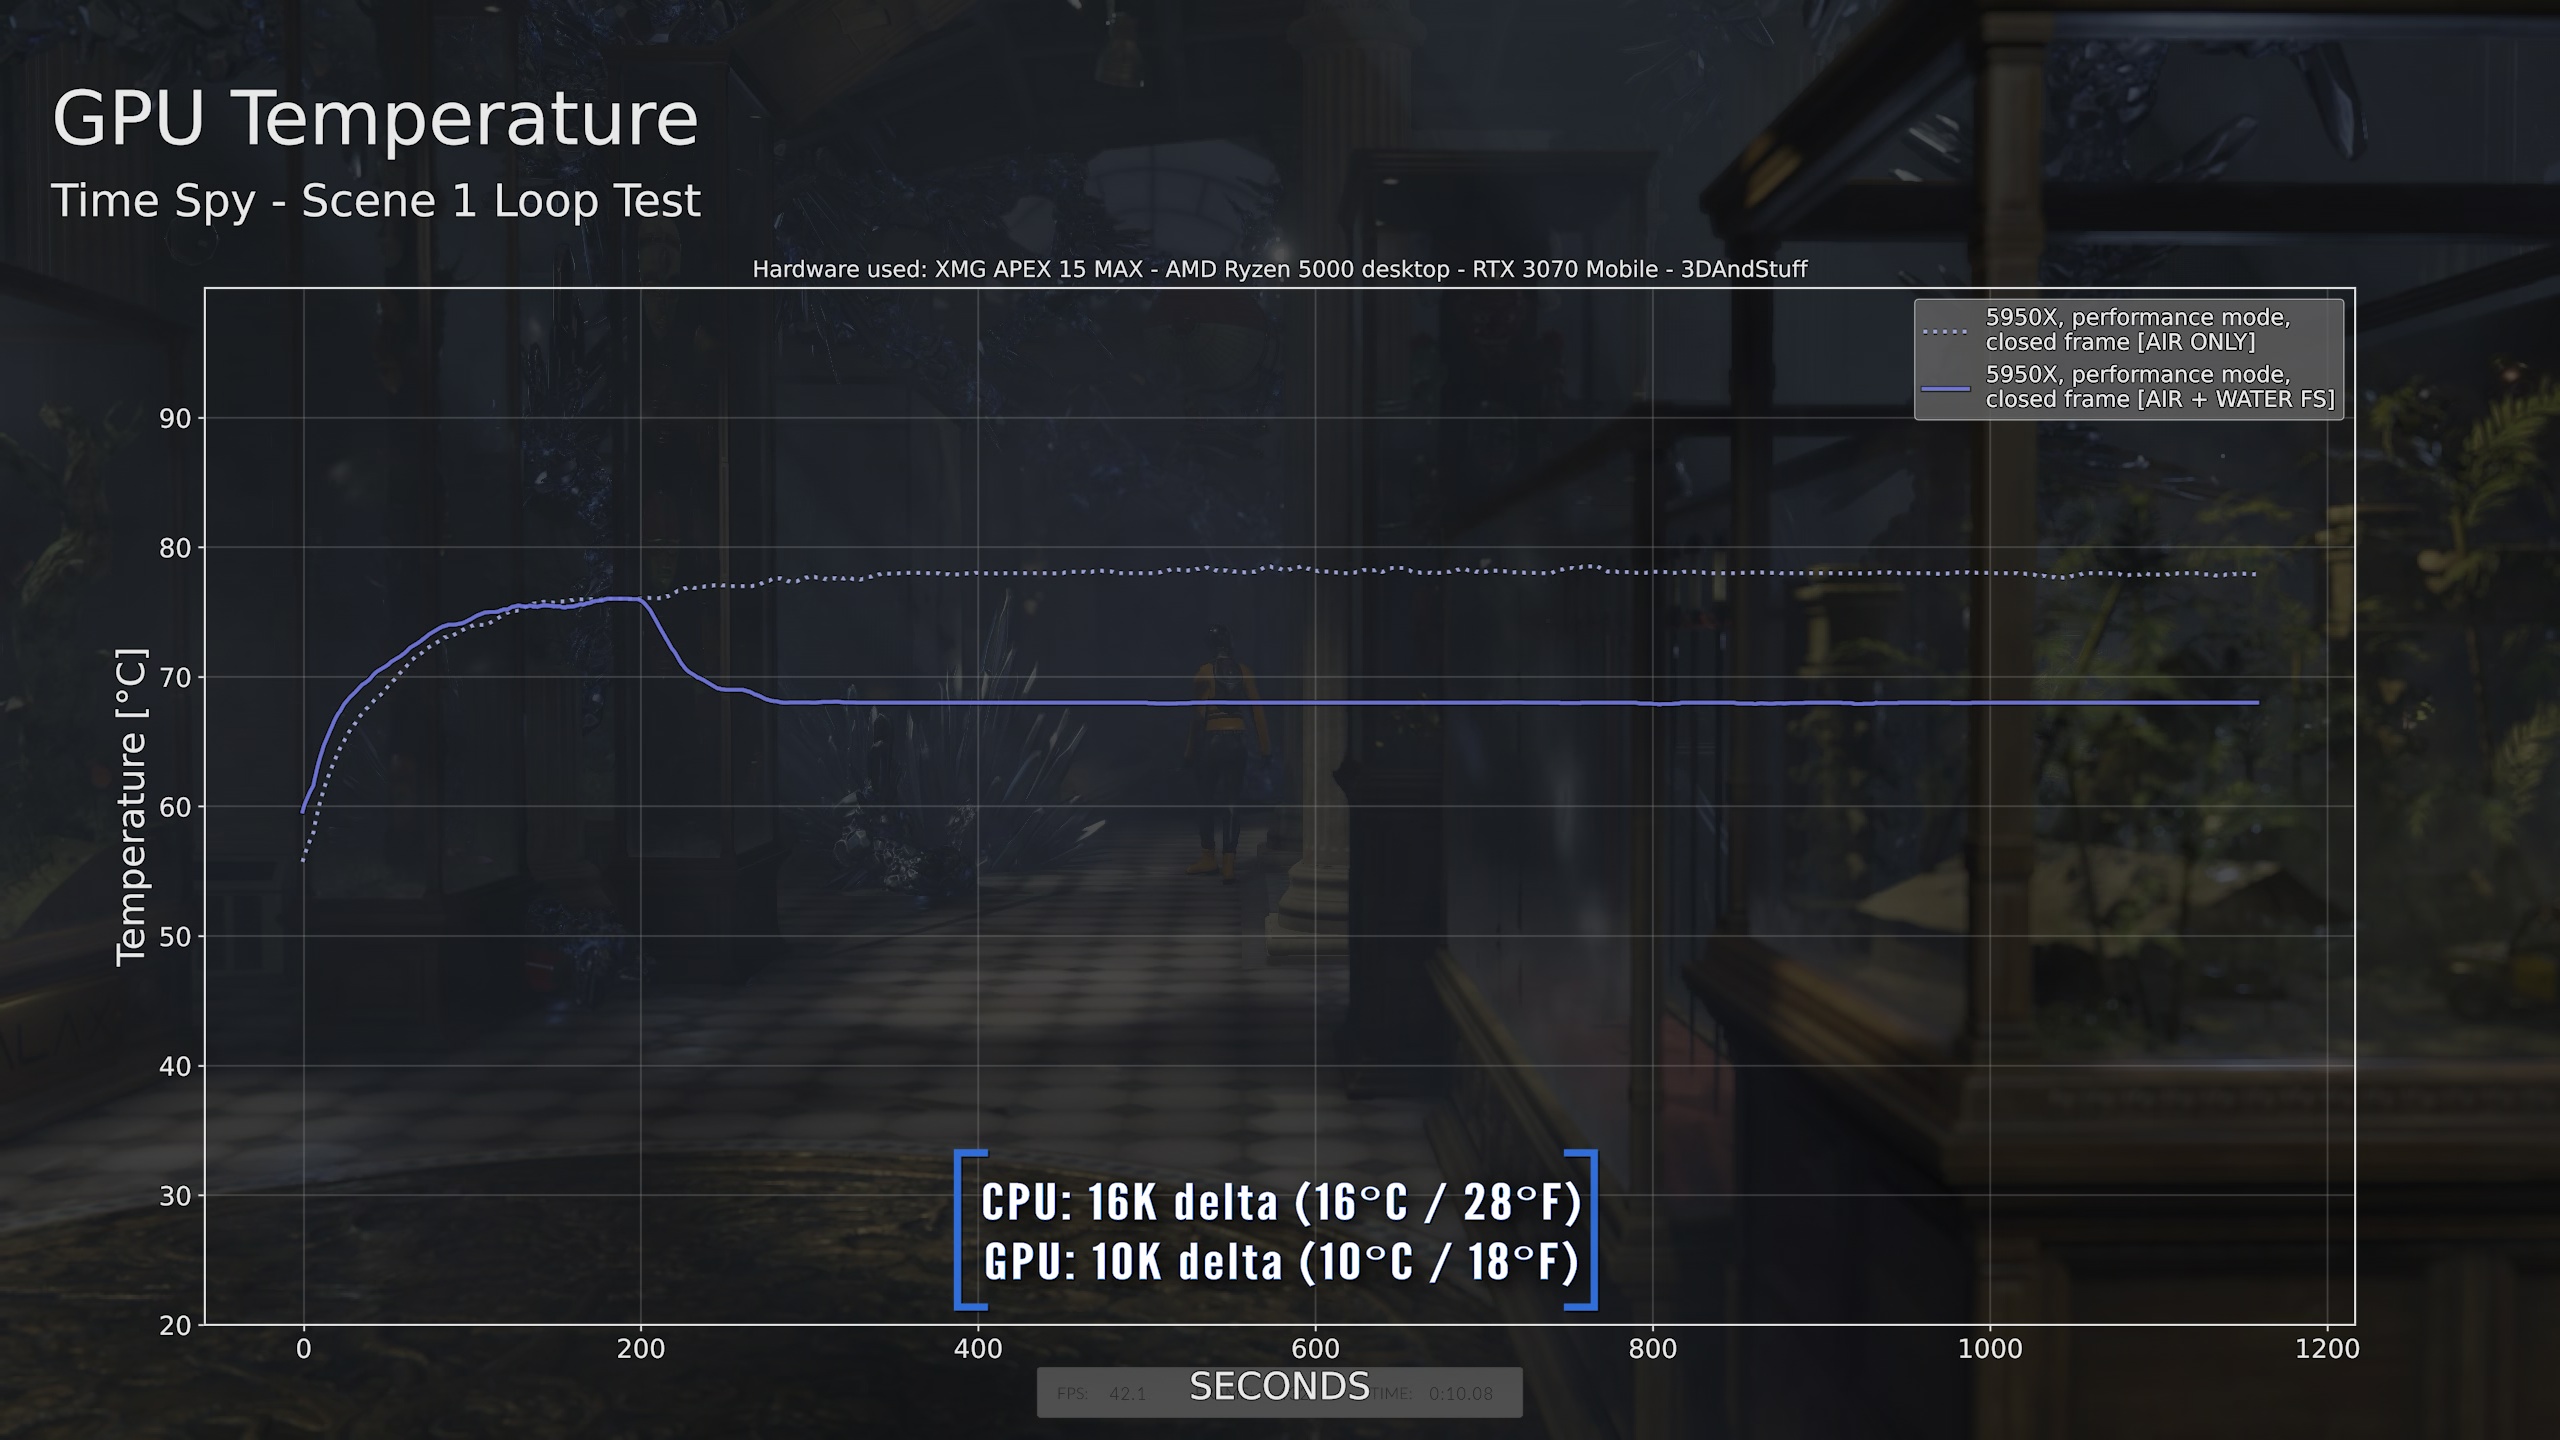
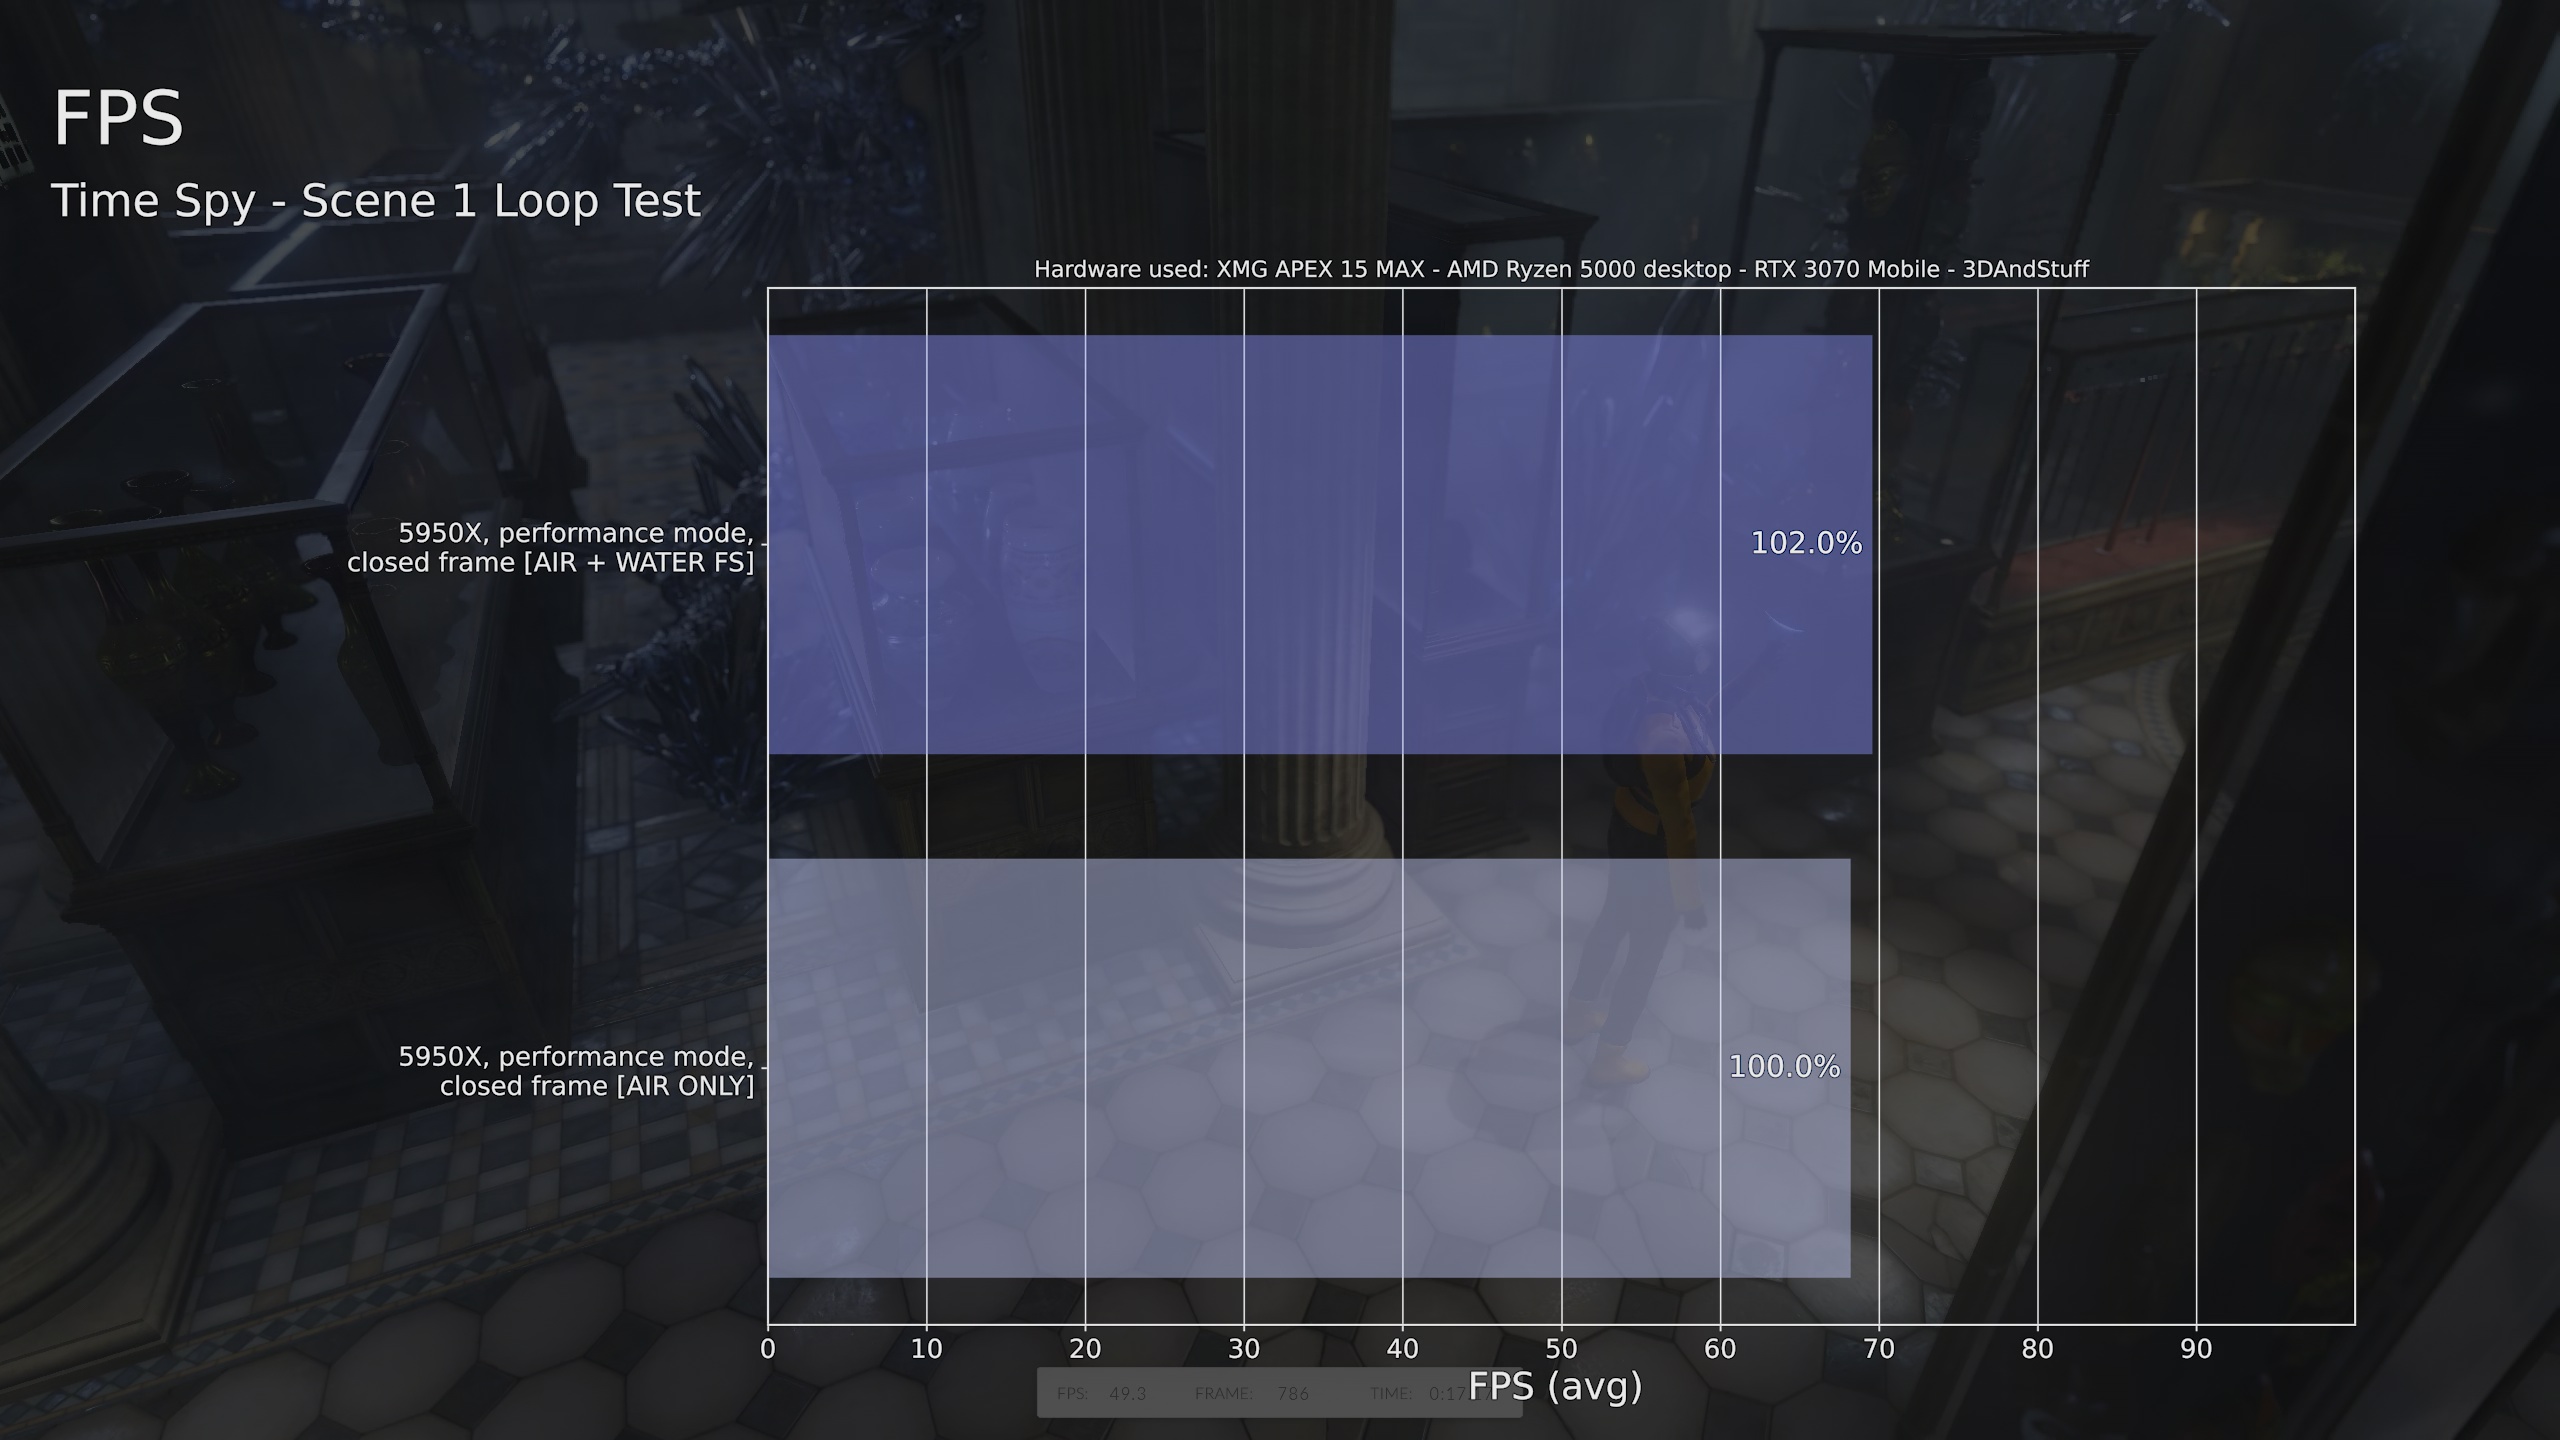
And finally the 20-minutes TimeSpy Loop Test is one of the more GPU-heavy loads of course. Even if the contact area to the GPU heatpipes is very small we can see a 10°C temperature difference and 2% more performance just from better cooling.
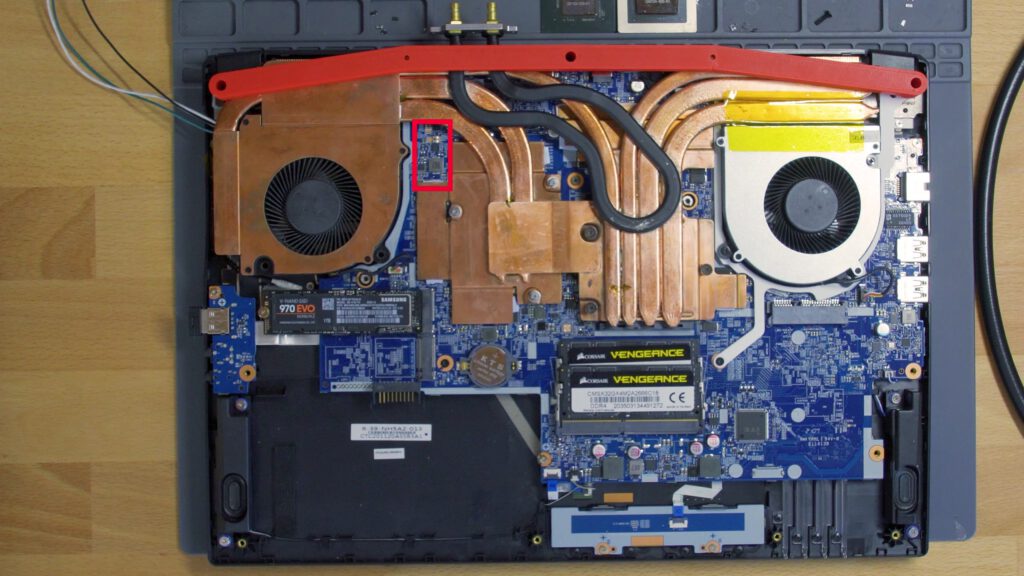
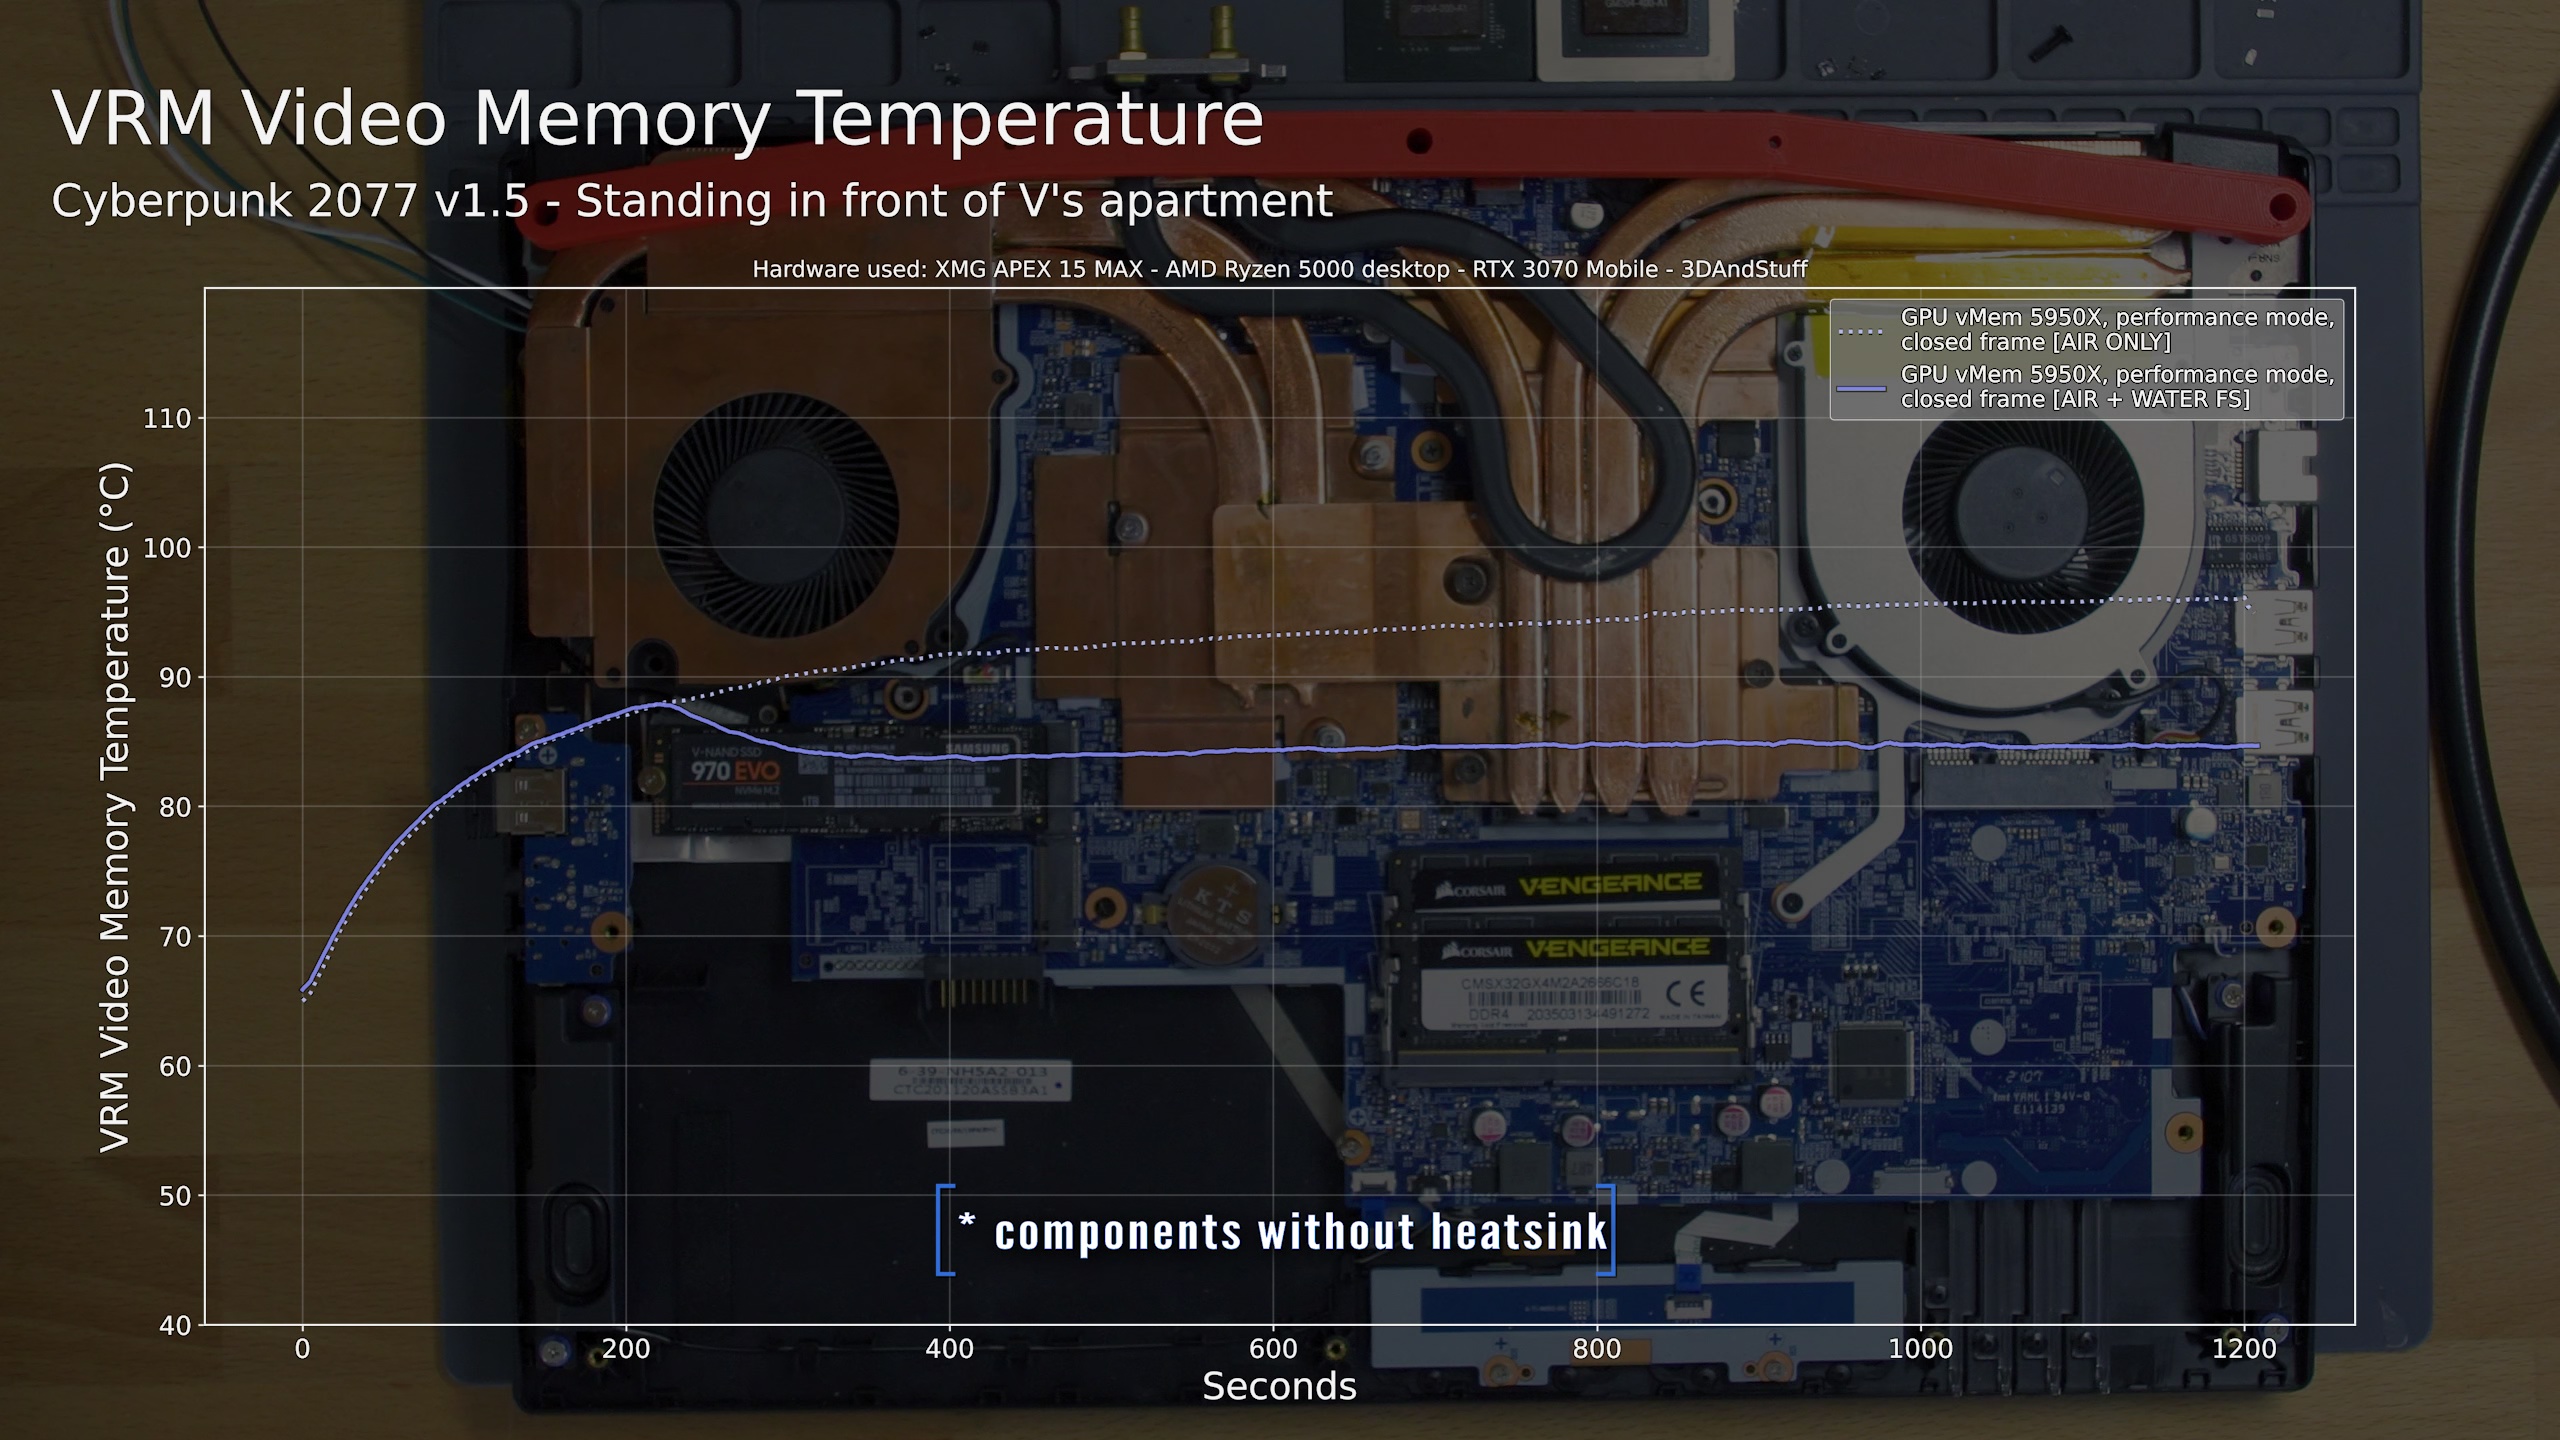
And lastly I want to note that the whole mainboard does benefit from the improved coolig performance a lot, too. You must know that in this laptop the video memory VRM is not cooled by a heatsink and can dissipate it’s heat through the board’s copper only. As you can see the cooling improved so much, that even components on the mainboard itself are exposed to less heat.
Outro
That’s it for this video. I think the efforts using the existing water pipe demonstrate the great potential of water cooled laptops and make me wonder how much I might be able to improve the results even further with a custom waterpipe, which includes even more contact area. I will start working on that right now.
So I guess nothing more to say than: Thanks for watching and see you in the next one.
Bye